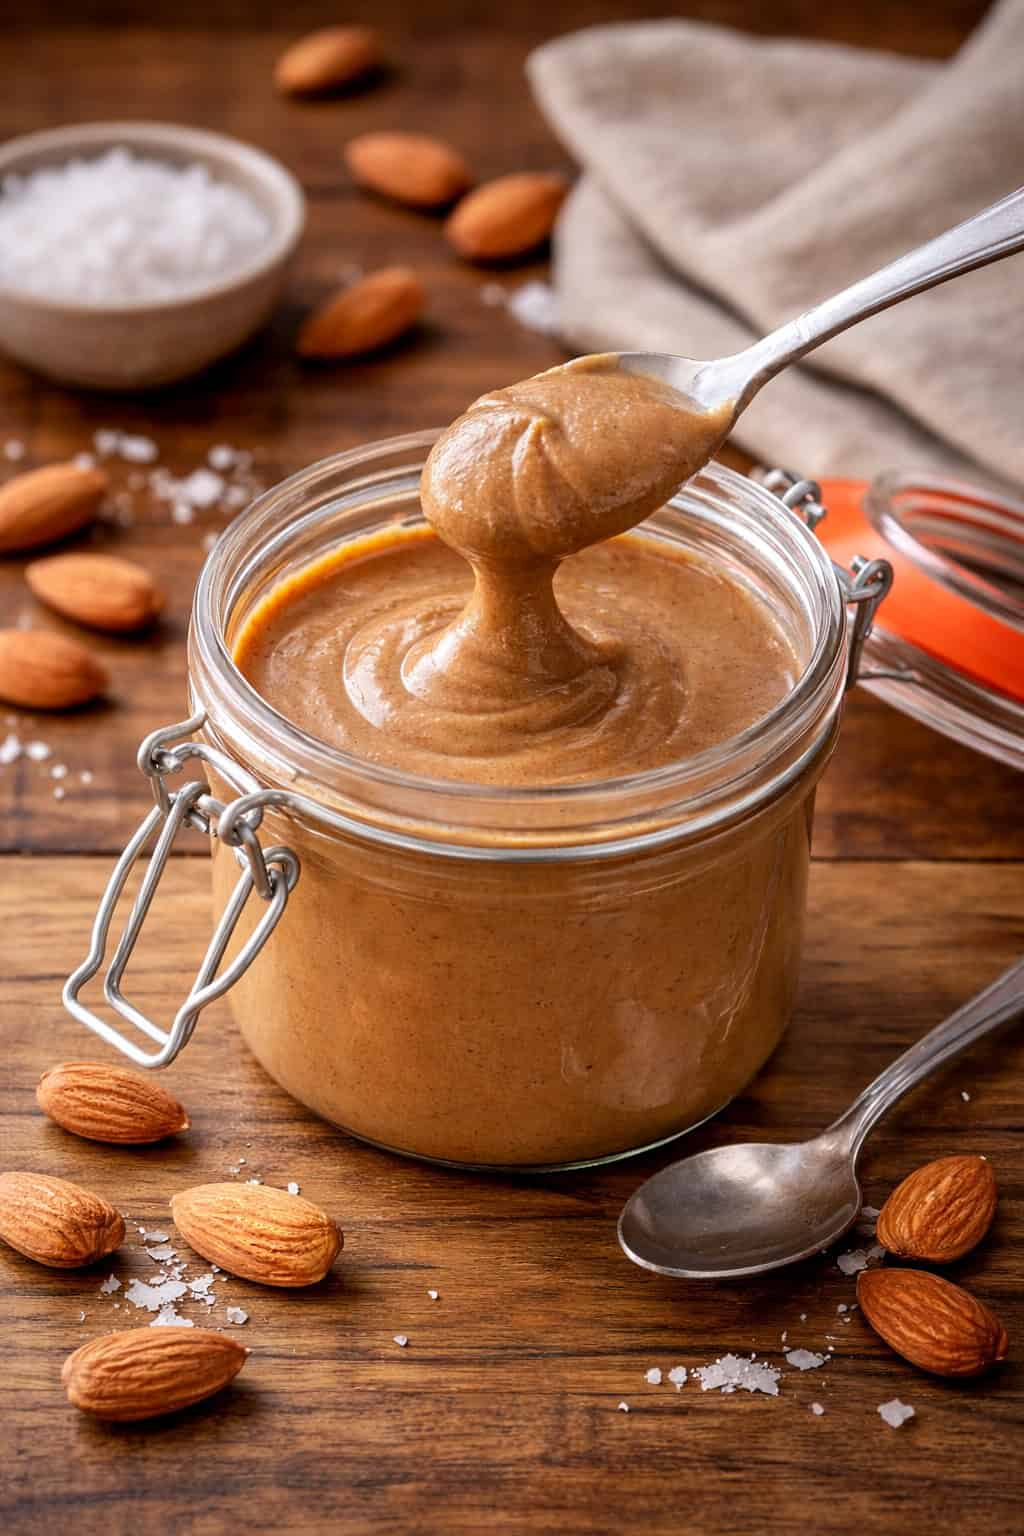
Easy Homemade Almond Butter Recipe (+9 Flavor Variations)
This post may contain affiliate links.
Move over, Justin’s—my simple Homemade Almond Butter recipe is here to claim the flavor crown! Freshly roasted almonds, a hint of salt, and fully customizable texture make this easy DIY nut butter so much better than anything you could buy at the store. Better yet, I’ve got tons of fun flavor variations so you never get bored.
I originally published this recipe in 2020 and have since updated it with new photos, improved instructions, and extra success tips.
Friends, once you try the first bite of homemade almond butter, I have a feeling you’ll never go back to store-bought. Not only is it more affordable, it’s also fresher tasting and made without any artificial extras. And, much like my other DIYs like homemade peanut butter and homemade hazelnut butter, it’s a snap to make!
Ingredients & Substitutions
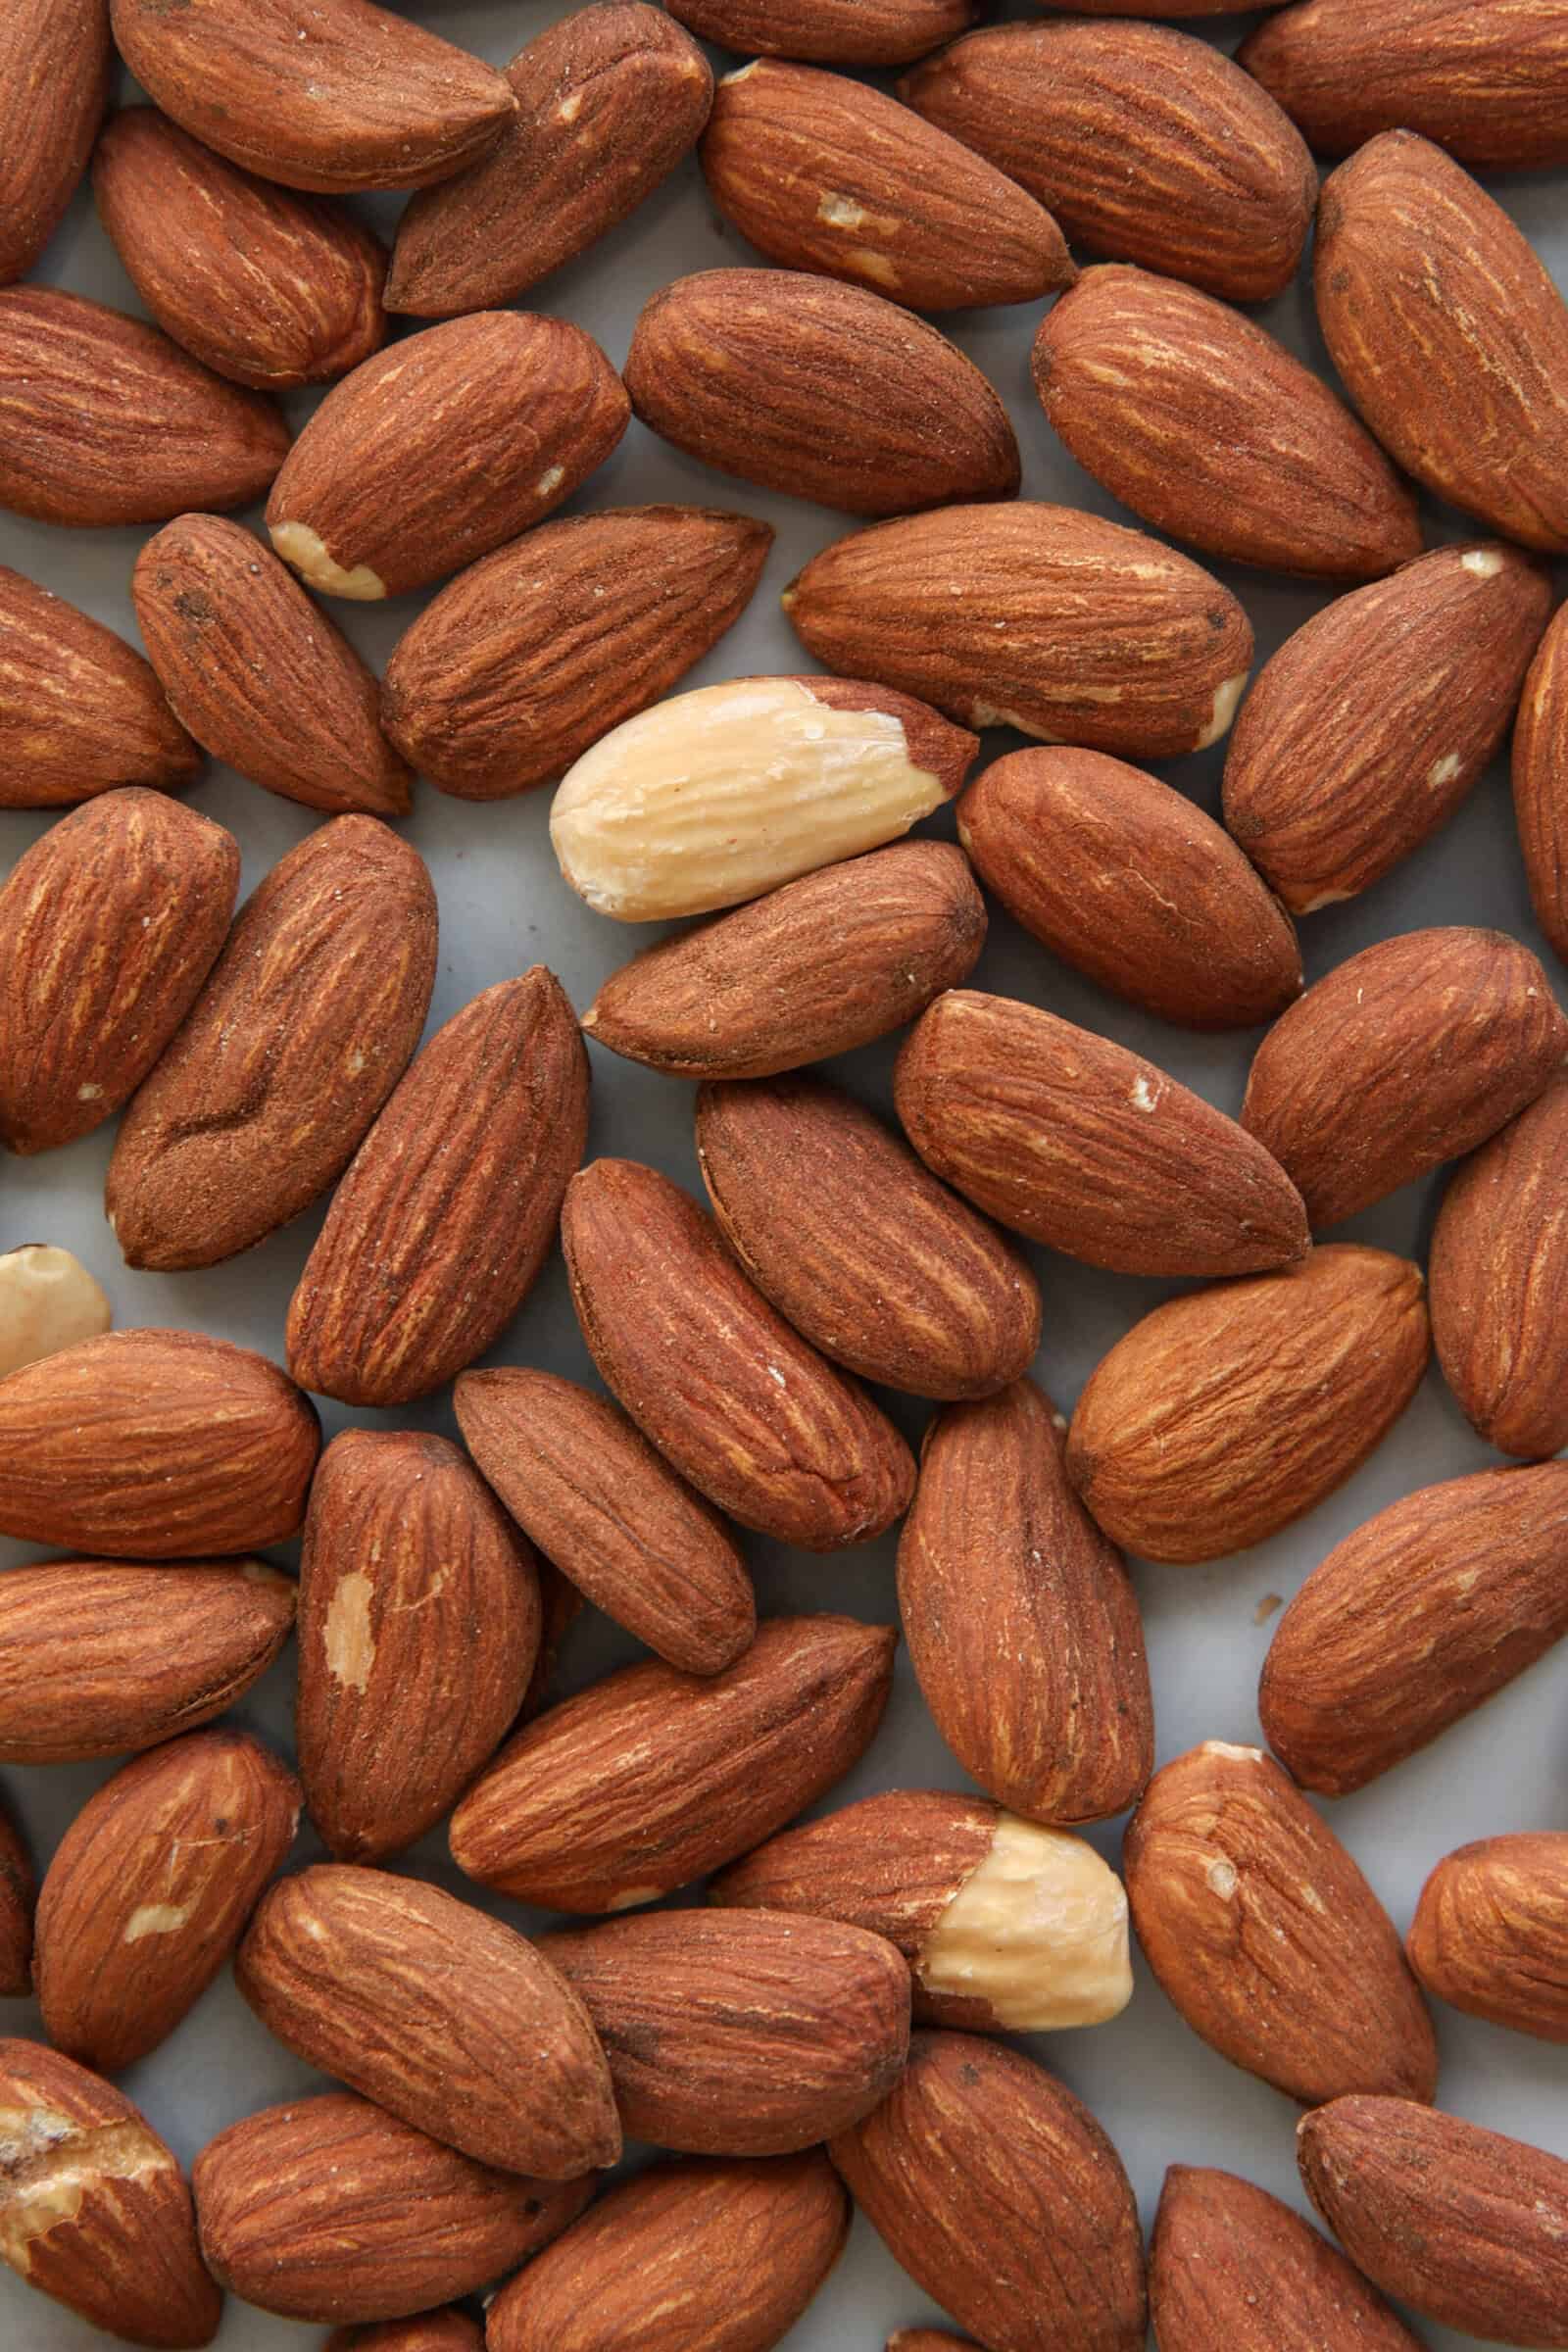
- Raw Almonds – Starting with raw almonds and toasting them fresh will give your DIY almond butter the best possible flavor.
- Salt – Optional, but excellent for drawing out even more nutty flavor.
- Neutral Oil – Optional, but useful in case your almonds are a bit dry. Good options include peanut oil, avocado oil, and canola oil.
This is just a short review of the ingredients; for the complete recipe, including quantities, scroll down to the recipe card 👇
Raw vs. Roasted Nuts For Nut Butter
When it comes to homemade almond butter, the type of almonds you choose, raw or roasted, plays a huge role in flavor, texture, and even how easily the nuts blend.
- Raw Almonds – Raw almonds create a milder, more neutral almond butter with a subtle sweetness and a lighter, more delicate flavor. Because they naturally contain less accessible oil than roasted almonds, raw almonds take longer to break down in the food processor and may result in a slightly thicker consistency. (That’s where the neutral oil comes in handy!)
- Roasted Almonds – Roasted almonds make a richer, deeper, more aromatic almond butter. The roasting process unlocks the almonds’ natural oils, allowing them to blend faster and more smoothly into a creamy spread. The flavor becomes warm, nutty, and slightly caramelized, making it taste much closer to specialty brands like Justin’s.
So, which is better for homemade almond butter? In most cases, roasted almonds produce the most flavorful and velvety almond butter, which is why they’re the preferred option for many homemade almond butter recipes. But with either choice, you’ll end up with a delicious, wholesome spread made from just one ingredient.

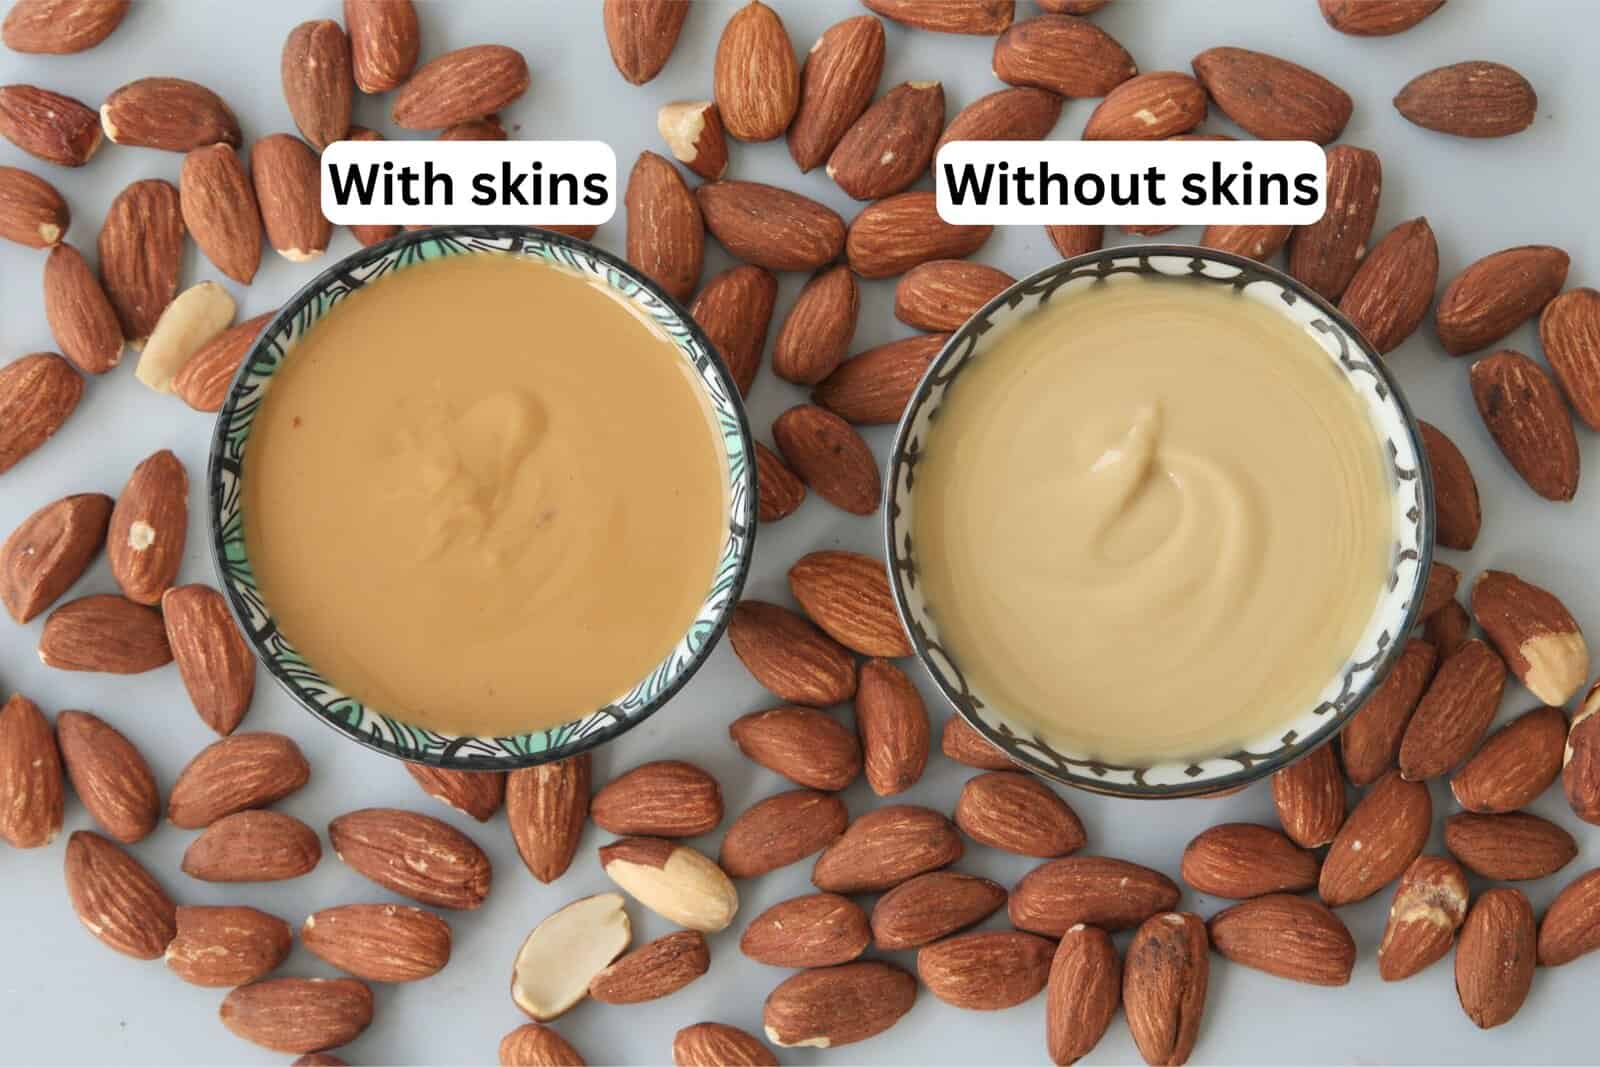
Do You Need to Peel Almonds for Almond Butter?
You don’t need to peel the almond skins when making almond butter, they blend in smoothly and add fiber, flavor, and a naturally deeper color. If you prefer a lighter-colored, slightly smoother almond butter, you can peel the almonds after roasting, but this step is optional and mostly aesthetic.
How to Make Homemade Almond Butter
Watch the full video recipe to learn how to make the BEST Homemade Almond Butter.
Prefer the written recipe? Scroll down to the recipe box 👇
Optional Variations & Dietary Adaptations
The best part about making your own nut butter is that there’s a wide world of flavoring possibilities! Have fun experimenting with different sweeteners, spices, and mix-ins to find your favorite combination. Here are just a few ideas to get you started:
- Honey Almond Butter – Stir in 1-2 tablespoons honey at the end for a lightly sweet, floral twist. Add after the almonds have fully blended to prevent seizing.
- Maple Almond Butter – Mix in 1-2 tablespoons pure maple syrup for natural sweetness and a warm, caramel-like flavor.
- Vanilla Almond Butter – Add ½ – 1 teaspoon vanilla extract or vanilla bean paste for a smooth, bakery-style flavor that makes your toast taste like dessert.
- Cinnamon Almond Butter – Add ½ – 1 teaspoon ground cinnamon for a cozy, warm variation. The cinnamon helps make it taste sweeter without any added sugar!
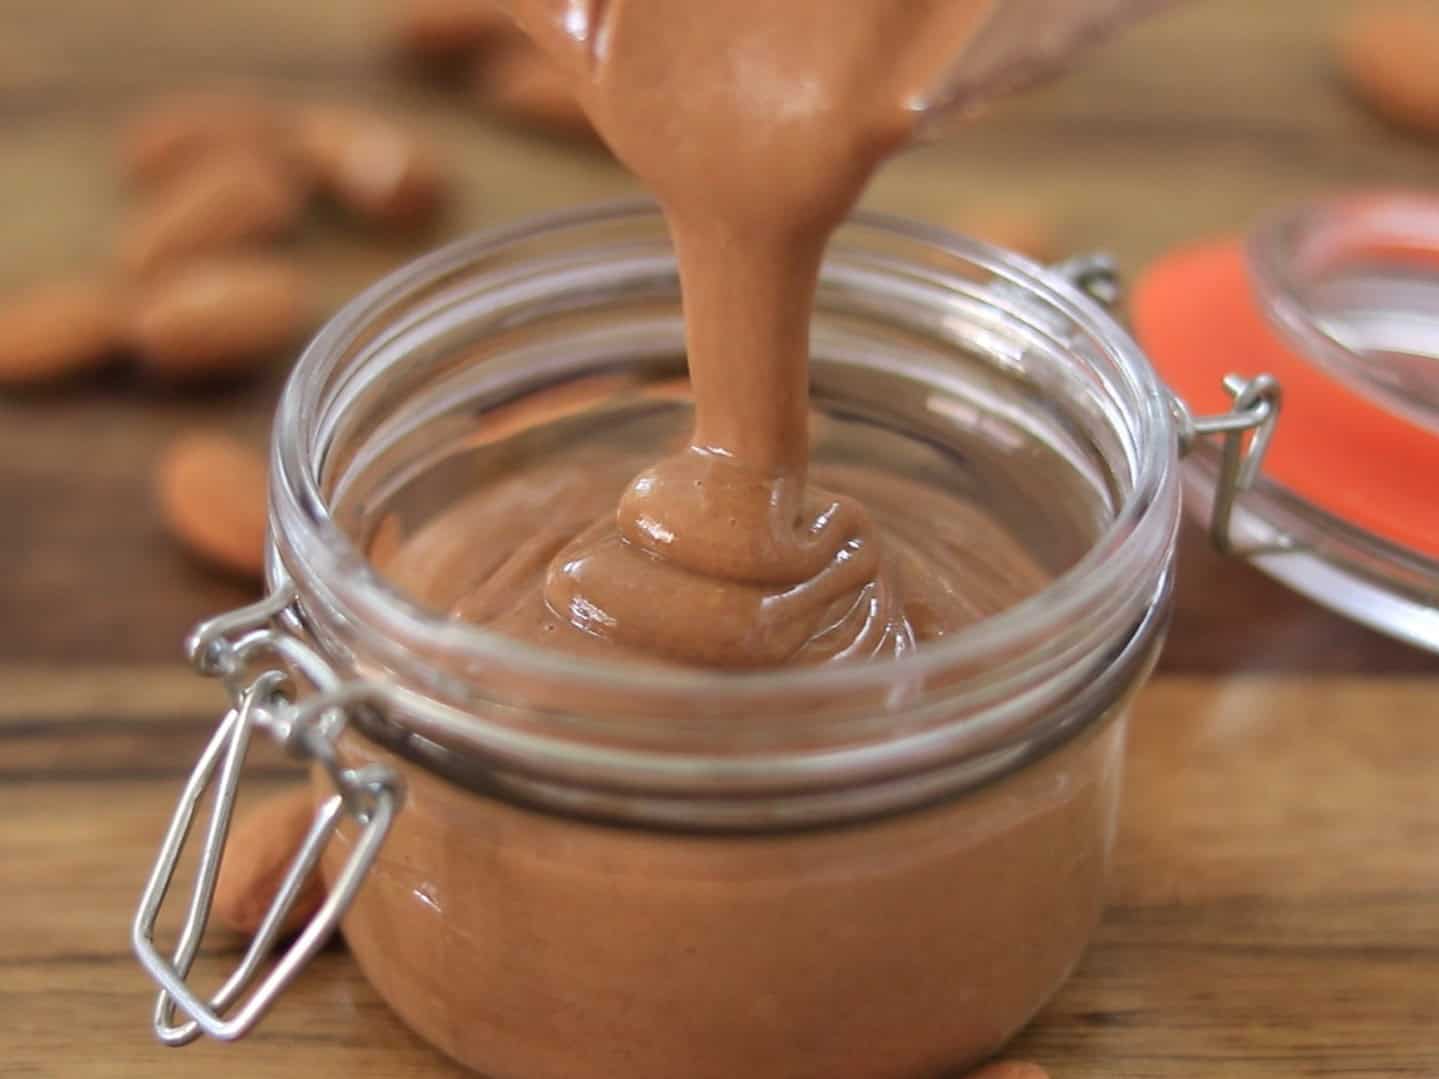
- Chocolate Almond Butter – Blend in 2–3 tablespoons cocoa powder or ¼ cup melted dark chocolate for a healthier Nutella-like spread that’s perfect for eating by the spoonful. If you want a little added texture, pulse in some cacao nibs for even more chocolatey goodness.
- Coconut Almond Butter – Blend in 2-3 tablespoons shredded coconut or add 1 tablespoon coconut oil for a lightly tropical flavor and a creamier texture.
- Crunchy Almond Butter – Pulse in a handful of roughly chopped roasted almonds at the end for added texture.
- Spiced Almond Butter – Add a pinch of nutmeg, ginger, cardamom, or pumpkin spice for a seasonal flavor that’s perfect for gifting. I also like to fold in candied ginger bits for added texture and pops of flavor!
- Sweet & Salty Almond Butter – Fold in a sprinkle of flaky sea salt, crunchy turbinado sugar, and some crushed pretzels for a fun, snackable twist.
Expert Tips & Tricks
- Warm your almonds for easier blending. Even if you’re using pre-roasted almonds, pop them in the oven for 5-8 minutes at 300°F (150°C) before blending. Warm nuts release their oils faster, shorten processing time, and help prevent your food processor from overheating.
- Be patient—almond butter forms in stages. It will look crumbly… then sandy… then like thick dough… and finally smooth, glossy almond butter. Keep going, scrape the bowl often, and trust the process. Depending on your machine, this can take 5-15 minutes.
- Don’t add liquids too early. Honey, maple syrup, vanilla, and other liquid add-ins can cause the mixture to seize if added before the almonds release their oils. Always add sweeteners and flavorings after the almond butter is fully smooth.
- Choose the right equipment. A powerful food processor or high-speed blender works best. If your motor gets warm, let it rest. Going slow and steady protects your appliance.
- Adjust texture to your preference. For thicker, spreadable almond butter, stop blending earlier. For a silky, drippy texture, keep processing until the oils fully emulsify. Add ½ – 1 teaspoon neutral oil only if necessary.
- Use unsalted nuts for maximum control. It’s easier to adjust salt levels and sweetness when you start with unsalted almonds. If your almonds are salted, reduce or skip additional salt until after tasting.
- Store it properly. Moisture is the enemy. Use a clean, completely dry jar with a tight lid to keep your almond butter fresh longer and prevent spoilage.
- Want extra flavor? Roast your own almonds. Home-roasted almonds give you better control over flavor intensity. Roast at 350°F (175°C) for 8-10 minutes until fragrant, then cool slightly before blending.
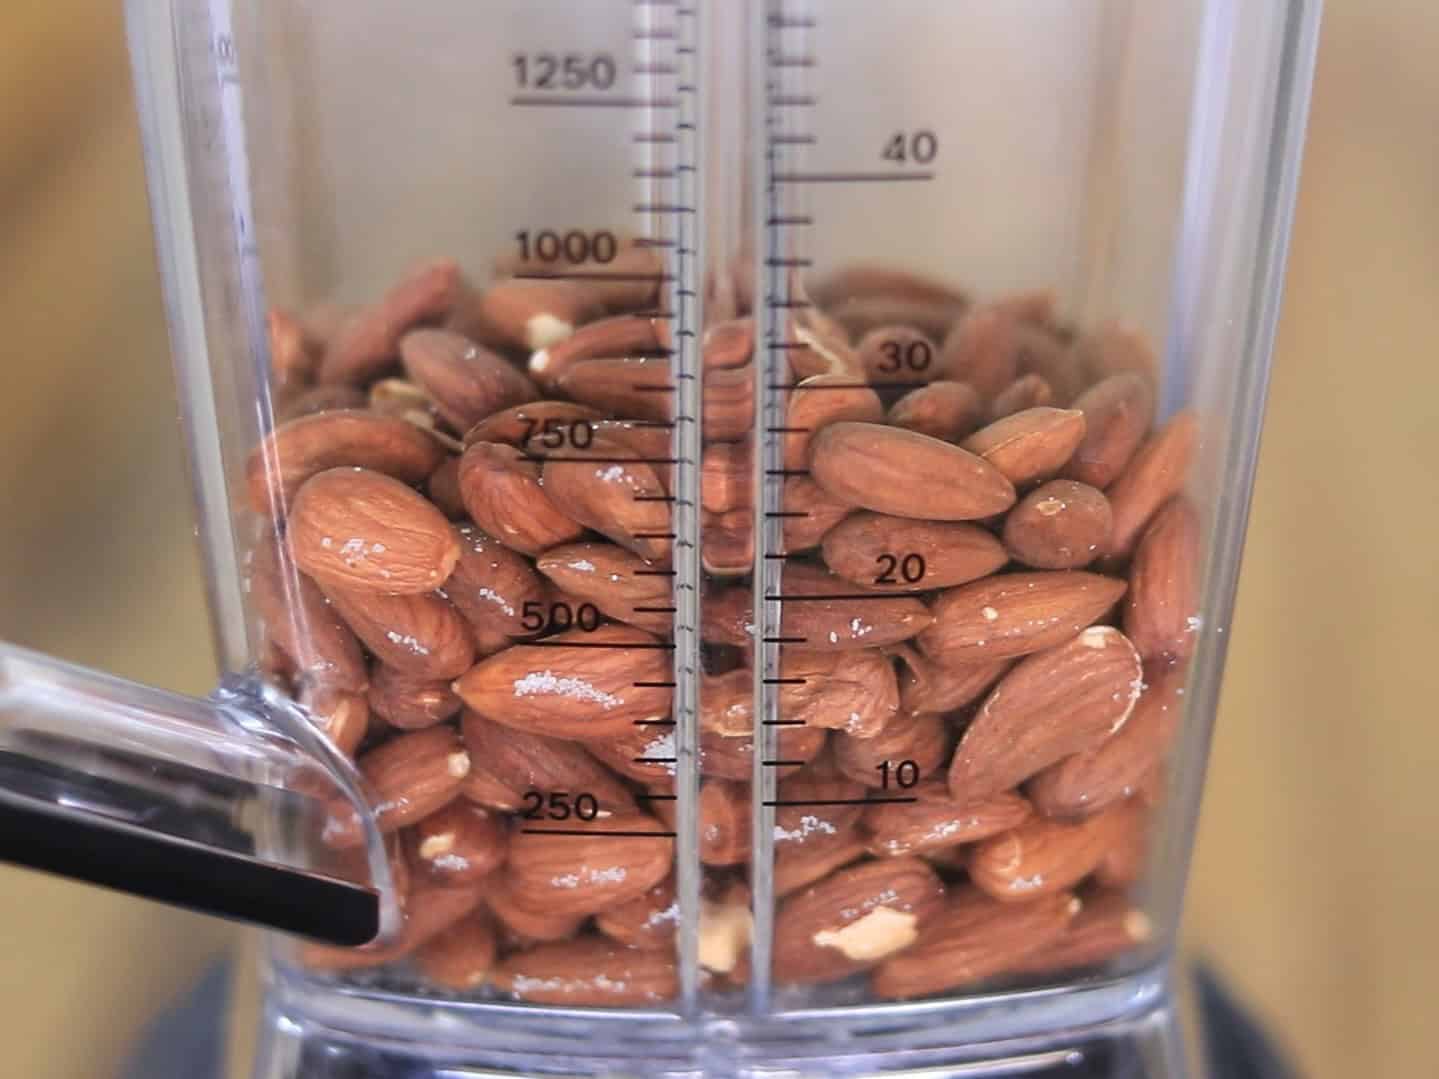
- Use enough almonds for smooth blending. For the best texture, start with at least 400 g (about 14 oz) of almonds. Smaller batches often don’t circulate well in most food processors or blenders, making it harder to achieve a smooth, creamy almond butter.
Almond Butter Uses and Recipe Ideas
Homemade almond butter is incredibly versatile, you can use it for breakfast, baking, savory dishes, smoothies, snacks, and more. Here are some of my favorite ways to enjoy it:
For breakfast, spread it on toast, swirl it into oatmeal, drizzle over pancakes, or add a spoonful to yogurt bowls. It also works beautifully in baking, use it in place of peanut butter in cookies, brownies, energy balls, granola bars, or no-bake desserts for a naturally nutty flavor and extra richness. You can even stir it into banana bread batter or blend it into frosting for a subtle almond twist.
Almond butter is also great as a snack. Serve it with apple slices, dates, rice cakes, or pear wedges, or drizzle it over warm porridge or homemade granola. It blends wonderfully into smoothies, adding creaminess and extra protein, especially in fruit smoothies, chocolate smoothies, or post-workout shakes.
If you enjoy savory recipes, you can whisk almond butter into salad dressings, sesame-style sauces, or noodle bowls as a mild alternative to tahini or peanut butter. It also works well in marinades, grain bowls, rice dishes, and vegetable stir-fries, adding body and a naturally creamy texture.
You can also substitute almond butter in many recipes that call for other nut or seed butters, including peanut butter desserts, tahini-based sauces, and homemade spreads. It’s especially useful when you want a slightly lighter, more delicate flavor that doesn’t overpower the other ingredients.
How to Store Almond Butter
- Room Temperature: If your almond butter contains only almonds (and optional salt), you can store it at room temperature for up to 2 weeks. Keep it in a clean, airtight jar away from heat and sunlight. Natural oils may separate—just give it a good stir before using.
- Refrigerator: For longer shelf life, refrigerate your almond butter for up to 2-3 months (though I think it tastes best within the first 4 weeks). Chilling slows the natural oils from turning rancid and keeps the flavor fresh. The almond butter will firm up slightly, so let it sit at room temperature for a few minutes before scooping for easier spreading.
- Freezer: Homemade almond butter freezes beautifully. Portion it into small airtight jars or silicone molds and freeze for up to 6 months. Thaw in the refrigerator overnight, then stir well to restore its creamy texture.
FAQs
Yes, making your own almond butter is absolutely worth it. It tastes fresher, has a cleaner ingredient list, and is often more affordable than store-bought jars. Plus, you can customize the texture and flavors and avoid added oils, sugars, and preservatives
If your almonds won’t turn into almond butter, it usually means they’re not releasing enough oil yet. This can happen if the almonds are too dry, not warm enough, or if the batch size is too small. Try lightly roasting or warming them to loosen the oils, processing for longer, scraping the bowl often, and using at least 400 g (14 oz) of nuts so your food processor has enough volume to work with. If needed, add a bit of neutral oil to help it along.
Almond butter and peanut butter are both nutritious, but almond butter is often considered slightly healthier. Almonds contain more vitamin E, magnesium, and fiber, and they tend to have a bit more heart-healthy fats and fewer carbs. Peanut butter, however, offers more protein and is usually more affordable. Ultimately, both are great choices as long as they’re made with minimal added oils or sugars.
No, you don’t need to peel the skins. They blend in smoothly and add fiber and flavor. If you prefer a lighter color and slightly smoother texture, you can peel them after roasting, but it’s optional.
A high-speed blender works well, but smaller or weaker blenders may struggle. If the mixture sticks to the sides, pause, scrape down, and blend in short intervals to avoid overheating.

More DIY Nut & Seed Butter Recipes

Easy Homemade Almond Butter Recipe (+9 Flavor Variations)
Ingredients
- 16 oz (450 g) Almonds raw (about 3 cups)
Optional:
- ¼ teaspoon Salt
- 1-2 tablespoons Neutral flavoured oil optional
Instructions
- Roast: Preheat the oven to 350°F (175°C). Spread the almonds in a single layer on a baking sheet and roast for 8 minutes, until lightly golden and fragrant. Let cool slightly.
- Blend: Transfer the warm almonds to a high-speed blender or large food processor. Add salt, if using. Blend, stopping occasionally to scrape down the sides.
- Process: Continue blending patiently. The almonds will go through several stages: crumbly, thick paste, and finally smooth and creamy. This process takes 5–15 minutes, depending on your blender or food processor.
- Adjust: If the almond butter isn’t smoothing out, add a small amount of neutral oil and continue blending until creamy.
- Store: Transfer the almond butter to an airtight container or mason jar and store in the refrigerator.
Video
Notes
- Oil: Almonds release their own oils naturally. Only add oil if needed. Use neutral oils like avocado or light olive oil.
- Minimum quantity matters: For best results, use at least 400 g (about 14 oz) of almonds. Smaller amounts often won’t blend properly in many blenders or food processors, making it difficult to achieve a smooth, creamy paste.
- Blender power: If your blender or food processor isn’t very powerful, blending can take longer and may stall. In this case, adding 1–2 tablespoons of neutral oil can help the almonds break down more easily and blend smoothly.
-
Flavor variations:
- Sweet: Add a touch of honey, maple syrup, or vanilla.
- Spiced: Cinnamon, cardamom, or pumpkin spice.
- Savory: A pinch of salt.
- Add-ins: Stir in cacao powder, coconut flakes, or chopped roasted almonds after blending.
- Storage: Store in the refrigerator for up to 3–4 weeks. Stir before using if natural separation occurs.
- Blender tip: A high-speed blender works fastest, but a strong food processor also does the job, just give it time.
")

 for Sushi")


")

Very useful guide, thank you.