Ladyfingers Recipe (Savoiardi) for Tiramisu & More
This post may contain affiliate links.
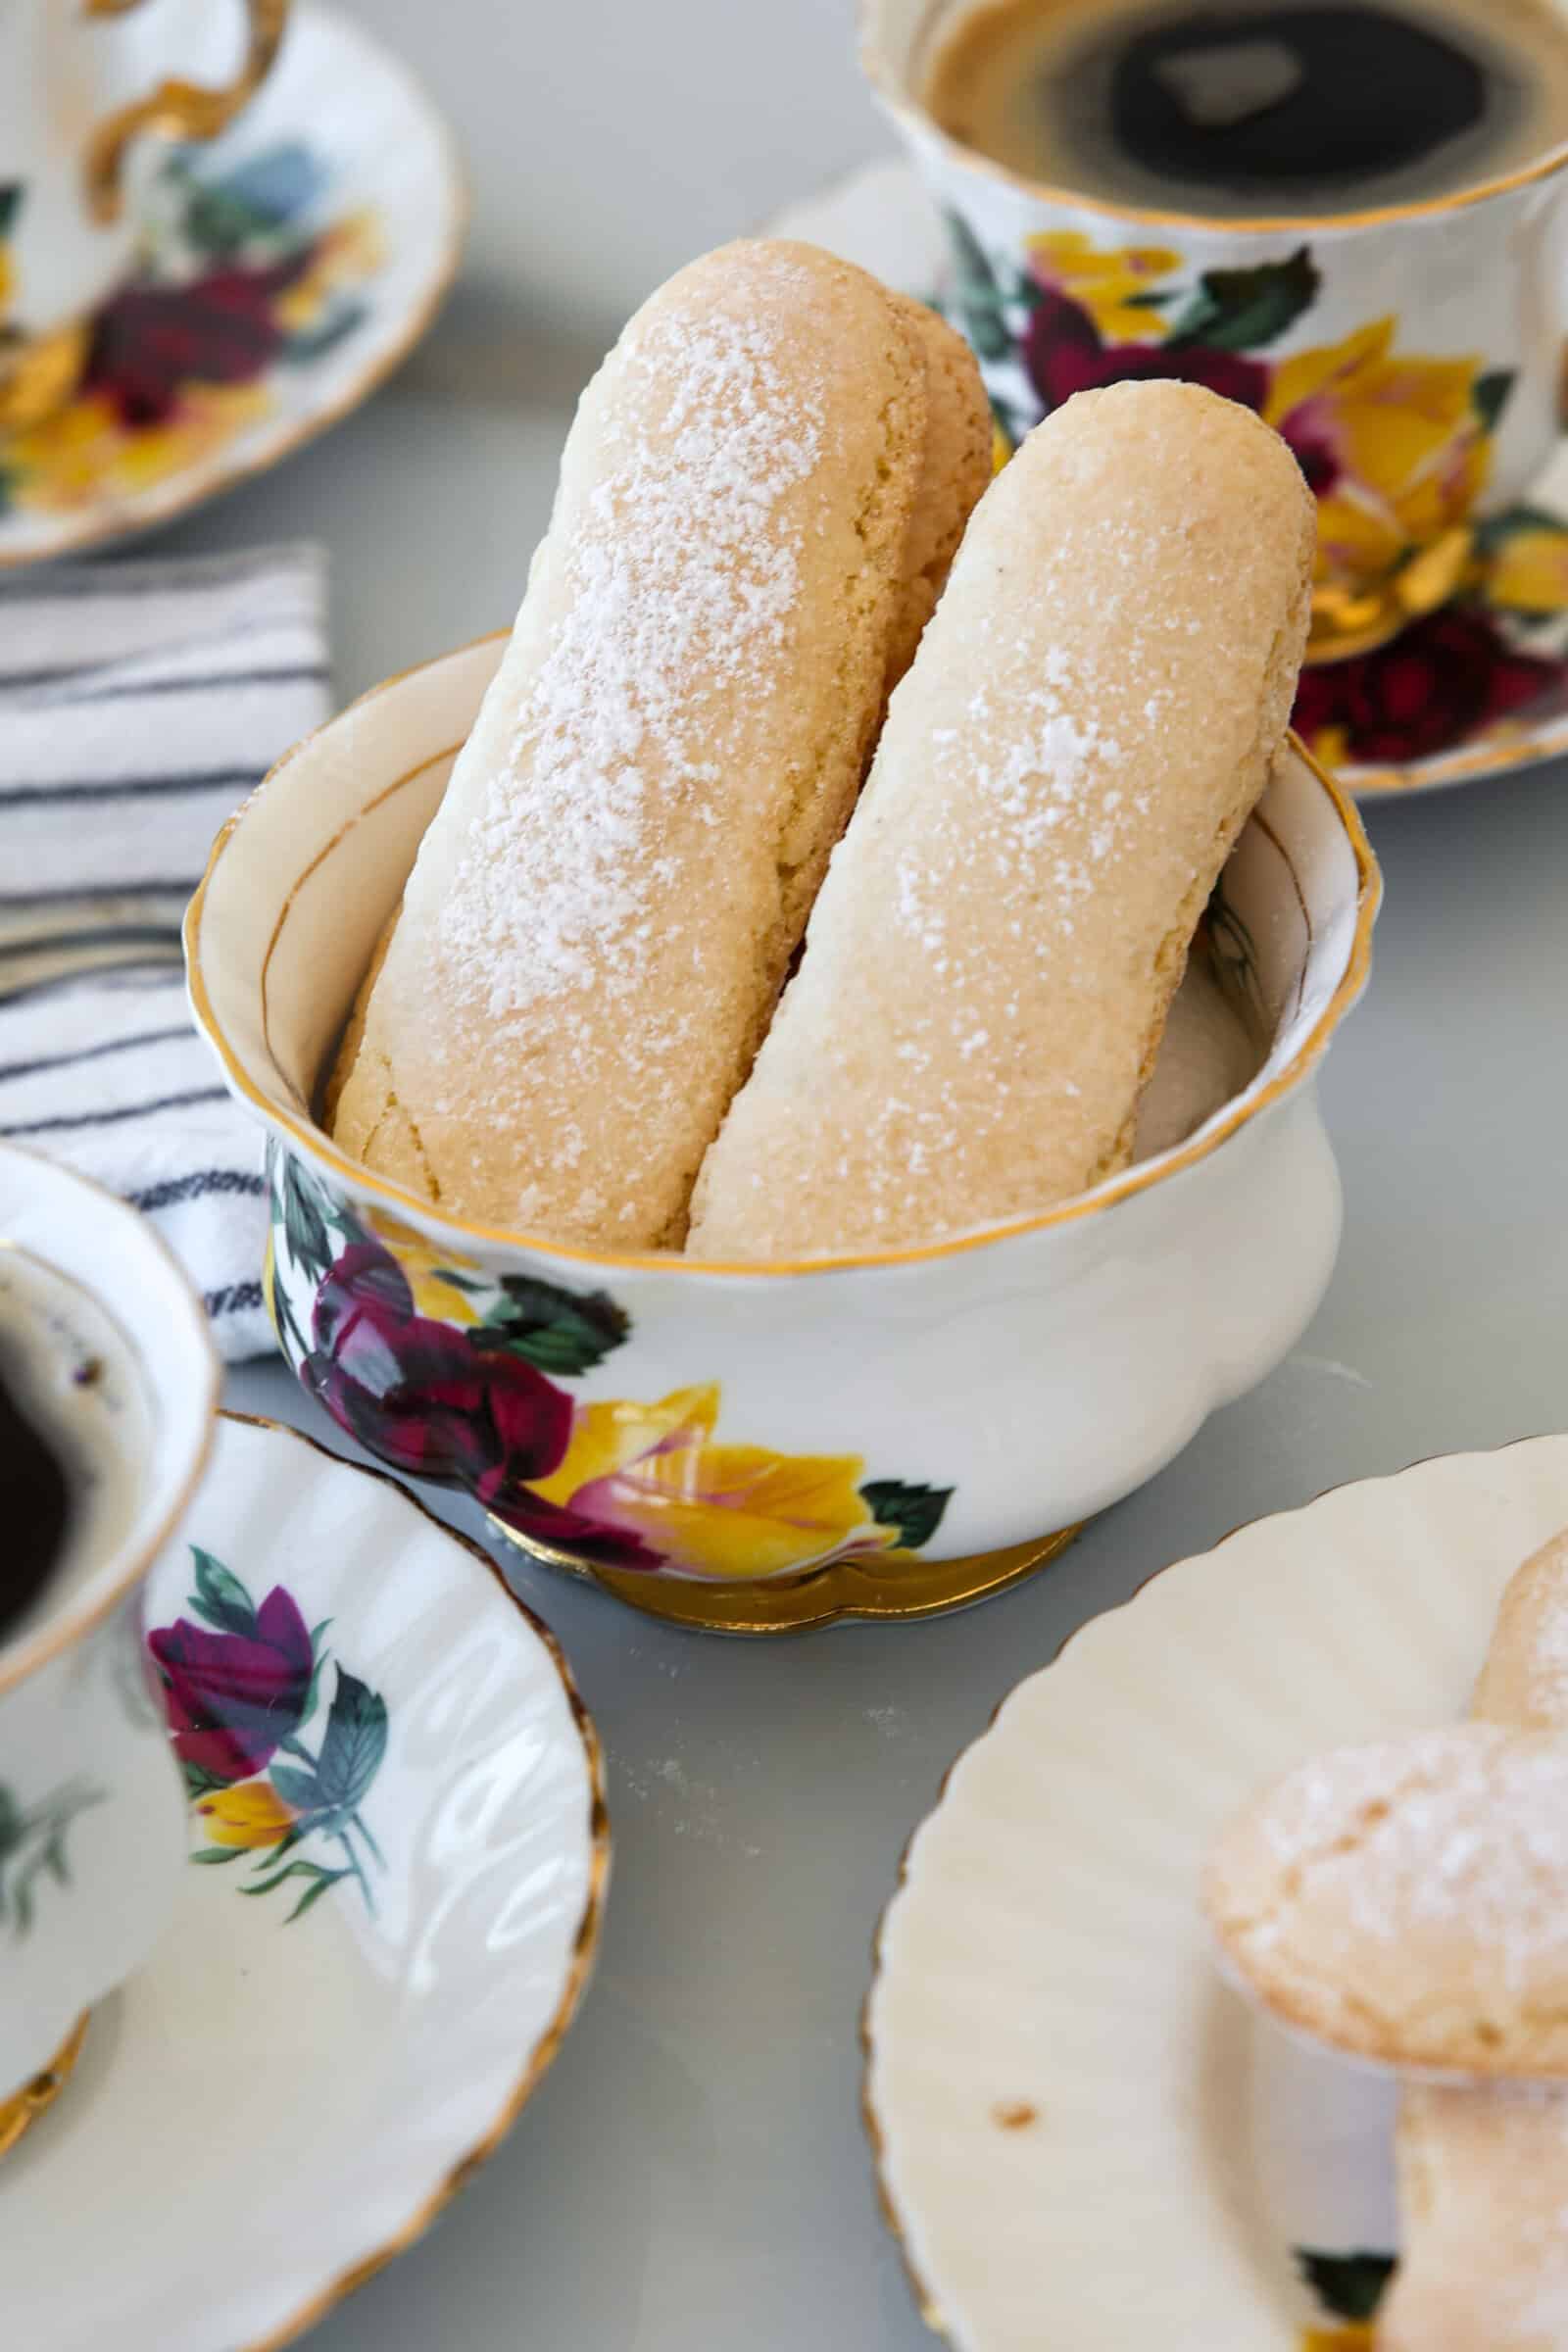
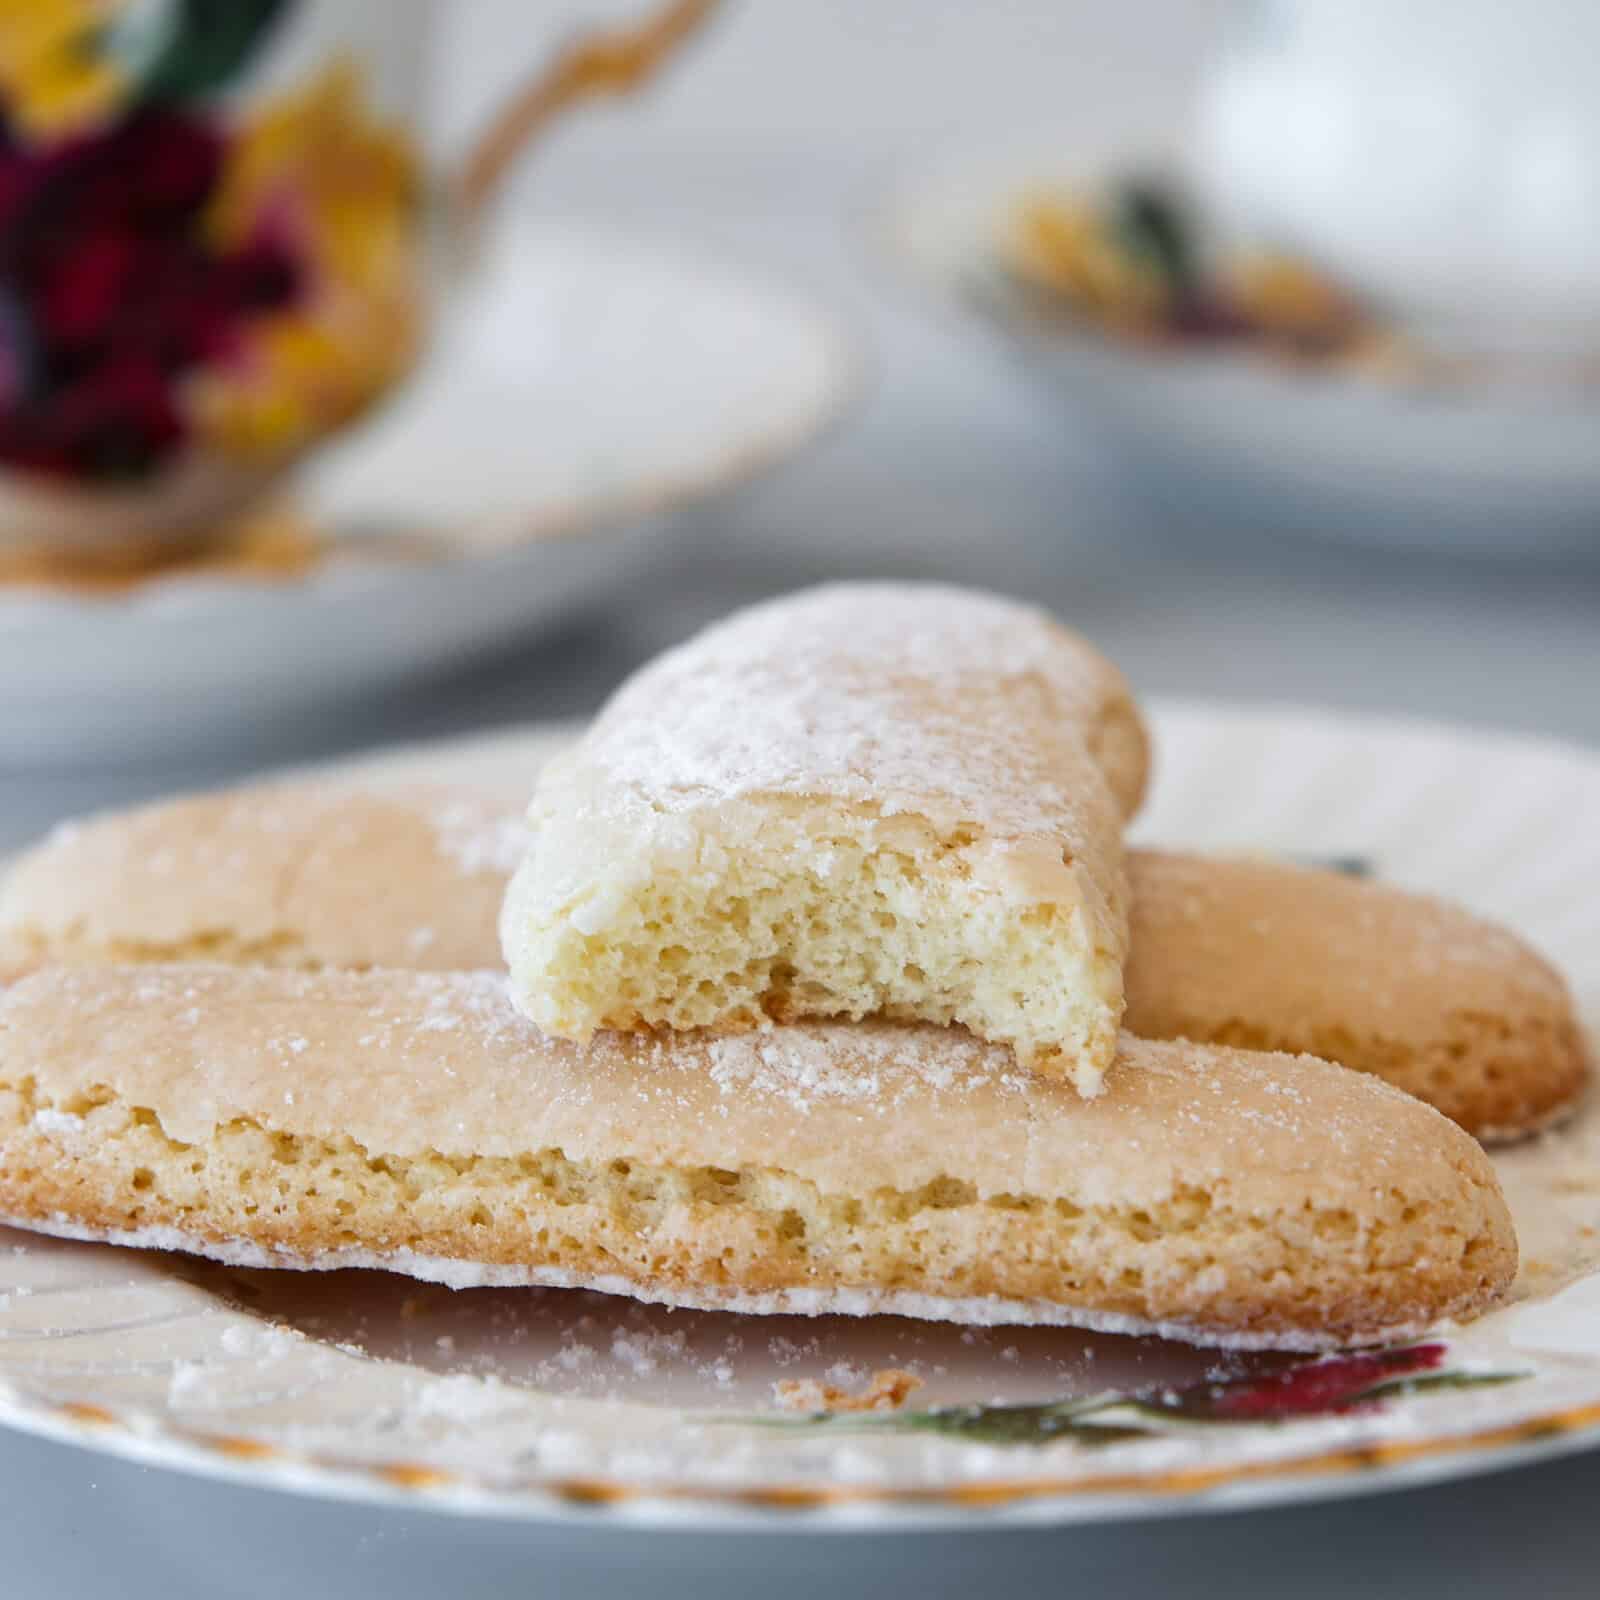
The delicately crisp-on-the-outside, soft-on-the-inside consistency and subtly sweet flavor of these Homemade Ladyfingers (a.k.a. Savoiardi) makes them equally lovely served with a cup of coffee or layered in desserts like classic tiramisu. Just 7 ingredients and 15 minutes of prep required!
Looking for a treat for your next tea time or want to scratch-bake a Brazilian pavê or tiramisu mousse cake? This simple Italian ladyfingers recipe is the way to go. Made with just eggs and 6 pantry staples, these biscuits are the perfect base for countless dessert recipes. They’re also delightful for snacking!
Why You’ll Love Homemade Savoiardi
- The way I see it, versatility is a superpower in the kitchen, and lady fingers have it in spades. They’re excellent as stand-alone snacks, but can also be used in numerous other fun ways: dipped in chocolate, made into classic or strawberry tiramisu, used to make a decorative ring on layer cakes, or layered into a quick trifle with whipped cream or strawberry mousse and fresh fruit. Read on for even more ideas below!
- Store-bought savoiardi aren’t always easy to find, which can be a real bummer when you have your heart set on making a particular dessert. Luckily, the DIY version is made with just a handful of cheap pantry staples, so they’re always within reach regardless of where you shop.
- Next time you need a sweet, crowd-pleasing treat on the fly, these yummy biscuit cookies should be top of mind. They take just 15 minutes of prep and 12 minutes to cook—less than 30 minutes from start to finish!
What Are Ladyfingers?
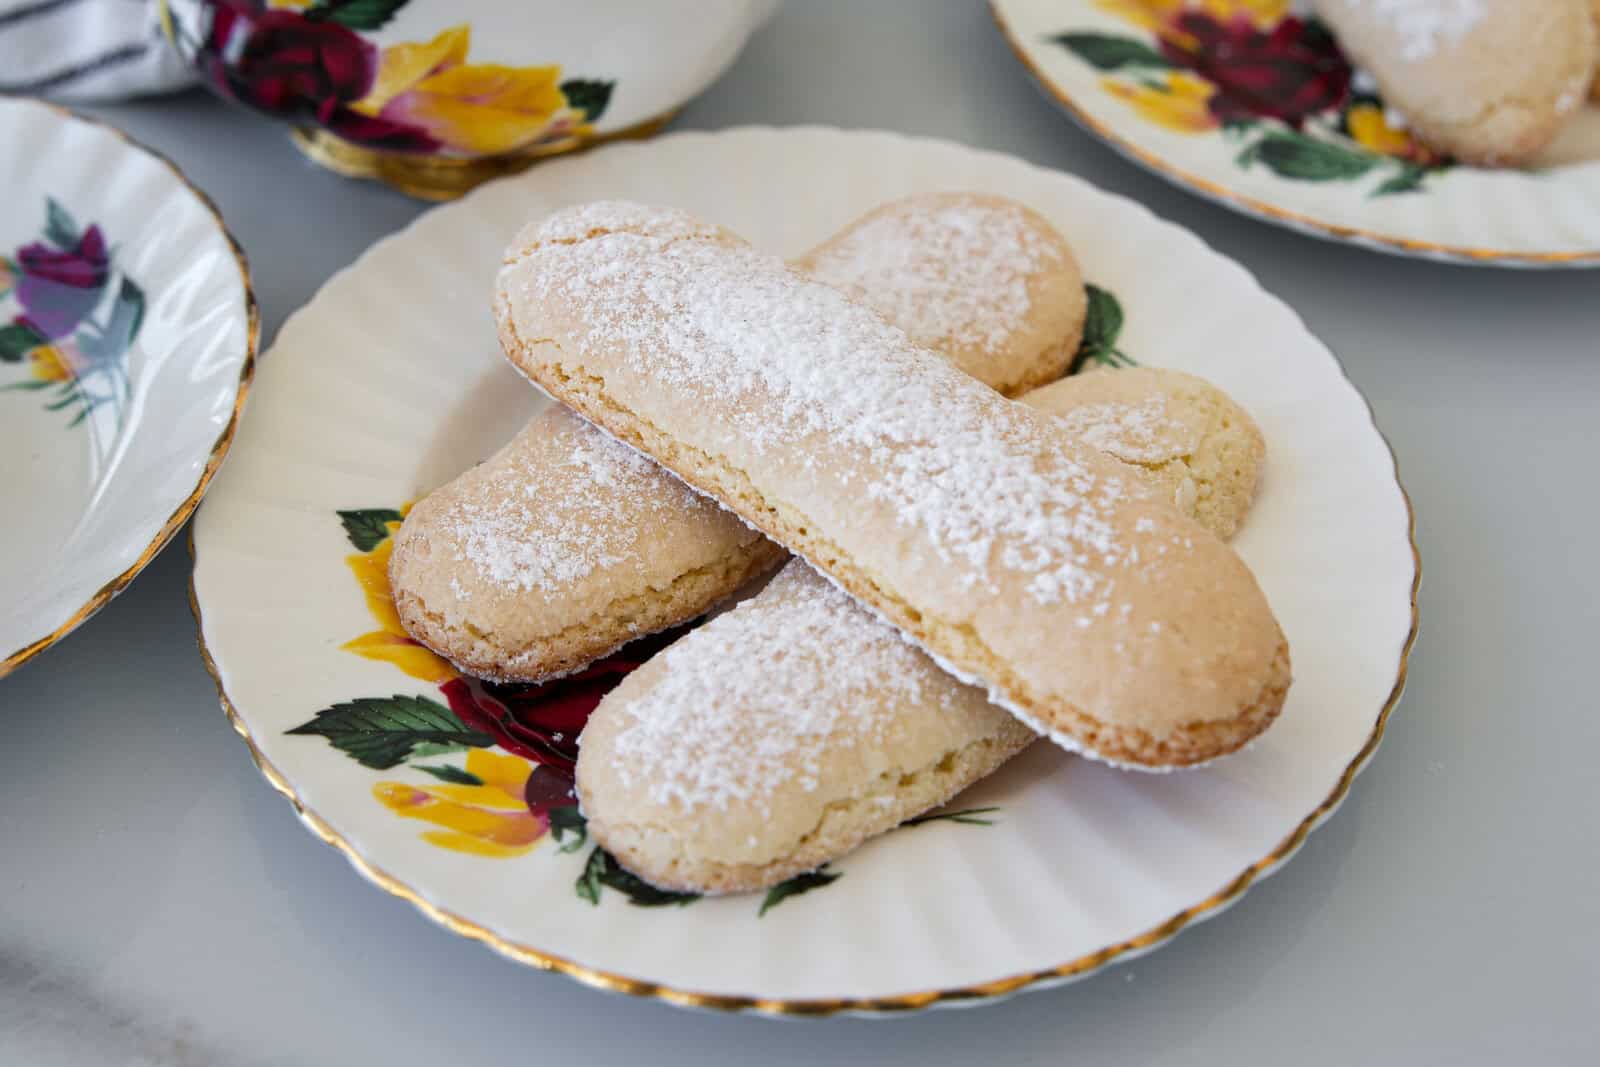
Ladyfingers, also known as savoiardi, are Italian sponge biscuits with a delicate, crisp exterior and a soft, melt-in-your-mouth interior. They’re traditionally piped into finger-like shapes (hence the name). These simple treats are made by folding whipped egg whites into a simple batter of egg yolks, sugar, and flour.
Once baked, they develop a slightly crunchy shell that softens beautifully when layered into desserts like trifles or charlottes. While you can buy them pre-packaged, homemade ladyfingers are fresher, softer, and more flavorful. They’re an excellent upgrade for all your favorite desserts like this no-churn tiramisu ice cream.
Ingredients & Substitutions
As promised, you only need a few simple ingredients to make perfect savoiardi biscuits:
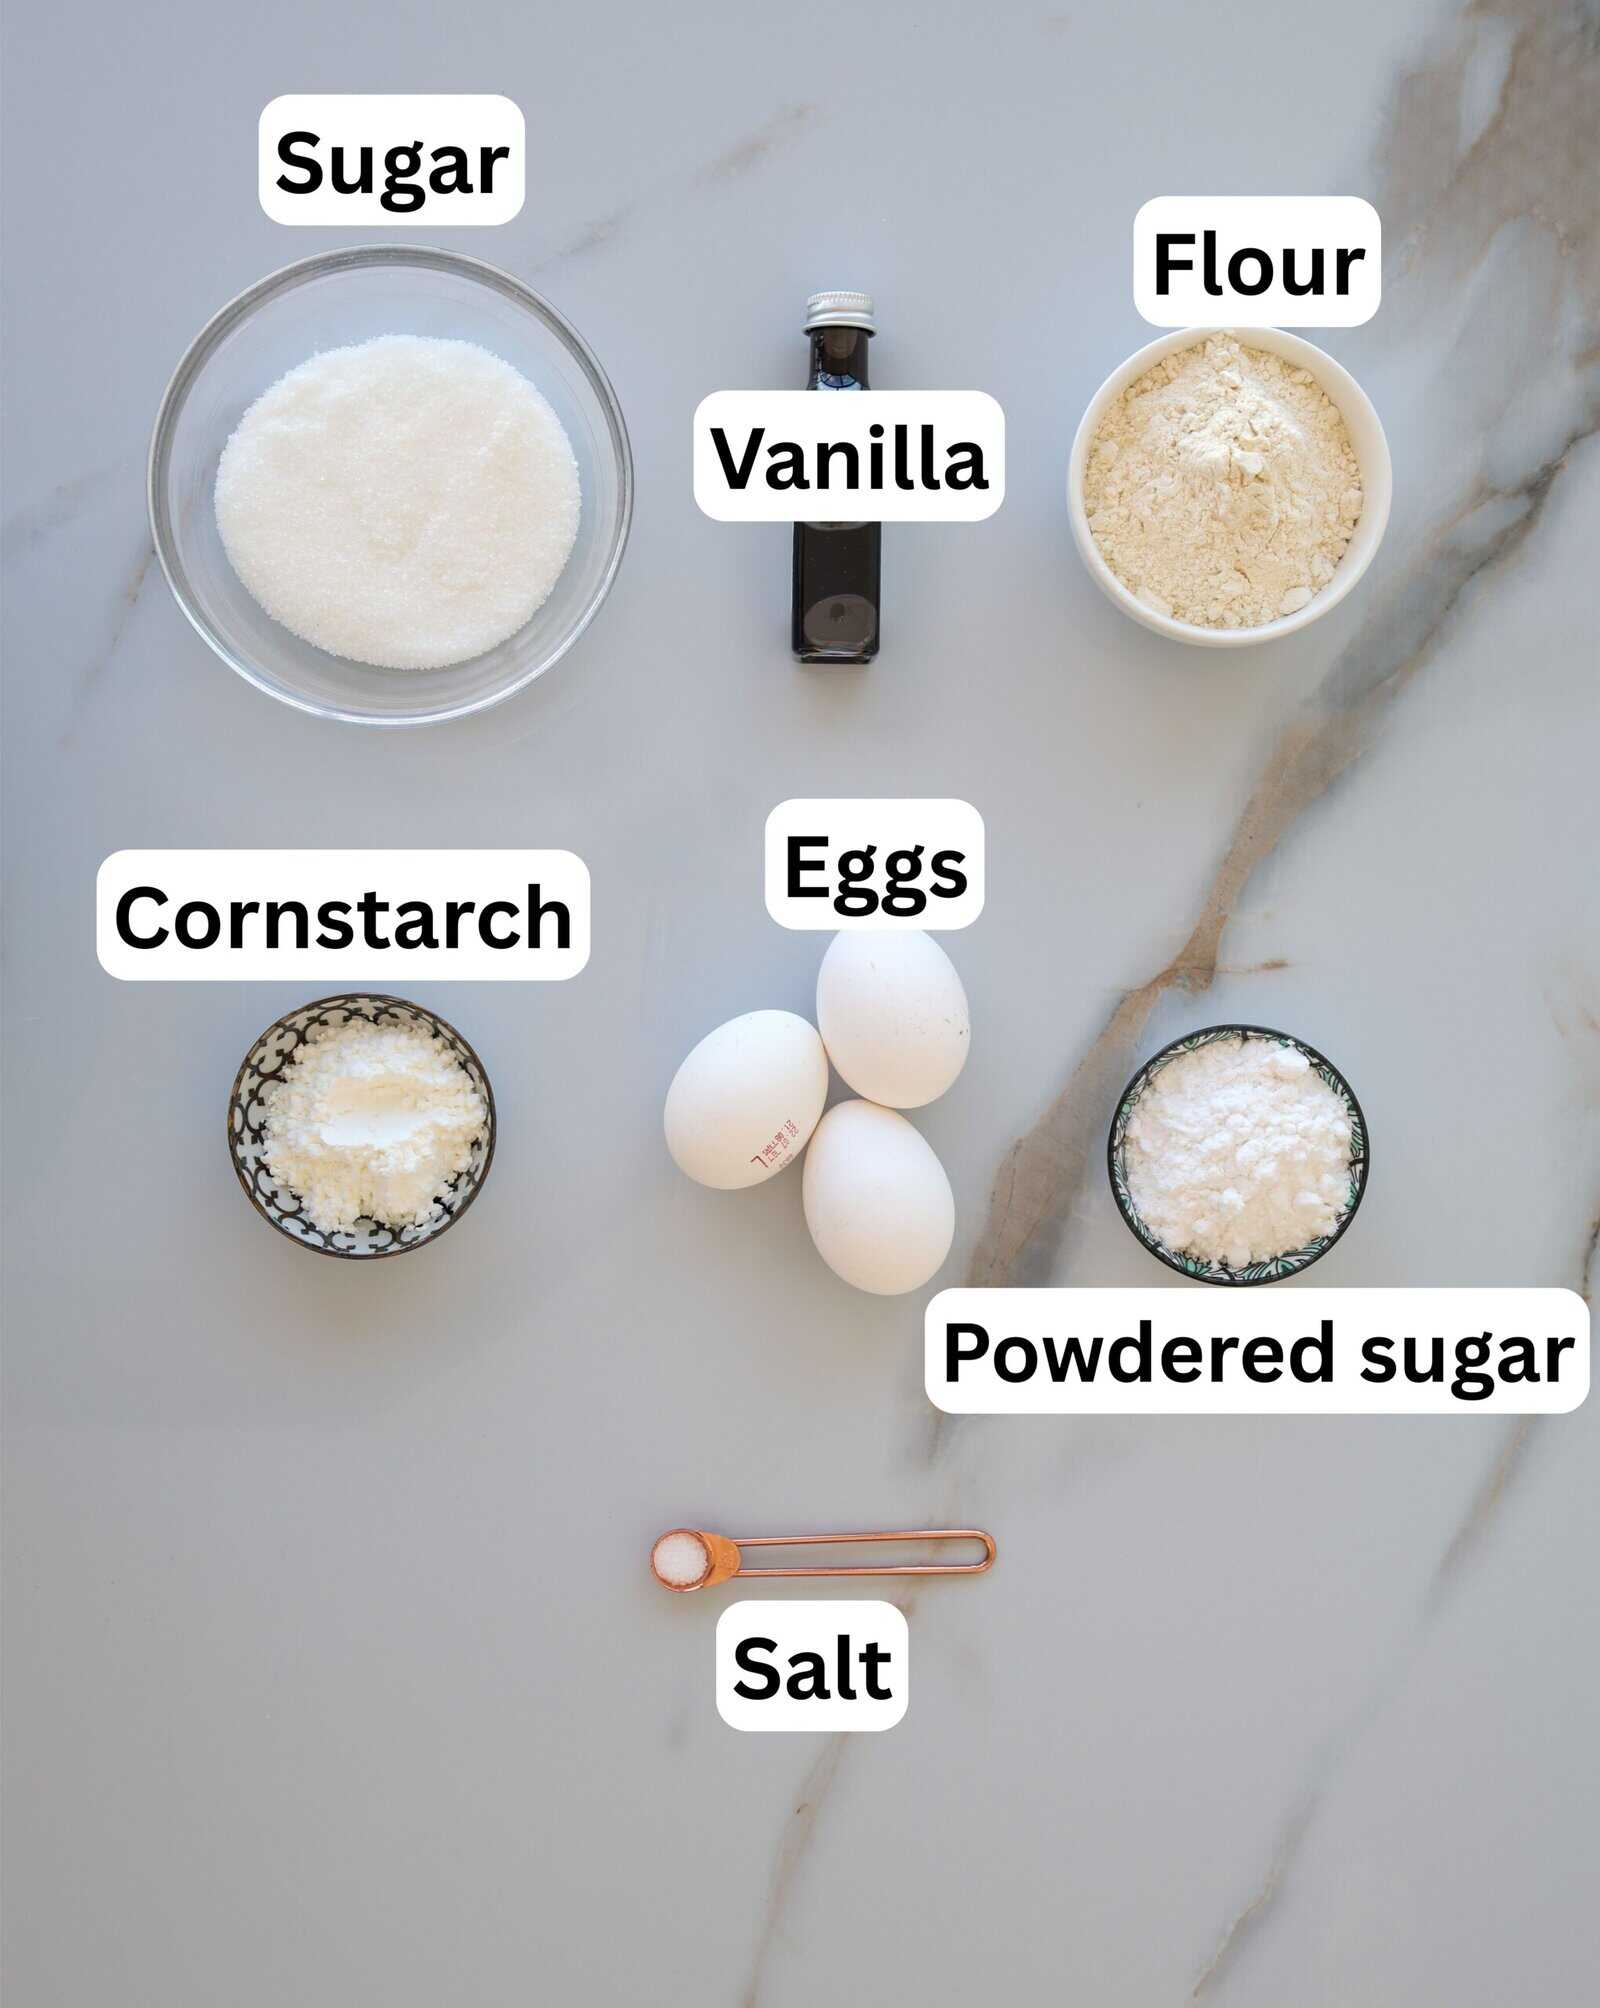
- Large Eggs – Whenever a recipe calls for multiple eggs, the size matters. If you’re using a different size, aim for approximately 2 tablespoons of white and a tablespoon of yolk per large egg. Note that liquid egg whites will not work here, as the whites won’t whip into a proper meringue.
- Granulated Sugar – Plain white sugar has a neutral pH and no additional moisture, both of which are important for achieving the perfect ladyfinger consistency. Feel free to use an equal amount of superfine/caster sugar (which is the same as granulated sugar, but with smaller granules) or pure cane sugar.
- All-Purpose Flour – Plain white flour is all you need! Feel free to use cake flour instead for a lighter result, but note that you don’t need to use the cornstarch if you do.
- Cornstarch – Optional, but recommended for achieving lighter texture. Swap in cake flour for the all-purpose if you don’t have any cornstarch on hand, or omit for a firmer, denser texture.
- Salt – Just a small amount of salt emphasizes the warm vanilla flavor of these cookies. Use fine sea salt or kosher salt for the best results.
- Vanilla Extract – Aromatic, sweet, and warmly flavored vanilla adds a nice complexity to otherwise simple treats. Feel free to use an equal amount of vanilla paste or powder.
- Powdered Sugar – Also known as icing sugar or confectioner’s sugar, this snowy white sweetener is the classic garnish for savoiardi ladyfingers. Don’t have any on hand? Simply blitz white sugar with cornstarch in a blender or food processor using a ratio of 1 cup to 1 tablespoon.
This is just a short review of the ingredients; for the complete recipe, including quantities, scroll down to the recipe card. 👇
Should Ladyfingers Be Soft or Crunchy?
It depends on what you’re using them for! Freshly baked ladyfingers strike a balance of soft and sponge-like on the inside with a lightly crisp exterior. I personally love this contrast, and when I’m eating them with coffee or tea, this is the texture I prefer.
That said, they’re often baked longer to become crisp when used in desserts like tiramisu. This crunchier texture allows them to soak up coffee, liqueur, or custard without falling apart. Store-bought varieties are typically on the crunchier side so they’re ready for using in layered desserts straight from the package.
How to Make Ladyfingers From Scratch
Watch the full video recipe to learn how to make Homemade Savoiardi. This step-by-step tutorial simplifies the process, offering tips and tricks to guarantee perfect results every time.
Optional Variations & Dietary Adaptations
- Corn-Free – If corn is a no-no, feel free to swap in an equal amount of potato starch or simply omit the cornstarch.
- Different Extracts – While vanilla is the classic flavoring choice for ladyfingers, don’t feel limited! Almond, hazelnut, lemon, maple, or even coffee extract can all be used for fun twists. Consider matching your flavor extract to whatever dessert you’re making (e.g. use lemon extract to make ladyfingers for lemon tiramisu). Just note that different flavor extracts can vary widely in potency, so start with just ½ as much as what is called for, then adjust to taste.
Expert Tips & Tricks
- Separate your eggs while they’re cold from the fridge, then allow them to sit out at room temperature to “age” for about 30 minutes before proceeding with the recipe. Why? Cold yolks are less likely to break, but warmer whites produce more stable meringues and warmer yolks blend more easily into batters.
- Make sure there is NO oil or fat in your egg whites! Any speck of yolk or any lingering oil or grease on your mixing bowl or beaters will prevent the whites from becoming properly light and billowy.
- Don’t over-mix the batter. Yes, you want to spend plenty of time whipping both the egg whites and the egg yolks in their respective bowls. You want the whites become fluffy and glossy and the yolks become thick and ribbon-y. But, once you fold the two together, and especially when you fold in the dry ingredients, make sure to use a light hand. Over-mixing can both knock the air out of the eggs and overdevelop the gluten matrix, leading to dense, tough cookies.
- Sift the cornstarch into the flour so that it’s evenly distributed and there are no clumps.
- Use a few dabs of batter to get the parchment to stick to your tray. It doesn’t take a lot, just a little fingertip-sized dot on each corner.
- Let the first dusting of powdered sugar rest for 5 minutes before dusting a second time. This gives the first application time to melt and reharden into a bit of a crust so the second application will look pretty and white on top.
How to Serve
Whether you’re making desserts or just need a little pick-me-up with your espresso, ladyfingers always feel like a special treat. Here are some of my favorite ways to use them:
- Tiramisu – Between classic espresso chocolate tiramisu cups, tangy no-bake tiramisu cheesecake, bite-sized tiramisu truffles, or fun flavor twists like my pistachio tiramisu, there’s a wide world of this beloved Italian dessert to explore. Starting with homemade ladyfingers will only make your treats that much more impressive!
- Mousse & Ice Cream – A glass of pillowy soft triple chocolate mousse or bowl of no-churn nutella ice cream is a delightful dinner party dessert on its own, but having some savoiardi on the side for dipping is a next-level hosting move.
- Coffee Break or Tea Time – Frothy chocolate dalgona mochas and dalgona coffees are excellent for midday pick-me-ups. Treating yourself to some fresh ladyfingers while you recharge makes the break less about caffeination and more about “me time!”

Storage & Reheating
- Once your ladyfingers have cooled completely, store them in an airtight container at room temperature in a cool, dark spot for up to 3–4 days. To keep them crisp, avoid humid or warm spots in the kitchen.
- For longer storage, freeze them in a single layer on a baking sheet until solid, then transfer to a freezer-safe bag or container. They’ll keep well in the freezer for up to 2 months. Let them thaw at room temperature on a wire rack (to prevent them from getting soggy) before using.
- If your ladyfingers are too soft and fresh for layered desserts, let them sit out uncovered for several hours or overnight to dry slightly.
More Cookie & Biscuit Recipes
Ladyfingers Recipe (Savoiardi) for Tiramisu & More
Ingredients
- 3 Large Eggs separated
- ½ cup (100 g) Sugar divided
- ⅔ cup (85) All-purpose flour sifted
- 2 tablespoons (16) Cornstarch
- Pinch Salt
- 1 teaspoon Vanilla
- Powdered sugar for dusting
Instructions
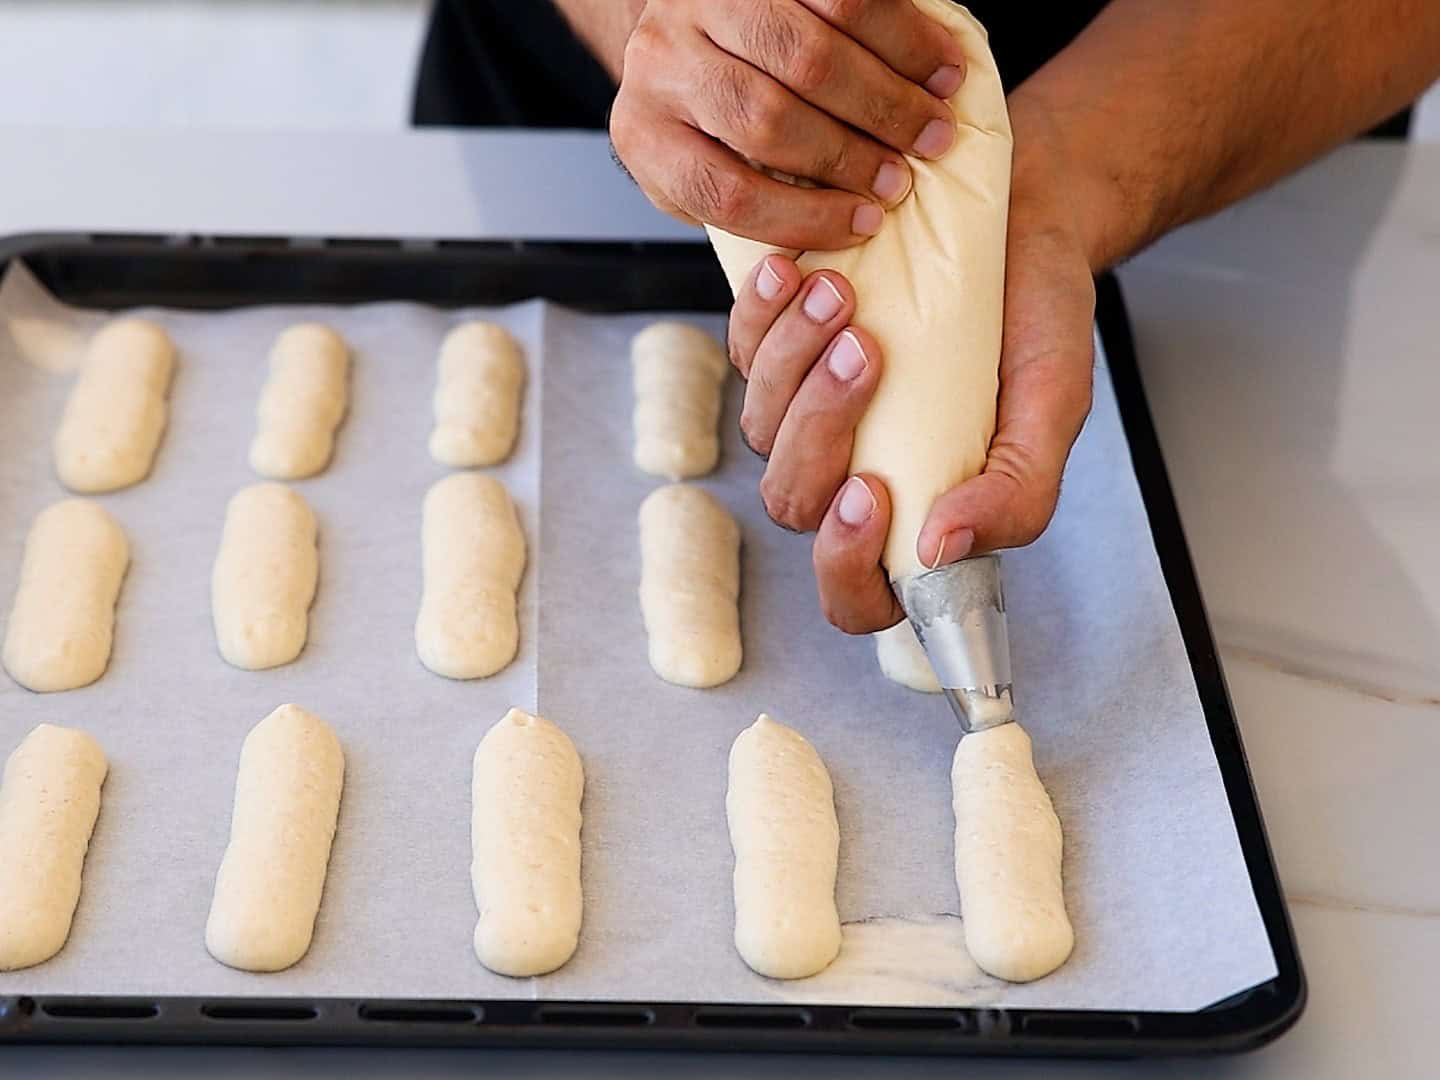
- Prep your tools: Preheat oven to 180°C (350°F). Line two baking trays with parchment paper. Fit a piping bag with a large round tip (about 1.2cm / ½ inch).
- Whip egg whites: In a clean, grease-free bowl, whisk the egg whites with a pinch of salt. Gradually add half of the remaining sugar (50g), beating until stiff, glossy peaks form.
- Whip yolks: In a separate large bowl, beat the egg yolks with half the sugar (50g) and vanilla until thick, pale, and ribbons form, about 3–4 minutes.
- Fold together: Gently fold the egg whites into the yolk mixture in 2–3 additions, using a spatula and light motions to preserve the air.
- Add dry ingredients: Sift in the flour and cornstarch over the batter. Fold carefully just until no dry streaks remain. Do not overmix.
- Pipe: Transfer the batter to your prepared piping bag. To secure the paper, pipe a small dot of batter in each corner between the parchment and tray. Pipe 8–10 cm (3–4 inch) long fingers, spacing them slightly apart.
- Dust and rest: Generously dust with powdered sugar, let sit for 5 minutes, then dust again. This helps develop a crust.
- Bake: Bake for 10–12 minutes, or until the ladyfingers are puffed, lightly golden, and springy. Let cool completely on the tray.
Video
Notes
- Clean bowl = stable meringue: Always use a clean, grease-free bowl for whipping egg whites. Any fat or residue can prevent stiff peaks.
- Don’t overmix: After folding in the dry ingredients, stop mixing as soon as everything is combined. Overmixing will deflate your batter.
- Flour: Use all-purpose flour for best results, or substitute with cake flour for a lighter texture.
- Cornstarch: This step is optional; however, adding cornstarch helps create a softer, more delicate texture. You can omit it, but the ladyfingers will turn out slightly firmer. Cornstarch works best when sifted together with the flour.
- Tray trick: Pipe a small dot of batter underneath the parchment in each corner to prevent it from sliding.
- Powdered sugar rest: Letting the first dusting sit for 5 minutes before the second helps the sugar absorb slightly, forming a delicate crust.
- Storage: Once completely cooled, store in an airtight container at room temperature for up to 3-4 days. For longer storage, freeze for up to 2 months. If using in desserts like tiramisu, slightly stale ladyfingers work best
Nutrition
FAQs
It’s likely that the egg whites weren’t whipped to stiff peaks or were overmixed when folded into the yolk mixture. The volume and structure from properly whipped egg whites are what give ladyfingers their light, pipeable texture. Be gentle when folding to avoid deflating the batter, and make sure your mixing bowl is clean and free of any grease, which can prevent the egg whites from whipping properly.
The whipped egg whites provide structure and lift, so if they’re not beaten to stiff peaks or are folded in too aggressively, the batter loses air and won’t hold its shape. Piping onto a warm or greased baking sheet can also cause spreading, so always use parchment paper or a silicone mat on a cool tray. Letting the piped batter sit too long before baking can also lead to deflation, so work quickly and bake right after piping.
A good ladyfingers substitute depends on the dessert you’re making. For tiramisu, trifles, or charlottes, vanilla sponge cake or lemon pound cake cut into thin strips works well. Drying the strips out slightly in the oven to mimic the crisp texture of traditional ladyfingers makes them more convincing. Madeleines are a bit denser, but their buttery vanilla flavor is typically well-suited to ladyfinger desserts. In some no-bake desserts, plain vanilla wafers or butter cookies can also do the trick, adding a bit of crunch and sweetness. Whatever you choose, look for something that can hold its shape and absorb liquid without falling apart.
Ladyfingers are similar to sponge cake, but they’re not exactly the same. Both use whipped eggs for structure and generally contain little to no fat. That said, ladyfingers are drier, firmer, and piped into individual finger-like shapes before baking. They’re often dusted with powdered sugar, which helps form their signature crisp exterior. Sponge cake, on the other hand, is typically softer, moister, and baked in a single pan.
")


")
")


I’d like to experiment with different flavors by trading out the vanilla. Most recently, I incorporated the taste of orange by using the zest and juice of one small orange. The ladyfinger didn’t hold its shape as much likely due to the added moisture from the juice, but the orange taste came through nicely. I am thinking that just using the zest would suffice, but iscthere an amount of orange juice to use to enhance the taste if orange without compromising the delicate shape of the ladyfinger?
Hi Donze,
That’s such a great idea, orange ladyfingers sound amazing 🍊
I haven’t personally tested this myself, so I can’t guarantee the results, but the orange juice likely caused the spreading because ladyfinger batter is very sensitive to extra moisture.
I would suggest using about 1 tablespoon of orange zest plus 1–2 teaspoons of orange extract instead of juice. If the batter looks too thin, you could carefully add 1–2 tablespoons of flour to help stabilize it.
Looks great I am going to make them tomorrow
Just what I needed. Thank you very much. Will try them this weekend.
Let me know how it turns out 🙂
As a huge tiramisu lover, I have to try these homemade ladyfingers.
Hope you’ll like it 🙂