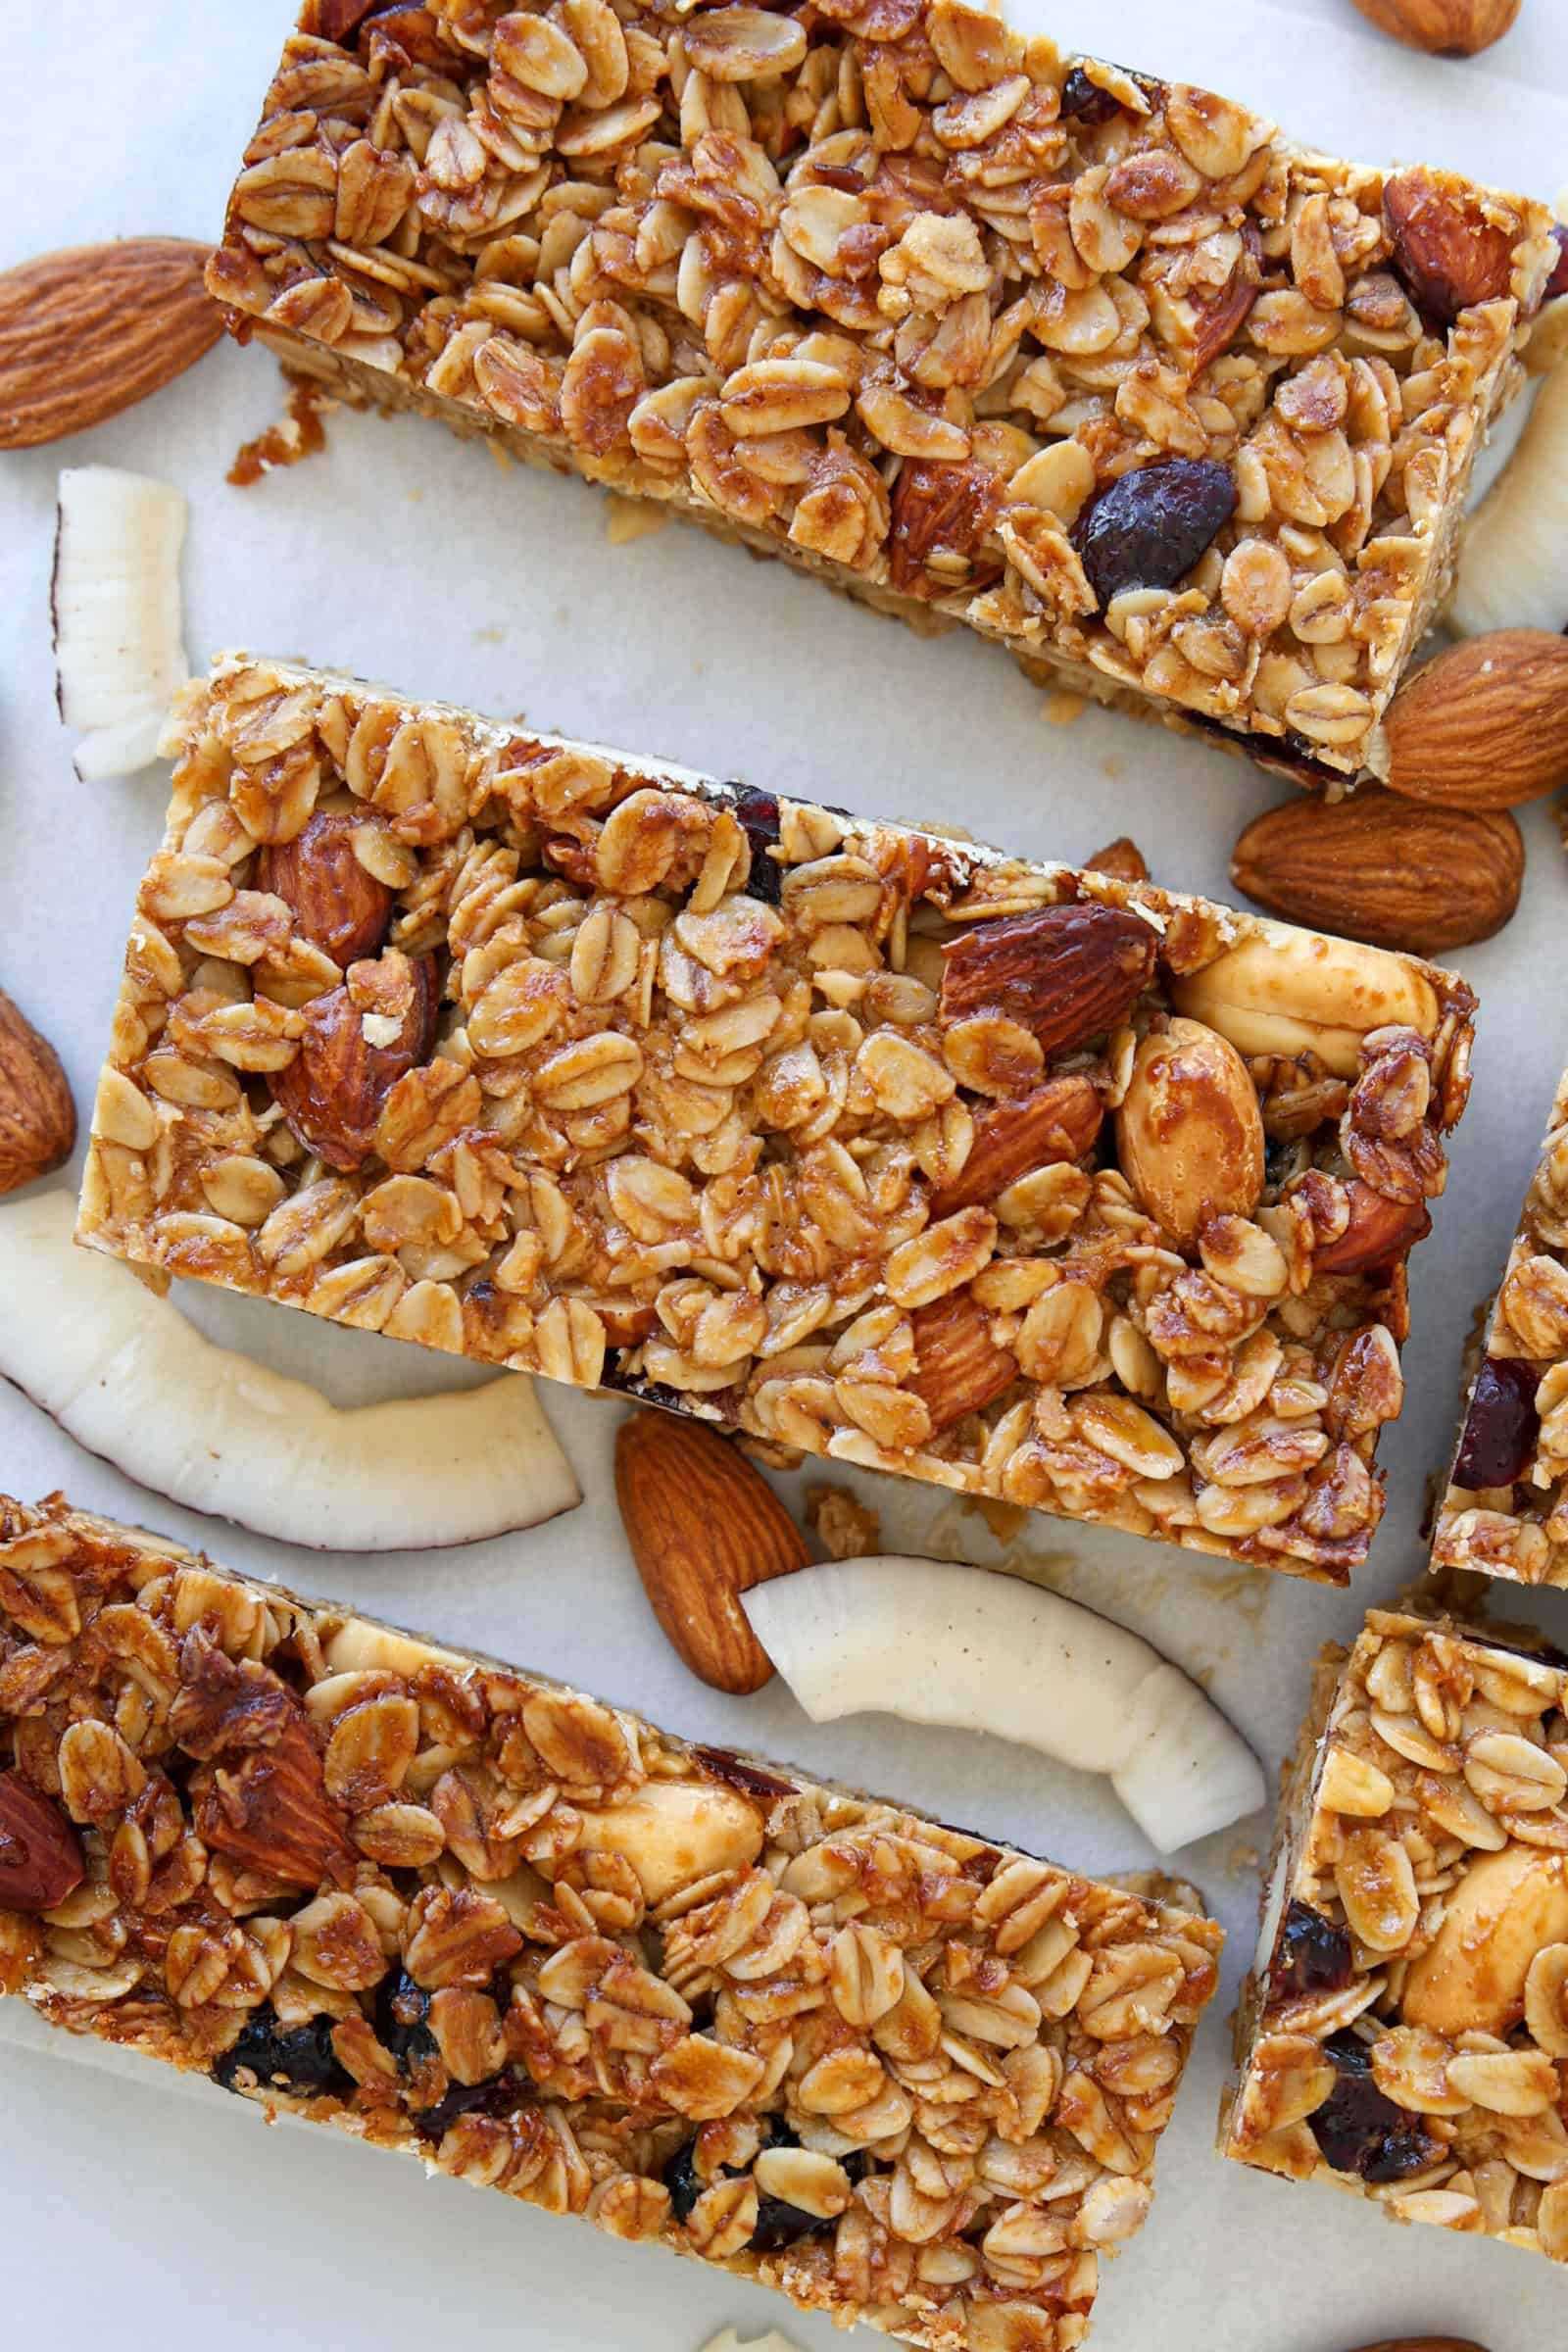
Healthy Homemade Granola Bars
This post may contain affiliate links.
Now that kids are back in school, it’s the perfect time to make these Healthy Homemade Granola Bars. Unlike store-bought versions that are chock-full of sugar, corn syrup, and preservatives, these whole-grain, honey-sweetened, fruit and nut-packed treats are all-natural so you can actually feel good about eating them!
I originally published this recipe in 2018 and have since updated it with new photos, improved instructions, and extra success tips.
Back when I was a kid, the best part of any school day was coming home to my mom’s after-school snacks. From walnut and peanut butter stuffed dates to slices of apple oatmeal snacking cake, crunchy roasted chickpeas to fruity frozen yogurt bars, there was always something nutritious and delicious to greet me. These healthy granola bars are here to continue the tradition. (P.S. Even if you don’t have any kids, make some. Everyone deserves yummy snacks!)
Why You’ll Love These Healthy Granola Bars
- As with any kitchen DIY, you have full control over what goes into homemade granola bars. Not a fan of cranberries? Swap in raisins! Can’t do nuts? Seeds are just as tasty. Prefer chewy or crispy granola bars? We can make that happen, too. They’re super customizable! Read on below for more ideas.
- Over 66,000 people have seen my YouTube video recipe for granola bars, and more than 12,000 have given it a thumbs up! With that many of your peers vouching for the pure deliciousness of these treats, you can proceed with confidence.
- Not only are homemade granola bars healthier than their store-bought counterparts, they’re often cheaper, too. I’d call that a win-win! Plus, they’re made with just 10 pantry staples, so healthy snacks are never far from reach.
How to Make Granola Bars that Are Healthy
Watch the full video recipe to learn how to make the BEST Low-Sugar Granola Bars. This step-by-step tutorial simplifies the process, offering tips and tricks to guarantee perfect results every time.
Prefer the written recipe? Scroll down to the recipe box 👇
Ingredients & Substitutions
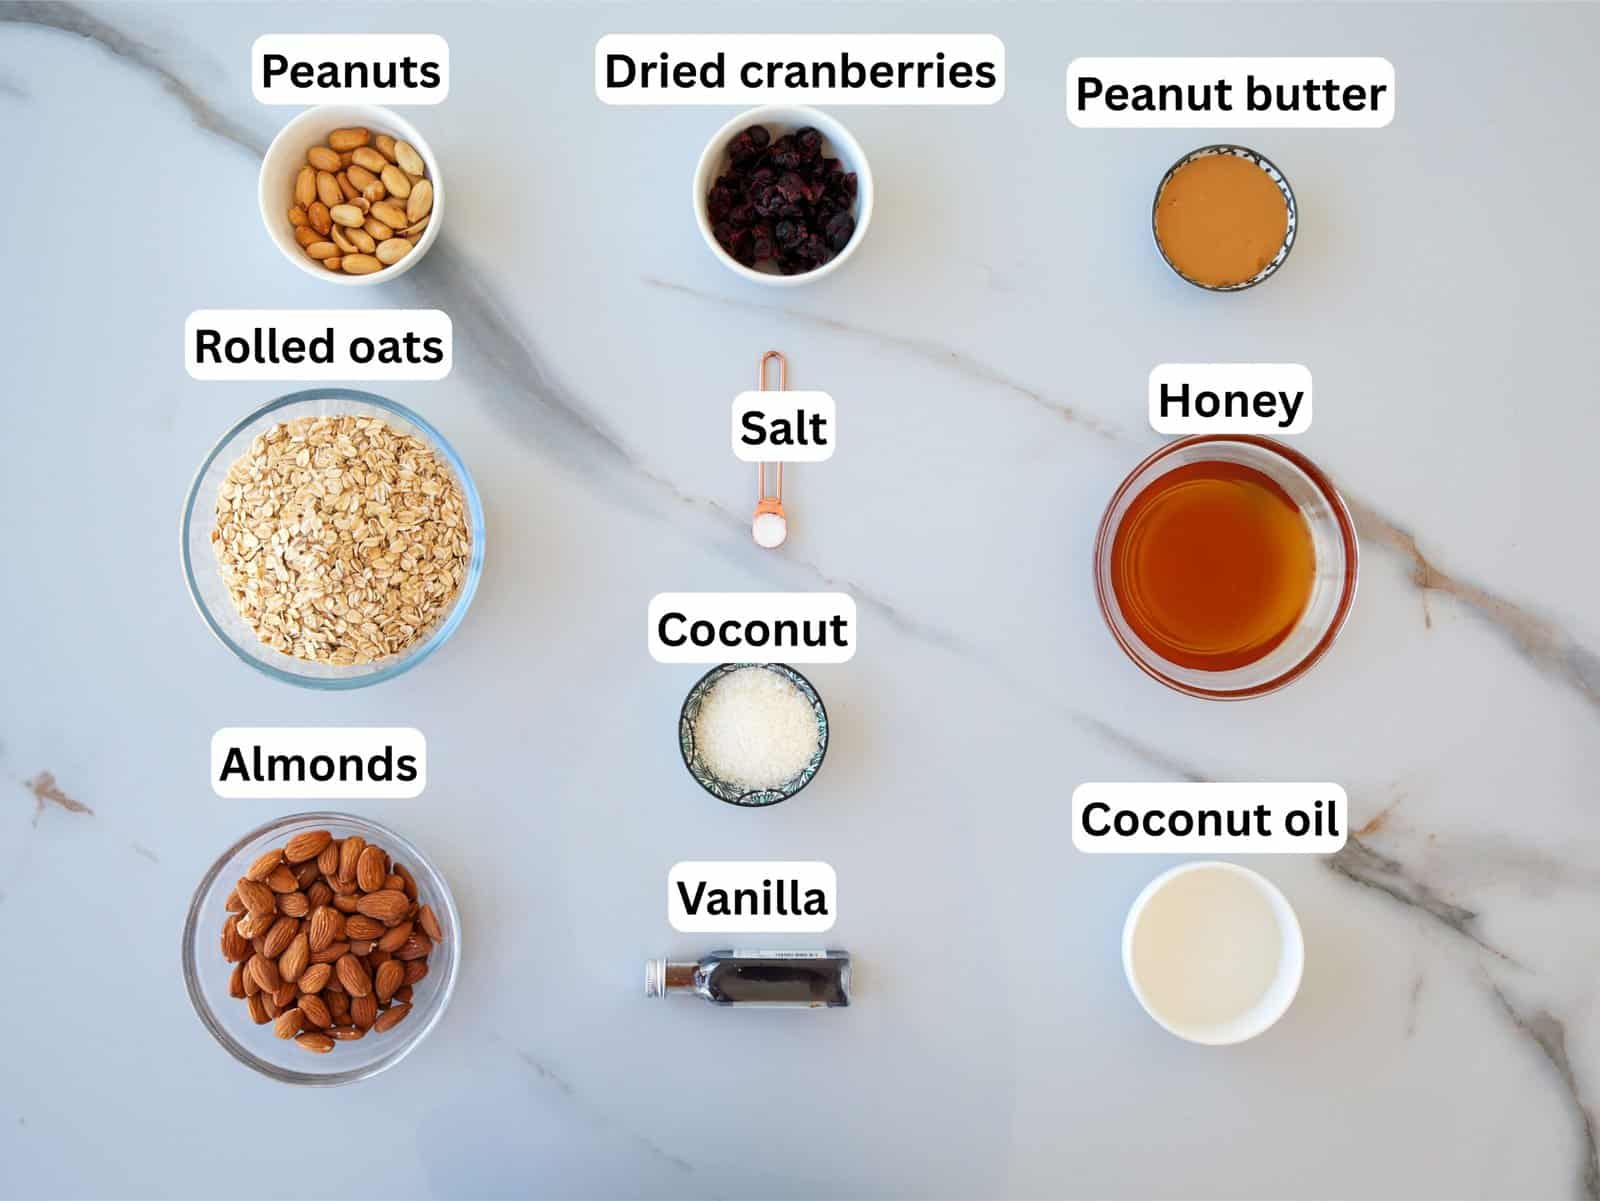
- Rolled Oats – A crucial element for any classic granola recipe! Make sure to reach for certified GF oats if you’re gluten-free.
- Almonds & Peanuts – Nuts add healthy fats and protein for extra staying power. Feel free to swap in your preferred nut combo, cashews, walnuts, pistachios, and pecans work, too.
- Dried Cranberries – I like having a bit of chew and a tart flavor to balance out the sweet honey-vanilla notes. Dried sour cherries are another great option. You’re also welcome to experiment with whatever dried fruit you prefer. (Just make sure to chop whatever you use into roughly raisin-sized pieces.)
- Unsweetened Desiccated/Shredded Coconut – Optional, but lovely for adding a hint of tropical flavor.
- Honey – Honey adds chewiness and flavor while simultaneously acting as a binder. Need to make them vegan? Use agave nectar instead. (Maple syrup works too, but the bars may be a bit softer.)
- Coconut Oil – Use unrefined if you want more of a coconutty flavor, or use refined if you don’t.
- Peanut Butter – The added peanut butter not only adds toasty, nutty flavor but also improves the texture and prevents crumbling. Almond butter, cashew butter, or sunflower seed butter work just as well.
- Vanilla Extract – Adding a touch of warm, aromatic sweetness makes our low sugar granola bars taste sweeter than they are.
This is just a short review of the ingredients; for the complete recipe, including quantities, scroll down to the recipe card 👇
Why Granola Bars are Perfect for Healthy Snacking
Granola itself first became popular in the United States in the late 19th century as a whole grain health food. As the natural foods movement gained momentum in the 1970s, companies began pressing oats, nuts, seeds, and sweeteners into portable granola bars (or sometimes granola cookies) for on-the-go convenience. (In Britain, the baked variety were called “flapjacks.”)
At their core, granola bars usually include a base of rolled oats, combined with binders like honey, nut butter, or syrup to hold everything together. From there, the possibilities are endless: nuts and seeds for crunch, dried fruit for sweetness and chew, and add-ins like chocolate, spices, or coconut to keep things interesting.
In my opinion, granola bars strike the perfect balance between yummy and healthy. They’re full of whole grains, fiber, and protein (sometimes). Plus, they’re easy to grab on your way out the door, tuck into a lunchbox, or enjoy as a post-workout bite. And when they’re homemade, you get to decide to make them as wholesome and nutrient-rich or sweet and indulgent as you like!
Optional Variations & Dietary Adaptations
One of the best parts about homemade granola bars is how customizable they are. Here are some tasty ways to switch things up:
- Nut-Free: Skip the almonds and peanuts and use seeds instead—sunflower seeds, pumpkin seeds (pepitas), or hemp hearts all add great crunch and nutrition. Swap peanut butter for sunbutter or tahini to keep them allergen-friendly.
- Seed-Free: Can’t do seeds either? No worries! Cookie butter or granola butter will work as binders. Just consider reducing the amount of honey you add since these are already sweetened. Alternatively, swap in some leftover egg whites for less fat, less sugar, more protein, and a crispy granola bar texture. As far as mix-ins go, stick to dried fruits and cacao nibs.
- Different Fruits: Instead of cranberries, try raisins, chopped apricots, dates, figs, or even dried blueberries. Just be sure to chop larger fruits into small pieces for even distribution.
- Add Chocolate: Mix in mini chocolate chips, cacao nibs, or drizzle melted dark chocolate over the top after baking the bars for a sweet upgrade.
- Spice It Up: Add cinnamon, pumpkin spice, or even a pinch of cardamom or ginger for a flavor twist.
- Protein Boost: Stir in a scoop of your favorite protein powder or collagen peptides to turn these into post-workout bars.
- Different Sweeteners: Agave nectar, brown rice syrup, or maple syrup can be used instead of honey. Keep in mind the texture may shift slightly (e.g., maple syrup makes them a little softer).
- Go Tropical: Add dried pineapple or mango, macadamia nuts, and coconut flakes for a sunny, island-inspired version.
- Extra Crunch: Mix in crispy rice cereal, chopped pretzels, or toasted quinoa for a fun texture.
Expert Tips & Tricks
- Choose the right pan size. A 9×9-inch pan is the sweet spot for perfectly thick granola bars. An 8×8-inch pan works too (they’ll just be a little taller—add 3–5 minutes to the bake time). For thinner bars, use a 9×13-inch pan and reduce the bake time slightly.
- Press firmly. Use the back of a measuring cup, spatula, or even clean, slightly damp hands to press the mixture into the pan as tightly as possible. This step is crucial for helping the bars hold together instead of crumbling.
- Cool completely. Patience pays off here! Let the bars cool fully in the pan before slicing, ideally chilling them in the fridge for 1–2 hours. Cutting too soon is the number one cause of crumbly bars.
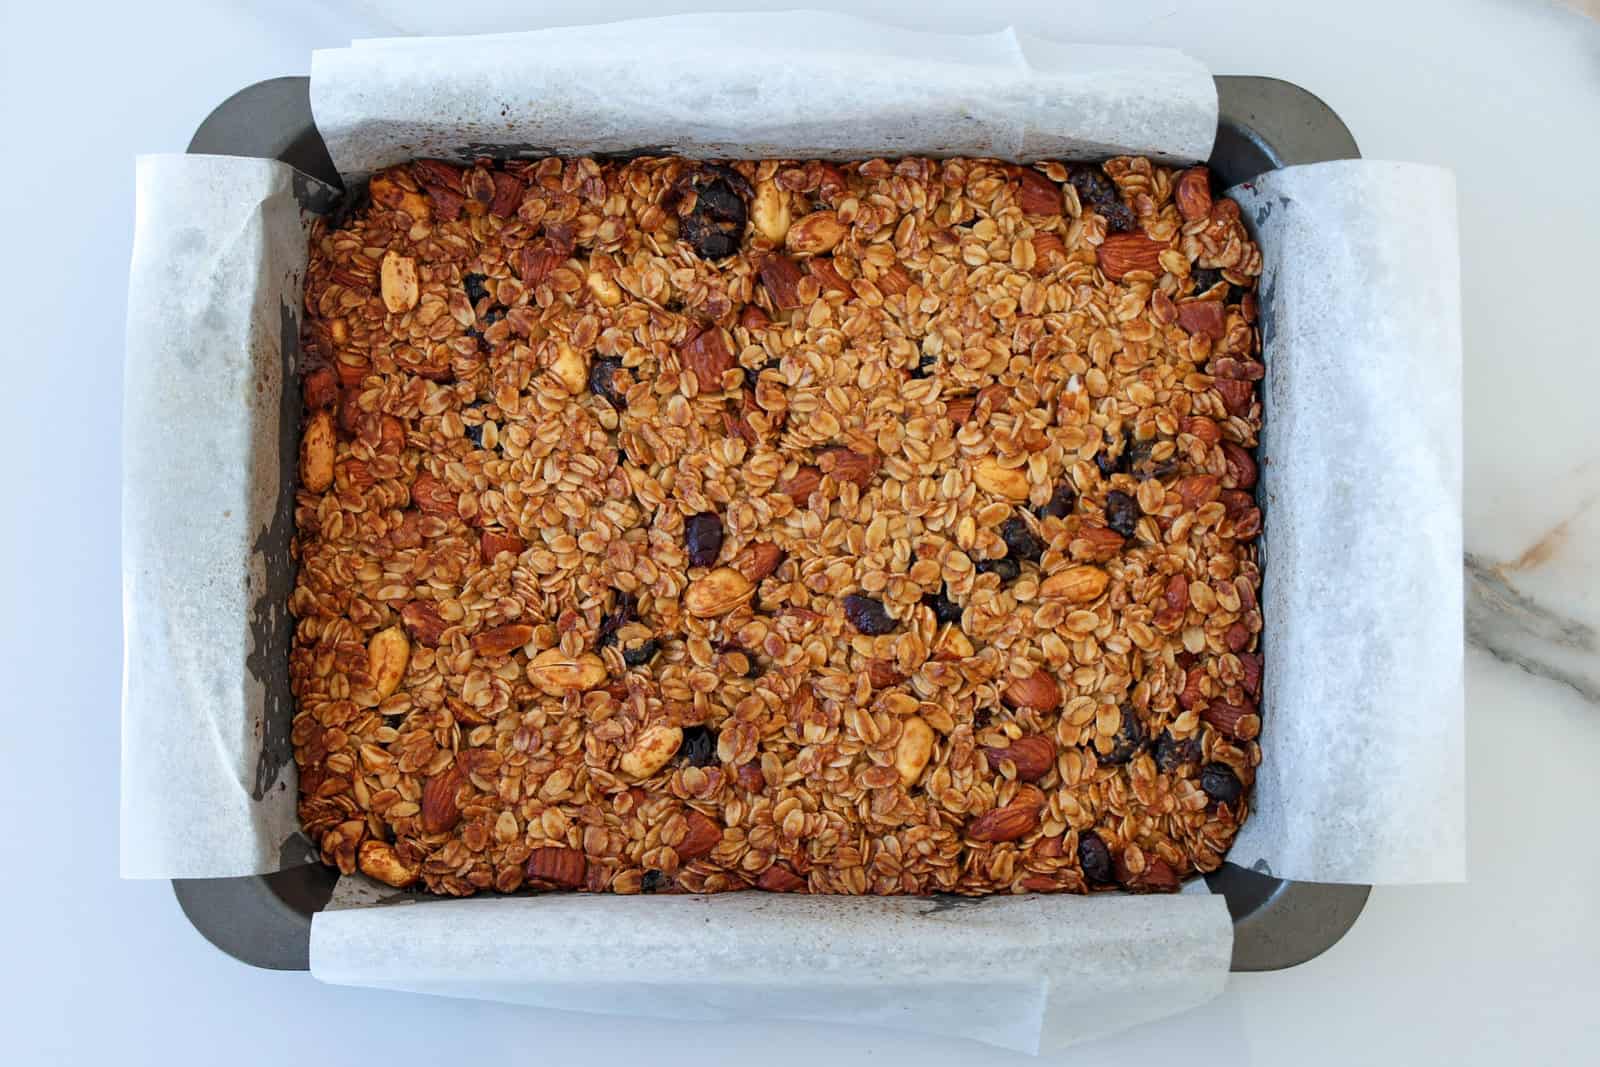
- Line your pan. Use parchment paper with overhangs on two sides—it makes lifting the cooled slab out of the pan much easier and ensures cleaner cuts.
- Warm sticky ingredients. If your honey, syrup, or nut butter feels too thick, warm it gently on the stovetop or in the microwave before mixing. This helps coat the oats and nuts more evenly and makes pressing easier.
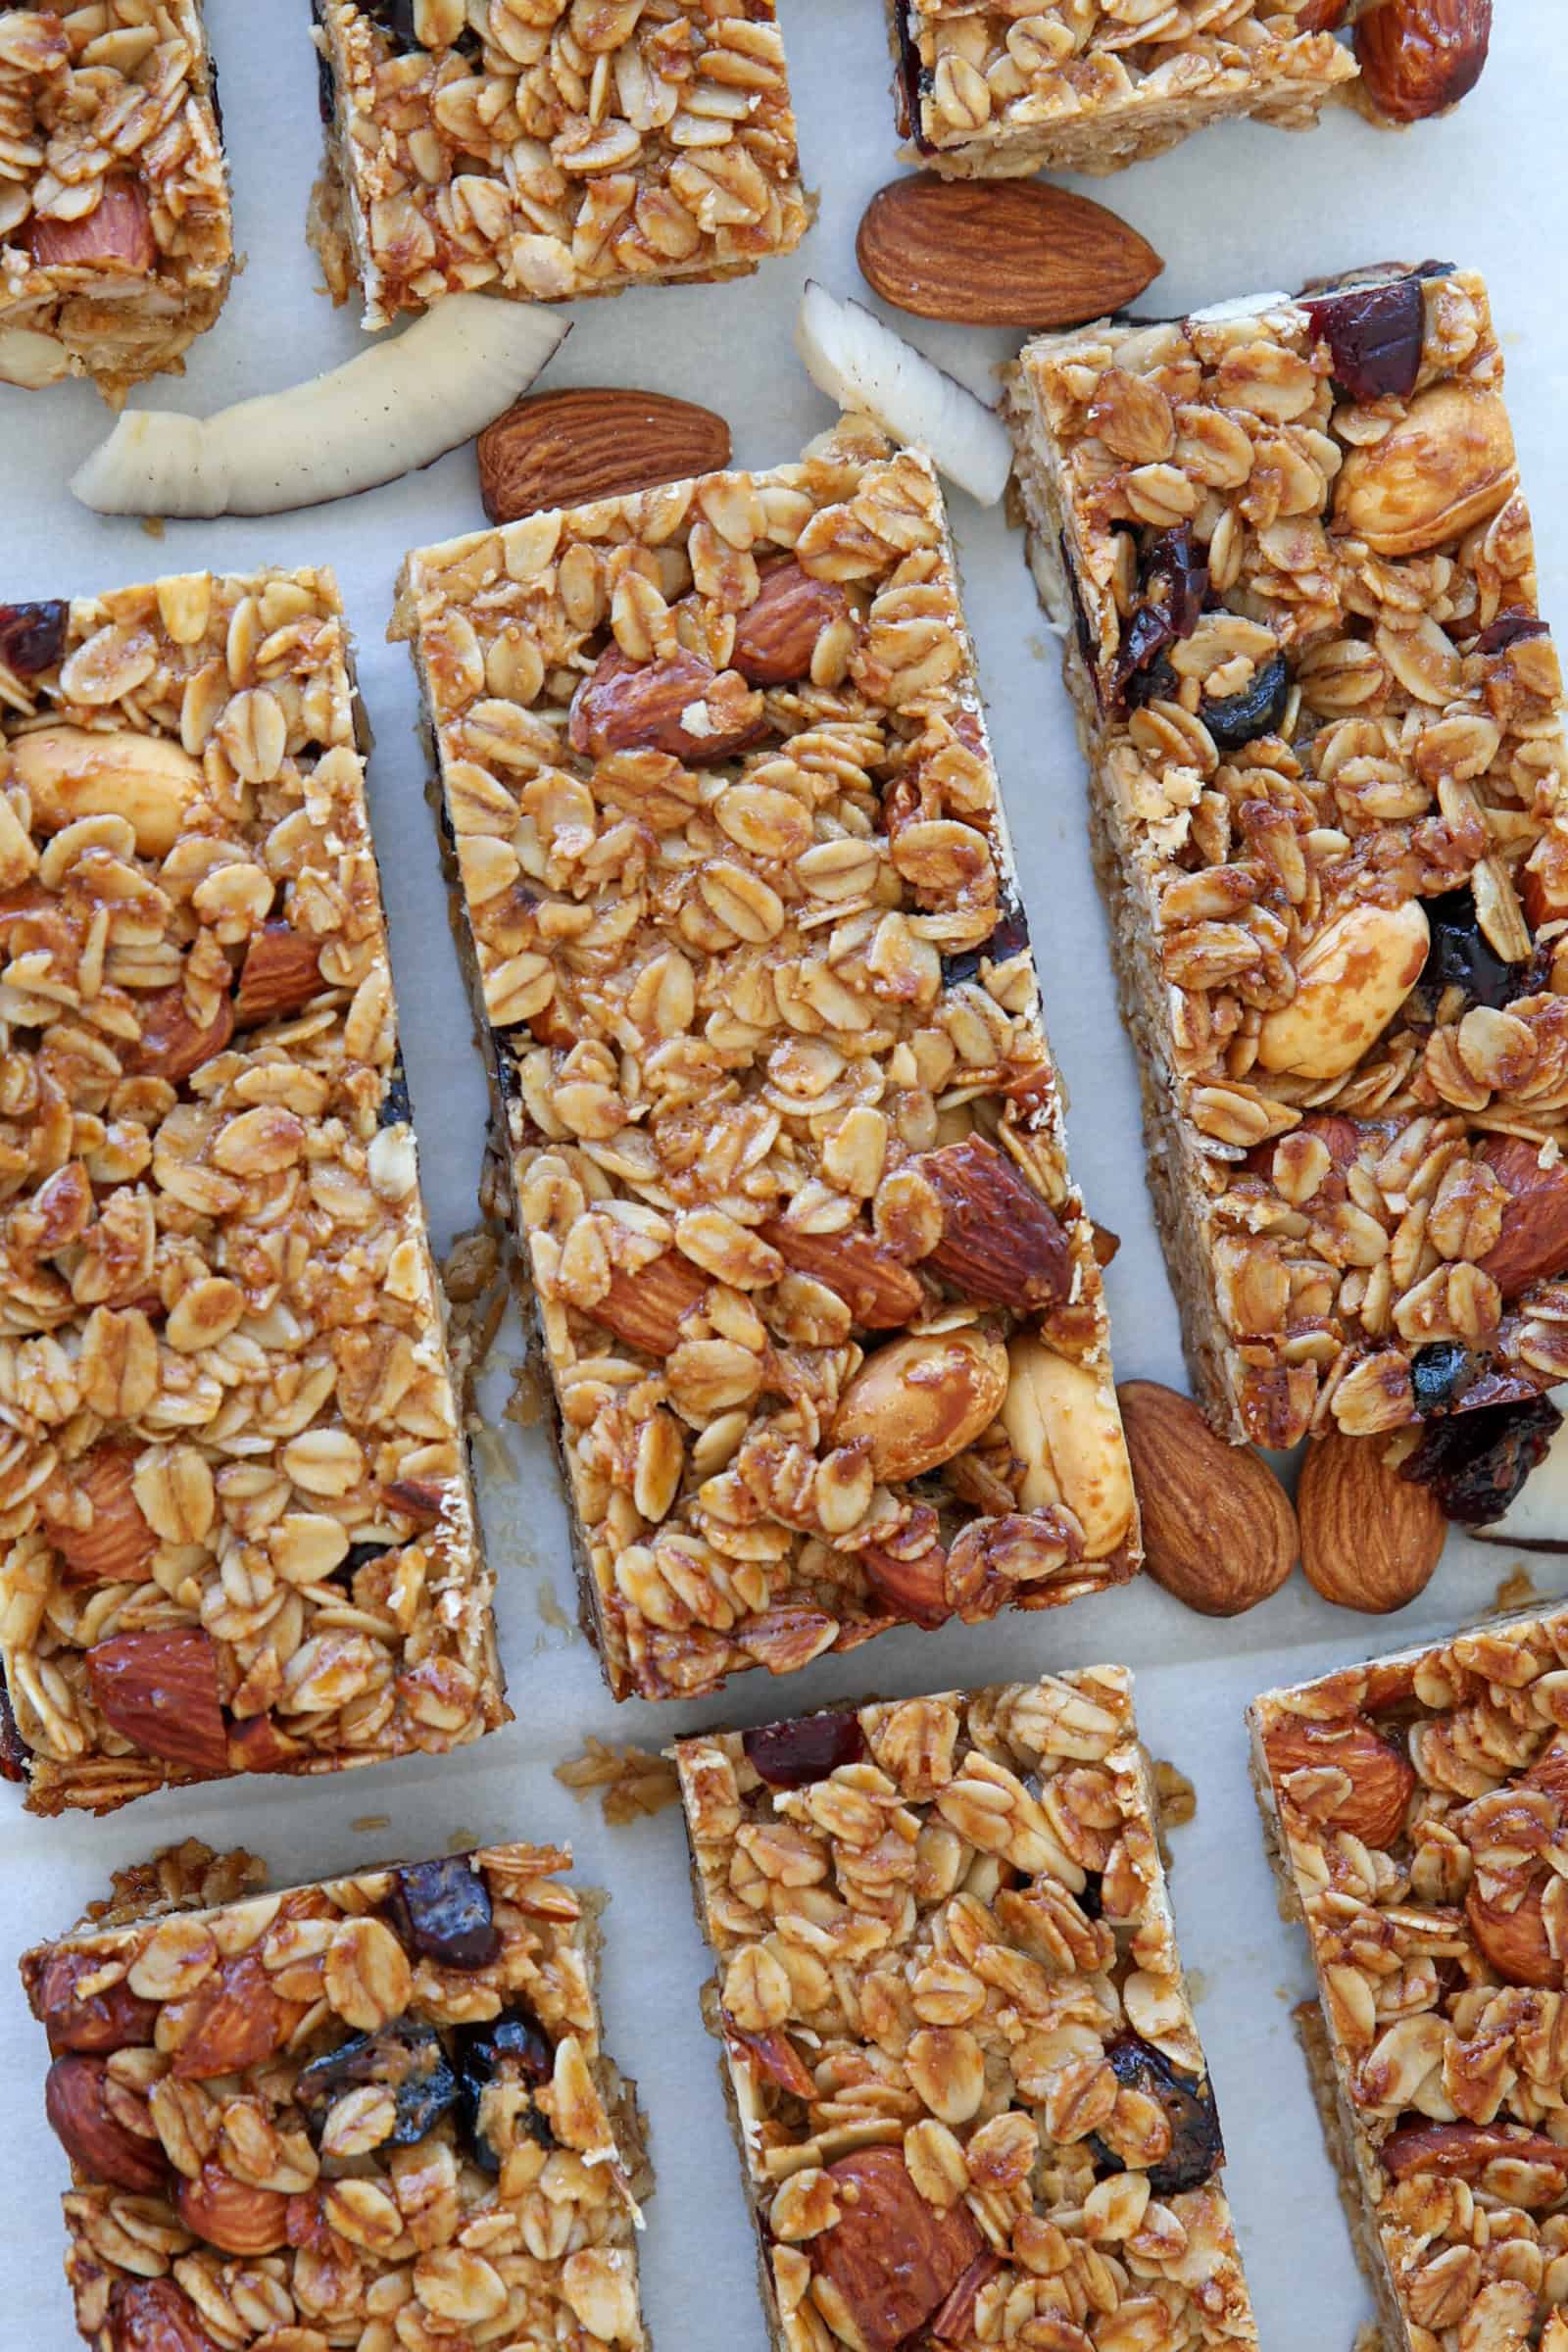
- Cut with confidence. Use a sharp, serrated knife and cut in one motion (don’t saw back and forth). Wiping the blade between cuts helps keep the edges neat.
- Store smart. For best texture, wrap individual bars in parchment and keep them in an airtight container at room temperature for up to 5 days, or in the fridge for a firmer bite.
How to Store Homemade Granola Bars
- Room Temperature: Store bars in an airtight container at room temperature for up to 1 week. Place parchment paper between layers to prevent sticking.
- Refrigeration: For a firmer texture and longer shelf life, refrigerate for up to 2 weeks.
Freezing: Wrap bars individually in parchment or plastic wrap, then place in a freezer-safe bag or container. Freeze for up to 3 months. Thaw at room temperature, or enjoy straight from the freezer for a chewy treat. - Meal Prep Tip: Wrapping bars individually makes them perfect for grab-and-go snacking.
More Healthy Snacks

Healthy Homemade Granola Bars Recipe
Ingredients
- 3 cups (270 g) Rolled oats
- 1 cup (140 g) Almonds roughly chopped
- ½ cup (40 g) Peanuts
- ½ cup (60 g) Dried cranberries or sour cherries
- 2 tablespoons (12 g) Desiccated/shredded coconut optional
- ¼ teaspoon salt
- ½ cup + 1 tablespoon (200 g) Honey or agave syrup/maple syrup
- ⅓ cup (80 ml) Coconut oil melted
- 3 tablespoons (45 g) Peanut butter read notes
- 1 teaspoon vanilla extract
Instructions
- Preheat oven to 340°F (170°C). Line a 11 × 7 inch(28 × 18 cm) or 9 × 9 inch (23 × 23 cm) baking pan with parchment paper.
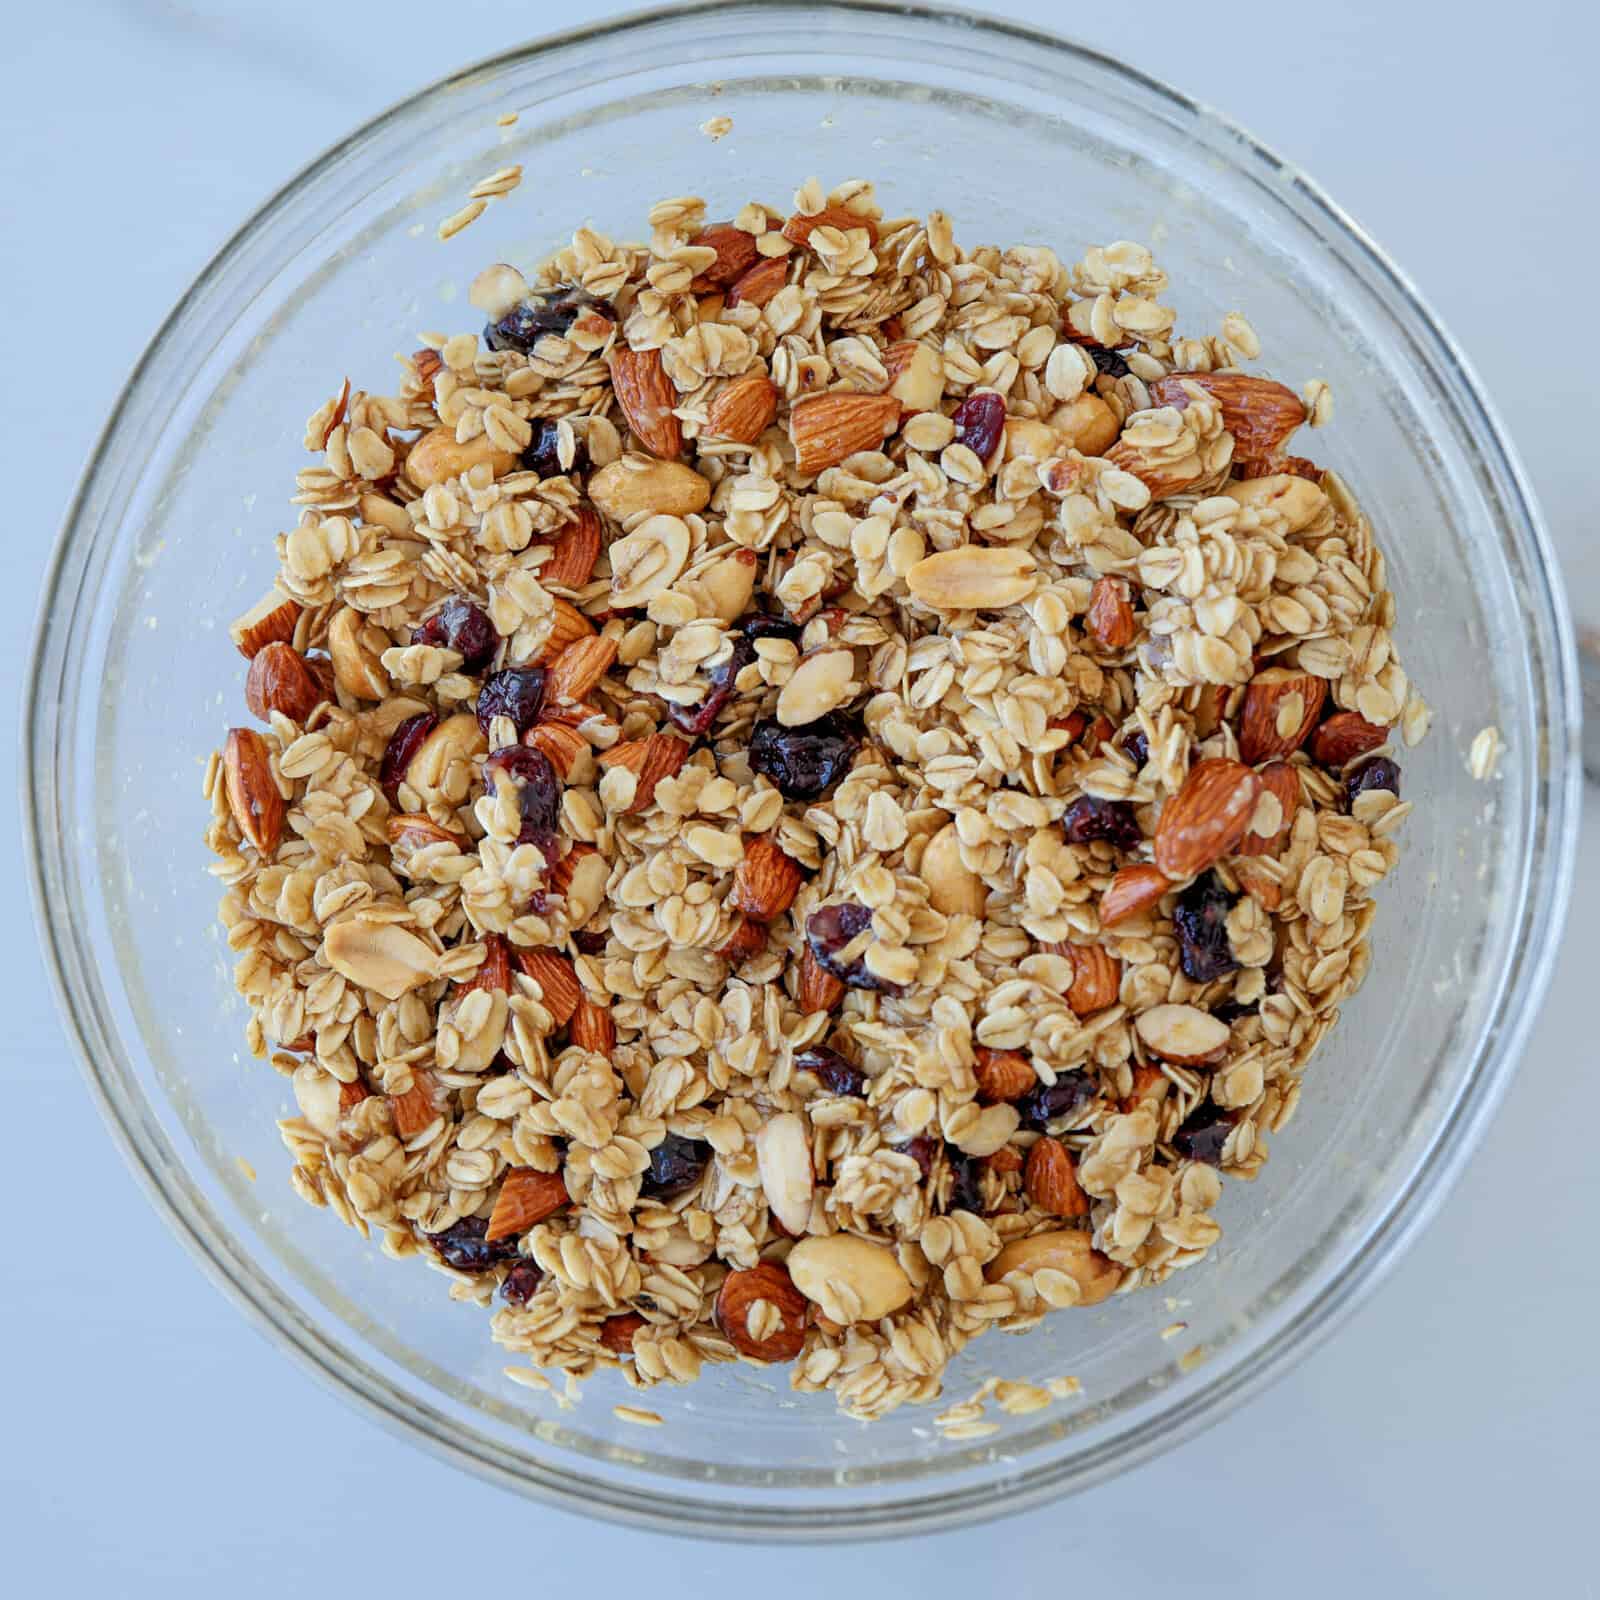
- Mix oats and nuts: In a large mixing bowl, combine oats, almonds, peanuts, dried fruit, coconut, and salt.
- Mix the wet ingredients: In a separate bowl, whisk together honey (or other sweetener), melted coconut oil, peanut butter, and vanilla extract until smooth.
- Add the wet ingredients: Pour the wet mixture over the dry ingredients and stir until everything is evenly coated.
- Transfer to the prepared pan and press down very firmly with the back of a spoon or measuring cup.
- Bake for 25–30 minutes, or until golden brown around the edges. For chewier bars, bake on the lower end of the time; for crunchier bars, bake a little longer.
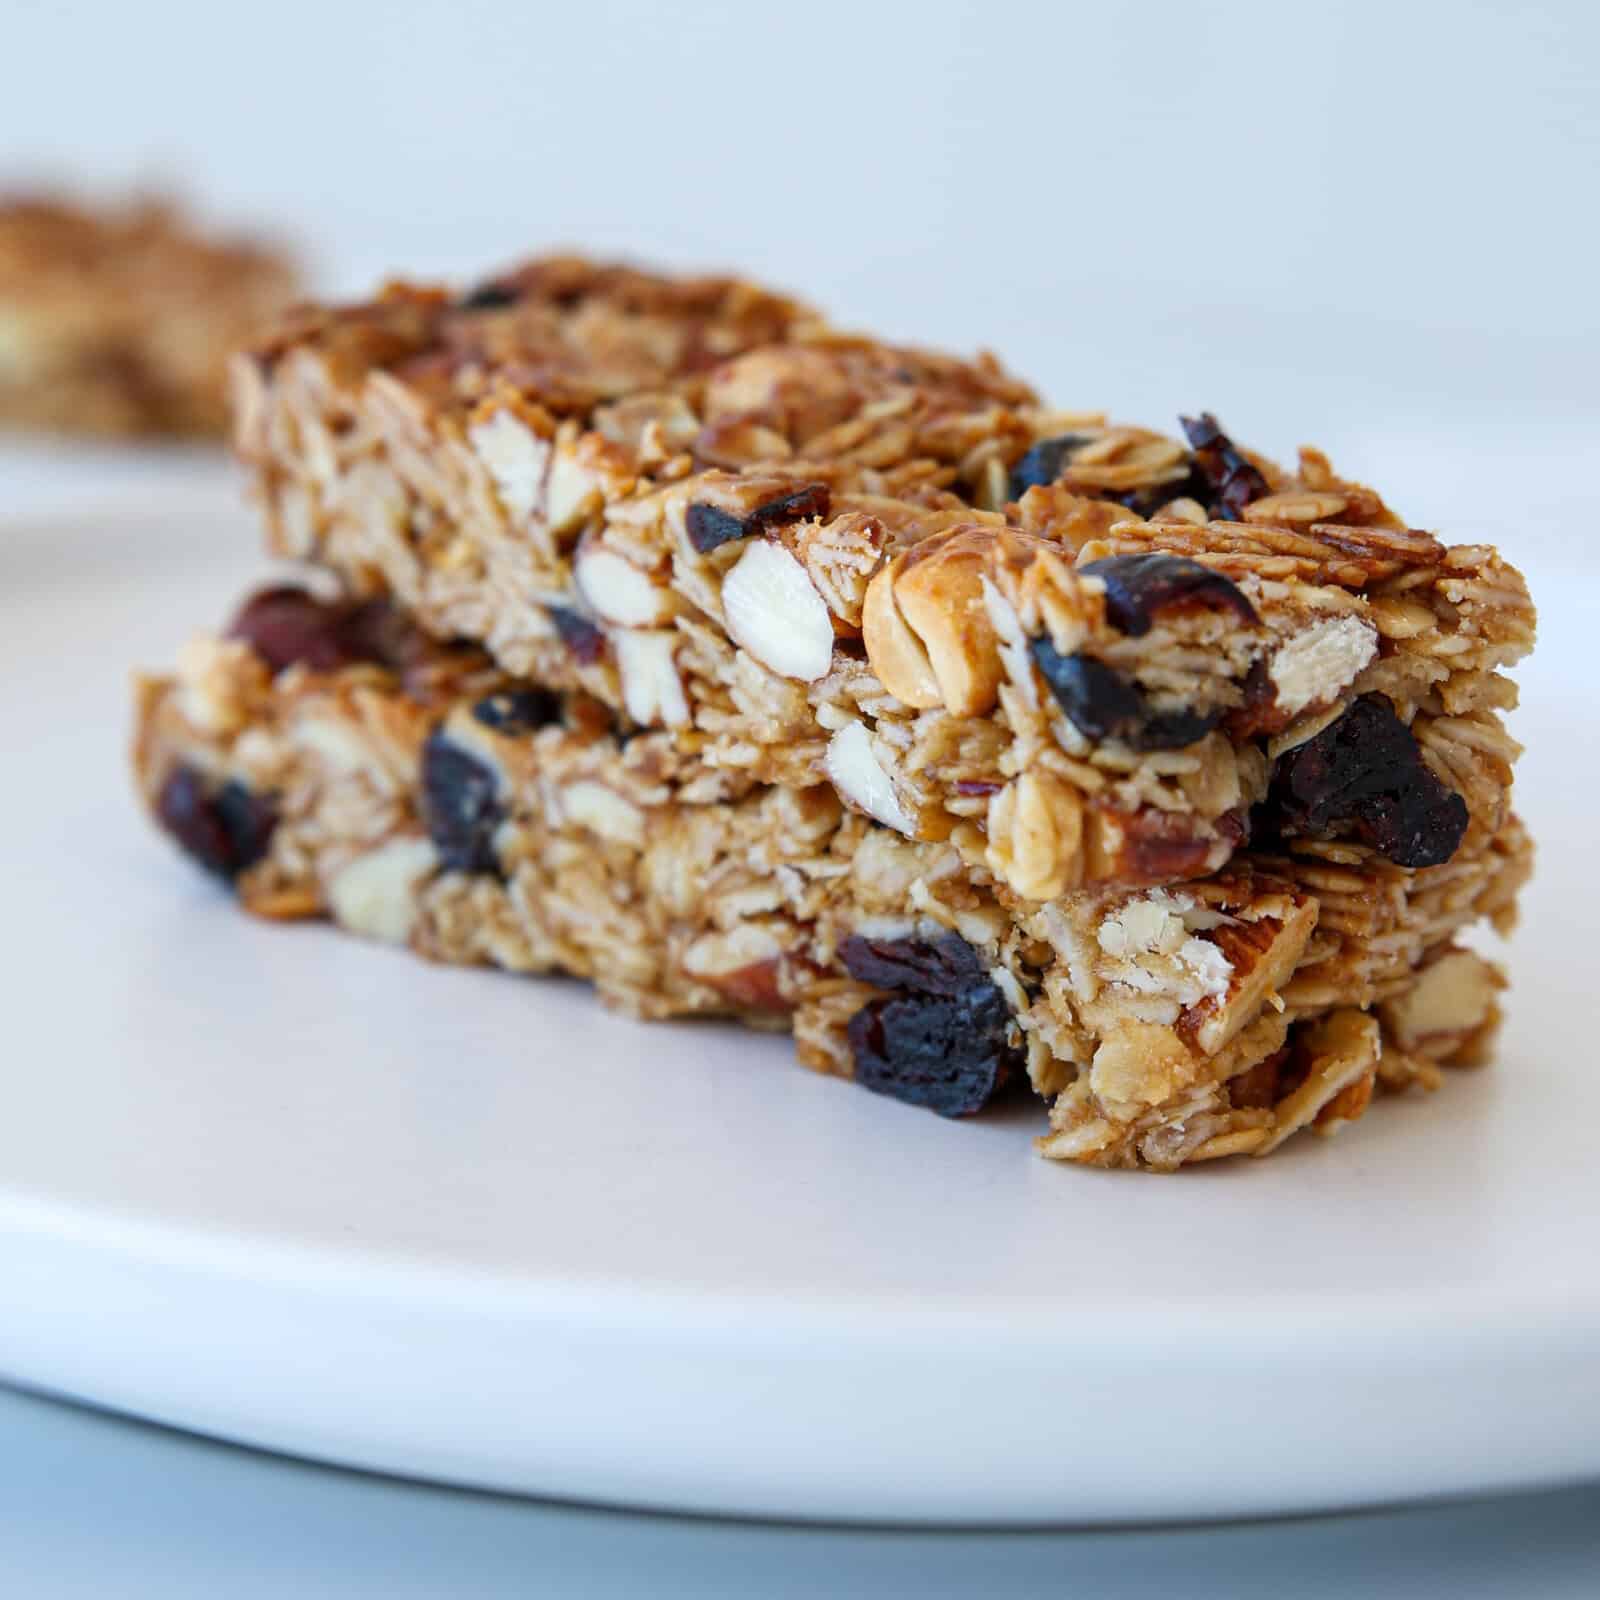
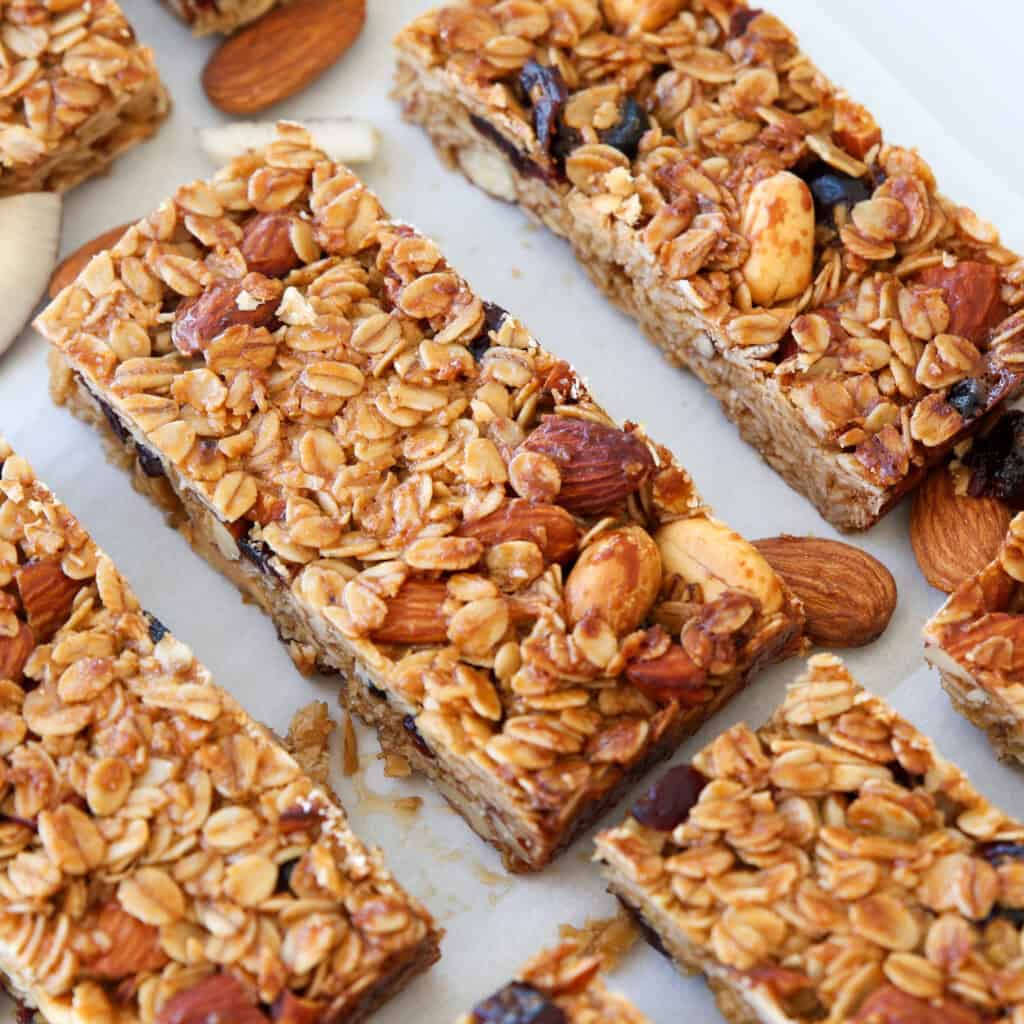
- Cool completely in the pan (at least 1–2 hours, ideally refrigerate), then lift out using the parchment. Slice into 12–16 bars with a sharp knife.
Video
Notes
- Pan size:
-
- 11 × 7 inch (28 × 18 cm) or 9 × 9 inch (23 × 23 cm) pan = standard thickness.
- 8 × 8 inch (20 × 20 cm) pan = thicker bars; add 3–5 minutes baking time.
- 9 × 13 inch (23 × 33 cm) pan = thinner bars; reduce baking time slightly.
-
- Press firmly: The tighter you pack the mixture into the pan, the better the bars will hold their shape.
- Cool completely: Don’t rush this step! The bars must cool completely in the pan before cutting. If they’re even slightly warm, they may crumble apart. For best results, chill in the fridge for 1–2 hours before slicing.
- Sweetener options: Honey adds chewiness and flavor, while agave syrup makes them vegan. Maple syrup works too, but bars may be softer.
- Peanut butter helps binding: The added peanut butter not only improves flavor but also prevents crumbling. Almond butter, cashew butter, or sunflower seed butter work just as well.
- Nuts & seeds: Swap almonds/peanuts for walnuts, cashews, pistachios, or sunflower seeds. For a nut-free version, use only seeds.
- Dried fruit: Raisins, apricots, dates, or blueberries all work well; choose unsweetened if possible.
- Add-ins: Stir in chia seeds, flaxseeds, sunflower seeds or chocolate chips.
- Storage: Store in an airtight container at room temperature for 1 week, or refrigerate up to 2 weeks. Freeze up to 3 months.
Nutrition
FAQs
Some of the best mix-ins include nuts (almonds, walnuts, pecans), seeds (chia, flax, pumpkin, sunflower), dried fruit (cranberries, raisins, apricots), chocolate chips, shredded coconut, and spices like cinnamon. Mix-ins not only add flavor but also boost the nutritional value of your granola bars.
Yes! You can easily make no-bake granola bars by mixing your ingredients and pressing them firmly into a lined pan. Chill in the fridge for 1–2 hours until set. No-bake bars are quicker to prepare and usually softer and chewier than baked ones.
Homemade granola bars are usually healthier because you control the ingredients. Store-bought bars often contain excess sugar, preservatives, or unhealthy oils. By making them at home, you can use natural sweeteners like honey or maple syrup, whole grains, nuts, and seeds for a nutritious, energy-packed snack.
Granola bars often fall apart when there isn’t enough binding ingredient (like honey, maple syrup, or nut butter) or if the mixture isn’t pressed firmly enough into the pan. For best results, warm your binder slightly, mix thoroughly, and use a spatula or the back of a glass to press the mixture down tightly before chilling or baking. Also, make sure to let the bars cool completely before slicing — cutting too early can cause them to crumble.


")
")

What can I use besides coconut oil?
You can replace the coconut oil with melted butter if you don’t need the bars to be dairy-free. For a dairy-free option, a neutral-flavored oil like avocado oil or light olive oil should also work well. The coconut oil helps the bars hold together, so I wouldn’t recommend skipping it completely without replacing it with another fat.
Can I replace the coconut oil with egg whites or unsweetened applesauce?
Hi Jackie,
I wouldn’t recommend replacing the coconut oil with egg whites—the recipe isn’t designed to be baked like that, and egg whites will change the texture completely.
Unsweetened applesauce can work as a partial substitute, but not a full one. Coconut oil helps the bars firm up and hold together once chilled, so if you replace all of it, the bars may turn out too soft and crumbly.
Hope that helps!
What can be used in place of coconut oil?
You can replace the coconut oil with the same amount of melted butter. For a lighter option, you can also use olive oil or avocado oil, just note that it may slightly change the taste.
Making this recipe for years now, my kids love it.
These bars did not stick together. I let them cool and they still just crumbled into granola!
Hi Dear,
Can I ask, How many calories in this recipe?
Thank you
It has 112 calories
hope that helped :DDD
Can I get a breakdown of nutritional info per bar. Thanks. They nod look delicious
please send me latest receipe