Fluffy Homemade Pita Bread (3 Easy Cooking Methods)
This post may contain affiliate links.
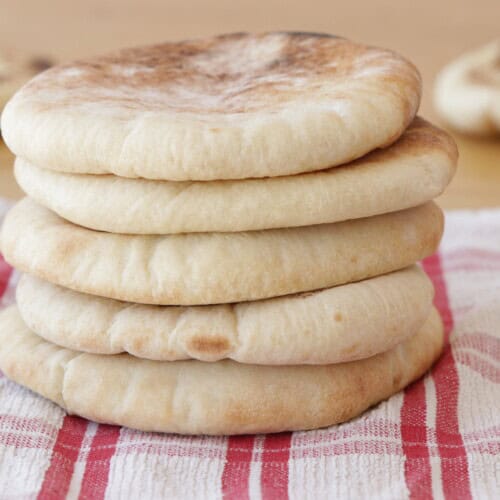
My tried-and-true Homemade Pita Bread recipe shows you 3 easy methods for making perfectly soft, fluffy, and stuffable flatbreads—in the oven, on the stovetop, and using a pizza oven. No matter which method you choose, you’ll get perfect pockets every time!
There’s something magical about homemade bread, even the most basic flatbreads. Whether you’re making these homemade pita breads, garlic naan, or my oatmeal bread, the delicious aroma of yeasty goodness fills the whole house. And the texture of freshly baked, fluffy pita bread? 🤌Chef’s Kiss🤌 Marvelous.
Video Recipe: Homemade Pita Bread
Watch the full video recipe to learn how to make the best pita bread. This step-by-step tutorial simplifies the process, offering tips and tricks to guarantee perfect results every time.
Prefer the written recipe? Scroll down to the recipe box 👇
What Is Pita Bread? Where Did It Come From?
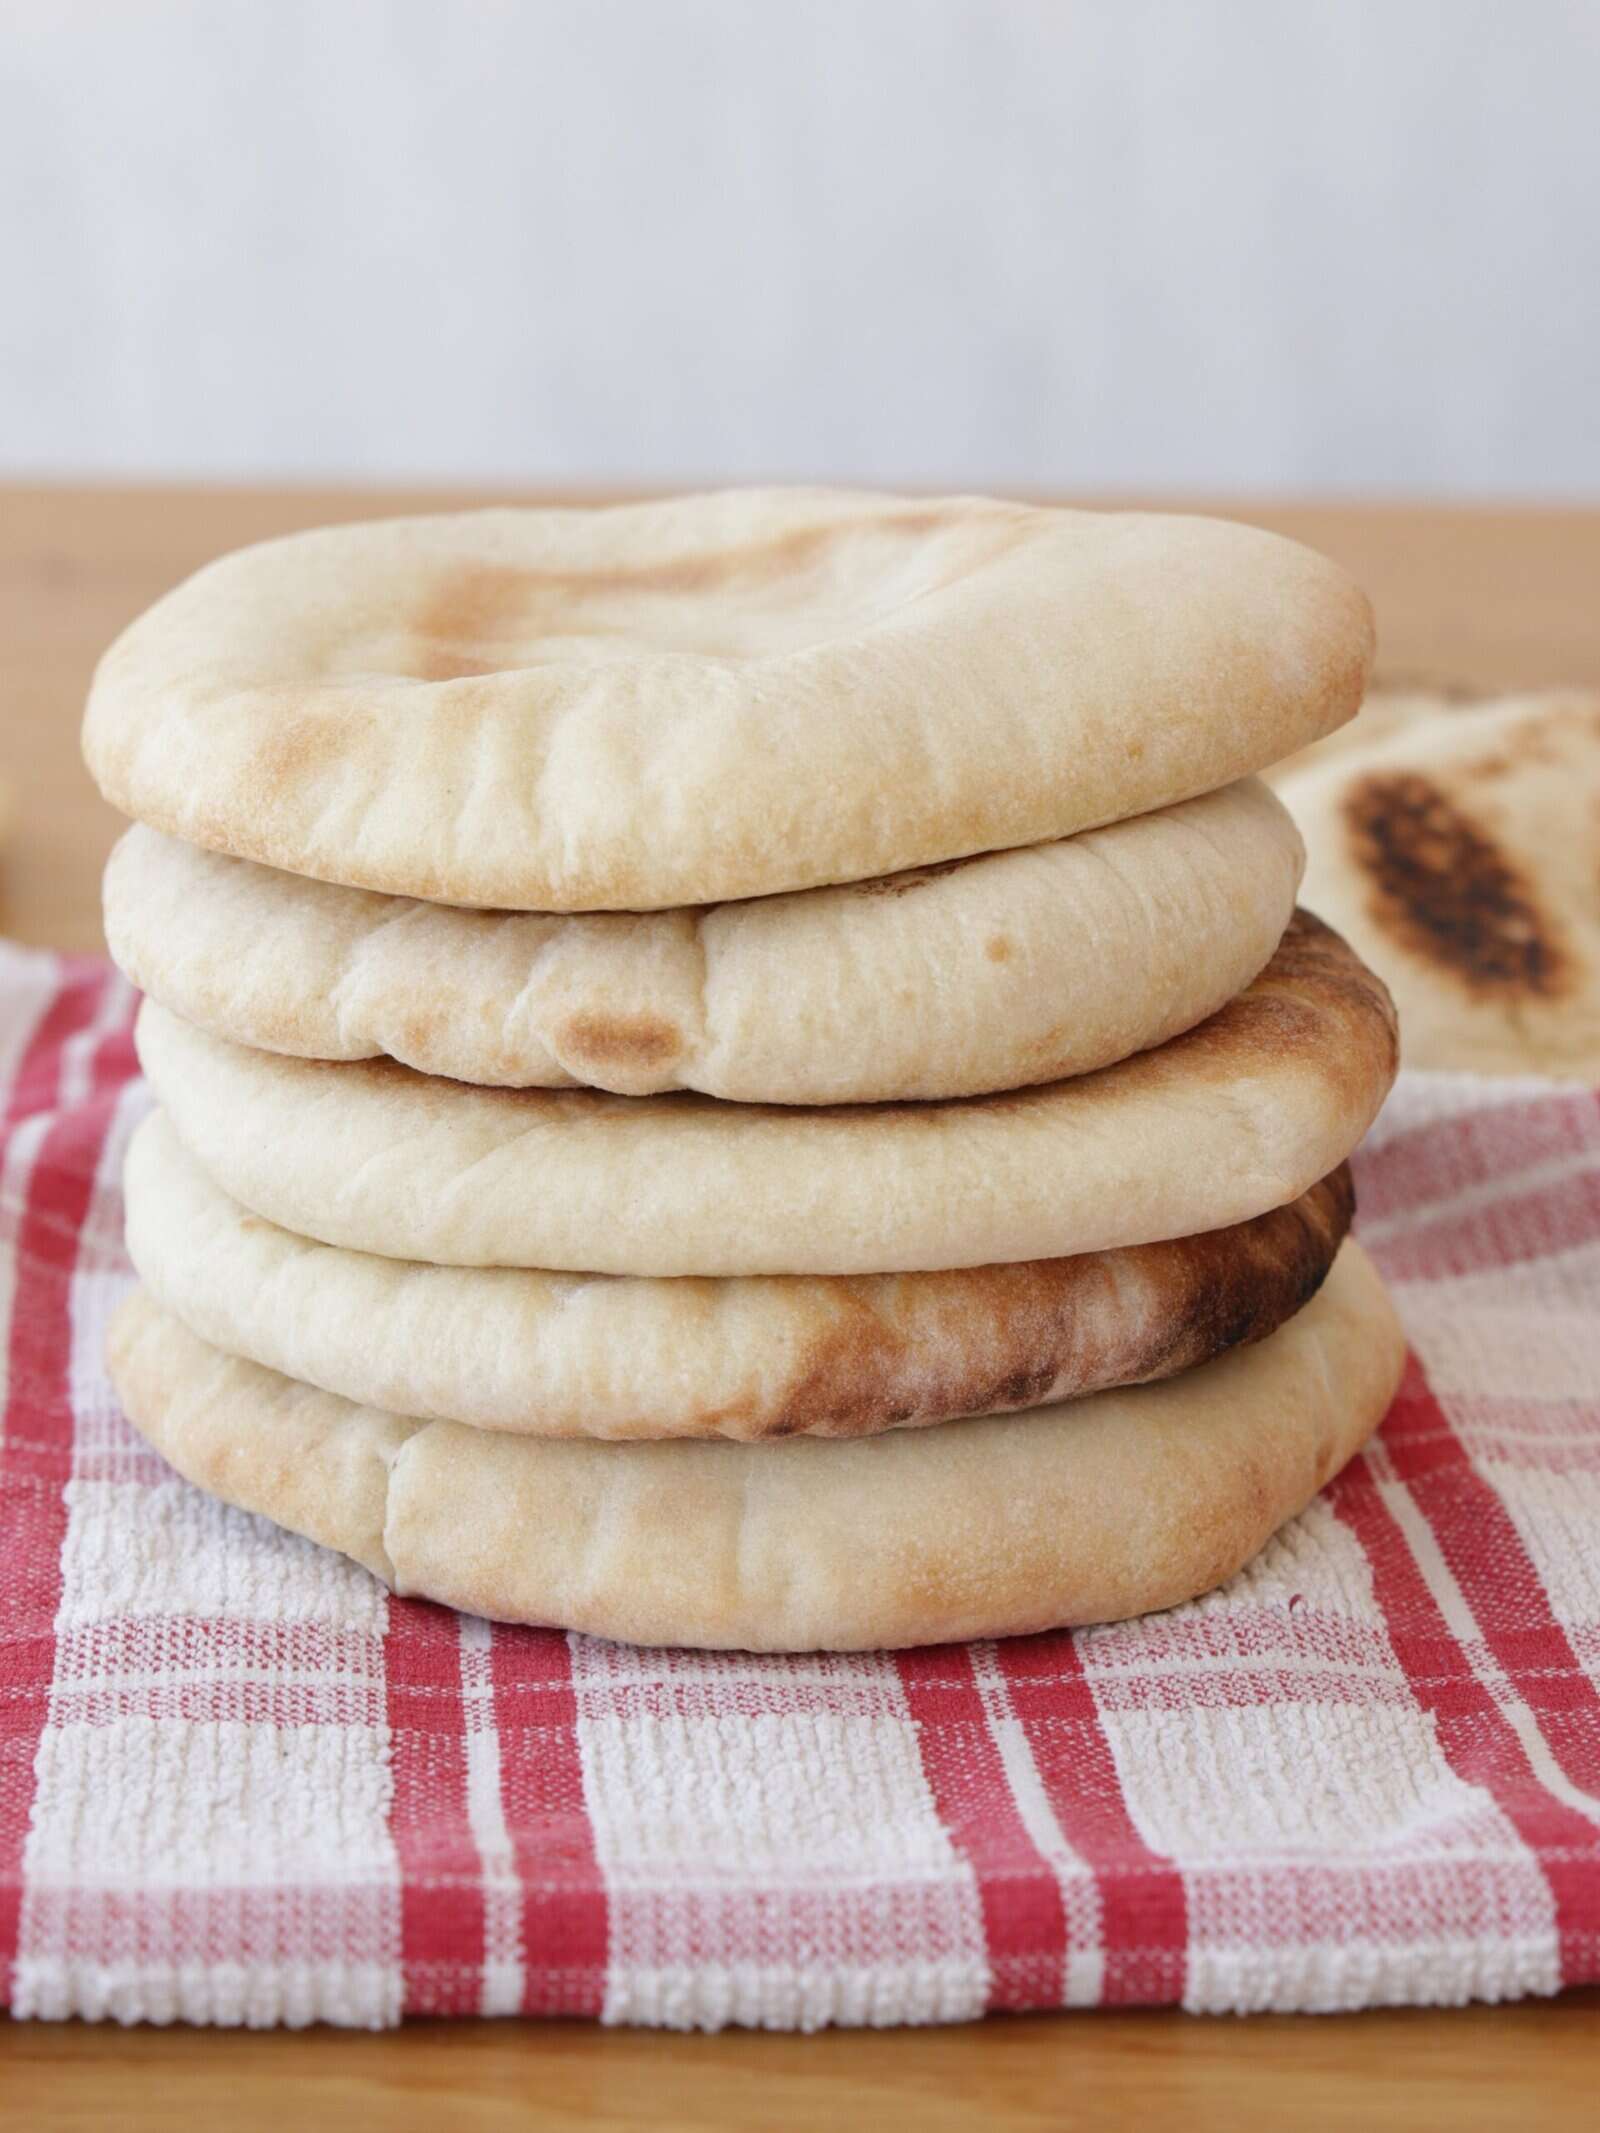
Pita bread is a soft, round, and slightly leavened flatbread known for its iconic pocket, which forms during baking thanks to steam puffing up the dough. Light and chewy with a tender crumb, pita is wonderfully versatile—you can stuff it with meat, dip it in creamy hummus, or tear off pieces to sop up your favorite stews.
Pita has ancient roots and is believed to date back more than 4,000 years. It originated in the Middle East, where it’s been a staple in countries like Israel, Lebanon, Jordan, Syria, and Egypt for centuries. The simple dough—made with just flour, water, yeast, and salt—made it easy to prepare in clay ovens or on hot stones, which were common long before modern ovens existed.Over time, pita spread across the Mediterranean and beyond, adapting to regional styles. While it goes by different names (like khubz in Arabic), the heart of it remains the same: a delicious, flexible flatbread that pairs perfectly with everything from baba ghanoush and falafel to chickpea curry, grilled meats and salads.
Why You’ll Love My Pita Pocket Recipe
- You only need 5 basic ingredients and less than 2 hours to make it—most of which is spent waiting for the dough to proof. It’s so simple, even newbies can nail it on their first attempt!
- With 3 different cooking methods to choose from, this easy pita bread recipe will meet you wherever you (and your kitchen) are. And don’t worry—the pockets are perfect no matter which method you try!
- Trust me: store-bought flatbreads aren’t even in the same league as homemade. When you grab a warm pita straight from the pan, the flavor and texture are transcendent. You can also feel good that there are no weird preservatives or artificial ingredients, and they just happen to be vegan, too!
Ingredients & Substitutions

- Instant Dry Yeast: This is the key leavening ingredient, helping the dough rise and giving pita bread its signature airy pocket. Only have active dry yeast? Not to worry. Use the same amount, but change your order of operations when making the dough—add the sugar and yeast to a bowl with the warm water and stir. After about 5-10 minutes, you should see a foamy, bubbly surface starting to form as the yeast activates. Once you see that foam, you’re ready to add the dry ingredients!
- Sugar: A small amount of sugar helps to activate the yeast, kick-starting the fermentation process.
- Bread Flour: Bread flour is ideal because its higher protein content provides structure and elasticity, giving pita its soft, chewy texture. All-purpose flour works as well but may result in a softer texture. You can also make your own bread flour by removing about 1.5 teaspoons of all-purpose flour per cup and replacing it with an equal amount of vital wheat gluten. Make sure to whisk it well to combine.
- Salt: Enhances the flavor and strengthens the dough structure, but be aware—salt kills yeast. Make sure you don’t put them right on top of each other when you add them to the bowl and whisk well to get plenty of flour between them.
- Olive Oil: Adds richness, helping the pita stay soft and tender while also giving it a hint of Mediterranean flavor.
This is just a short review of the ingredients; for the complete recipe, including quantities, scroll down to the recipe card 👇
How to Make Pita Bread—3 Ways
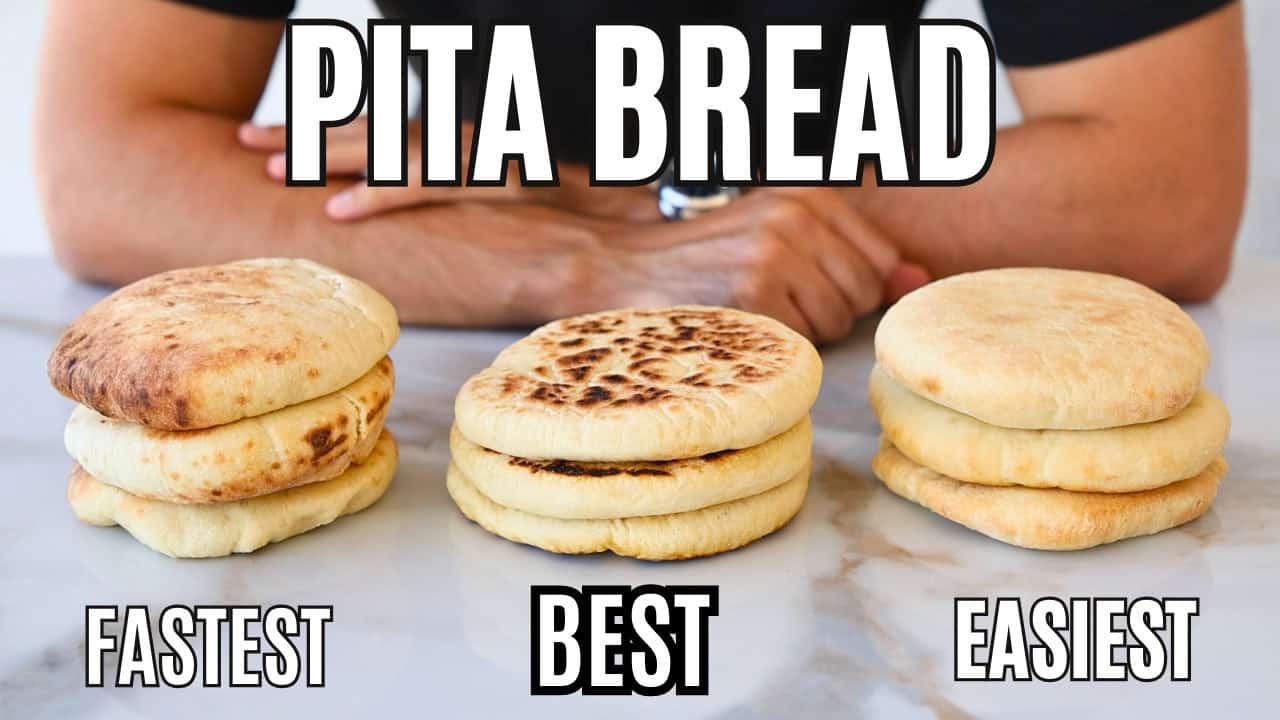
The oven, stovetop, or pizza oven all work well—just follow the best practices for each for that Mediterranean-style pita perfection! I regularly use all three of these methods for baking pitas, and they all have their unique charms.
How to Make Pita Bread Dough
To make pita dough, sift flour into a large bowl and mix in yeast, sugar, and salt. Add olive oil and water, then mix until a rough dough forms. Knead on a floured surface for 10 minutes (or use a mixer with a dough hook) until smooth and elastic. Place the dough in a lightly oiled bowl, cover, and let it rise until doubled in size. Punch down, divide into equal pieces, roll into balls, and let rest briefly. Then roll each ball into a ½ cm (¼ inch) thick circle—perfect for creating the classic pita pocket.


How to Make Pita in The Oven
I love using the oven method, as it yields bakery-style results with ease.
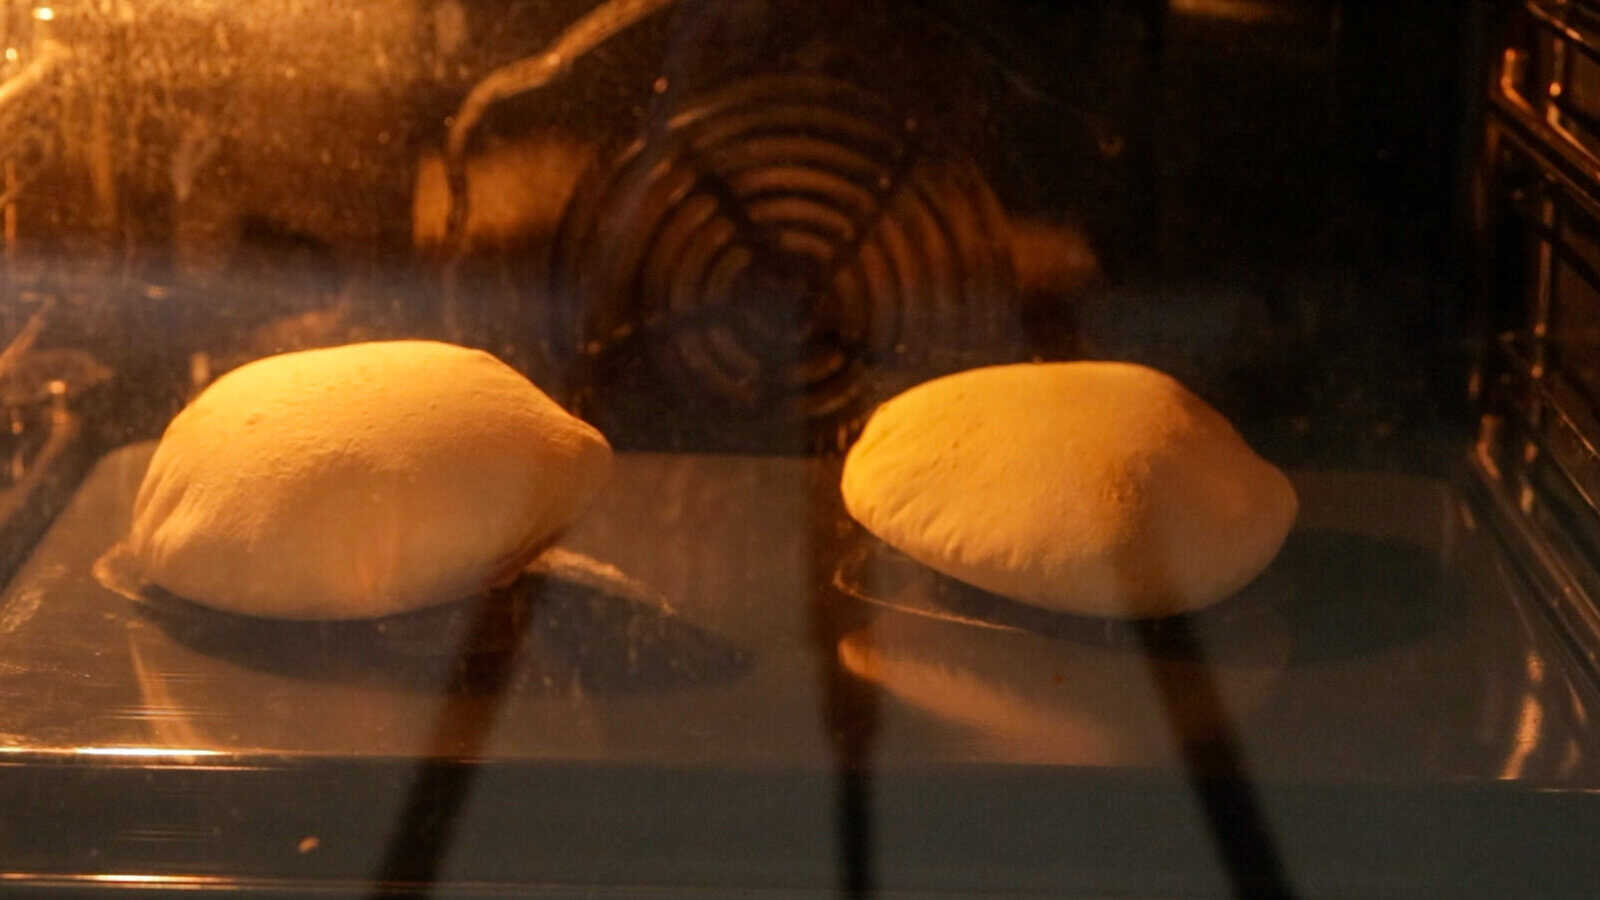
- Preheat the oven to the highest setting (around 485°F/250°C) and place a baking tray upside down inside to heat.
- Roll the dough into ¼-inch thick circles on a floured surface.
- Bake the pitas on parchment paper placed over the hot tray for about 3 minutes, until they puff up. Flip and bake 1 more minute until lightly golden.
- Cover immediately with a clean towel to keep them soft and fluffy.
How to Make Pita on The Stovetop
Don’t have an oven at your disposal? Not to worry. Using a skillet on the stovetop works well, though it does make the outsides of the pitas a bit darker and crustier.

- Preheat a skillet (cast-iron or heavy-bottomed) over medium-high heat until very hot.
- Roll the dough into ¼-inch thick circles on a floured surface.
- Cook the pitas one at a time for 1–2 minutes until puffed and golden spots appear, then flip and cook 1 more minute.
- Cover immediately with a towel to keep them soft and fluffy.
How to Make Pita in a Pizza Oven
Since pizza ovens can get screaming hot in a way home ovens can’t, they bake pita breads much faster. Each one takes just 30-60 seconds to get to puffy perfection!
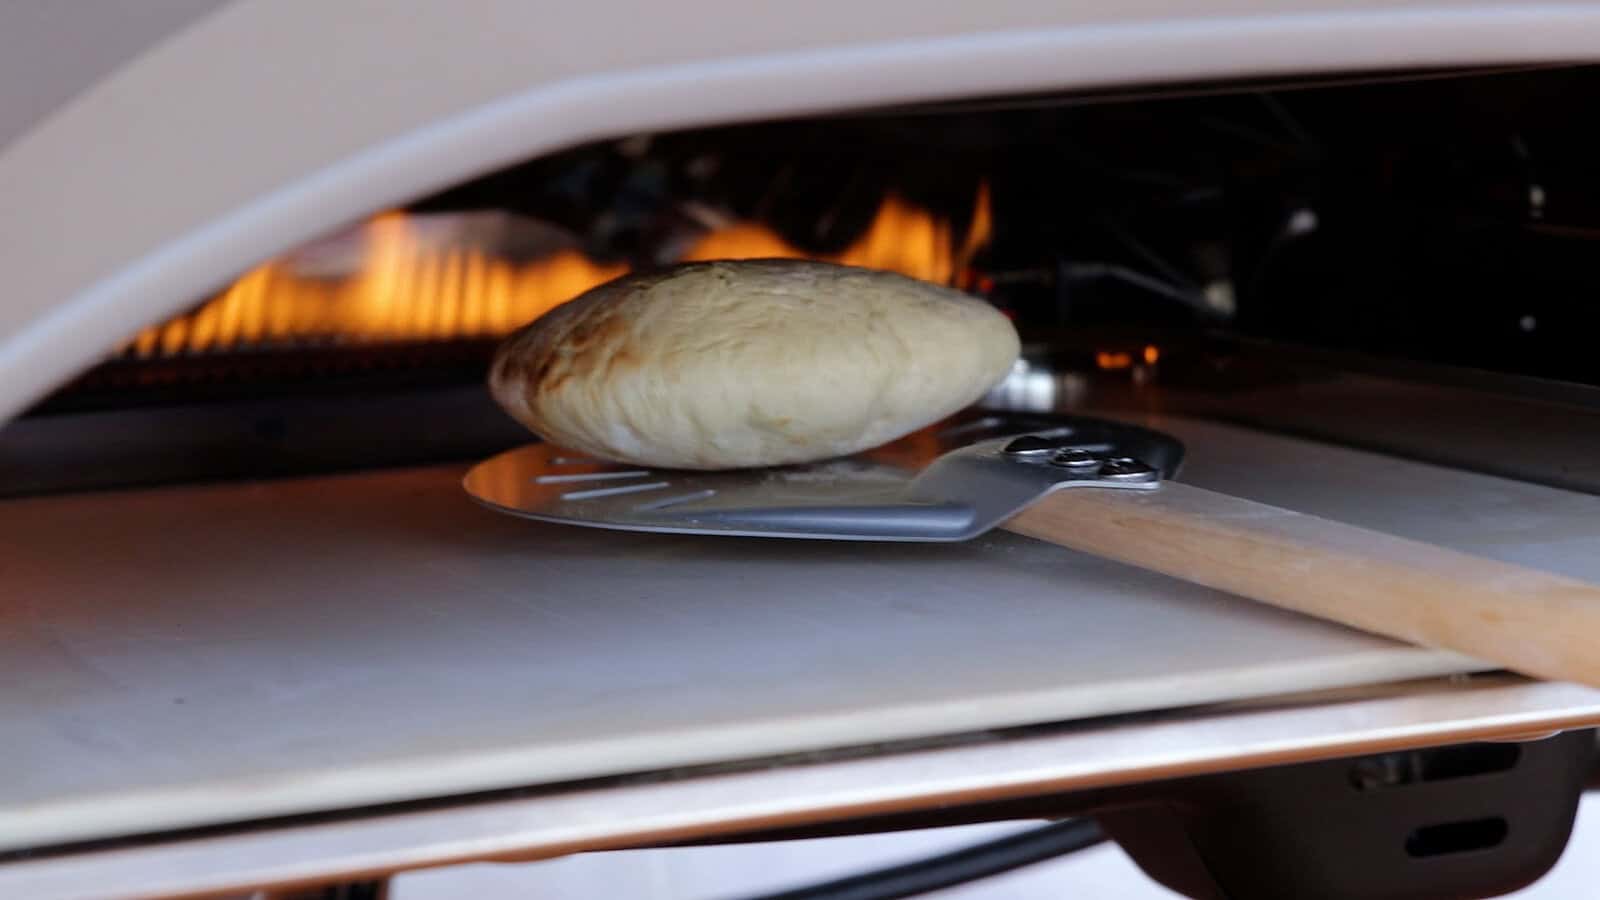
- Preheat your pizza oven to 600–700°F (315–370°C); the high heat helps pitas puff quickly.
- Roll the dough into ¼-inch thick circles on a floured surface.
- Bake directly on the oven surface for 30–60 seconds until puffed and golden. Flip and cook a few more seconds.
- Cover immediately with a towel to keep the pitas soft and steamy.
Why is My Homemade Pita Bread Not Puffing up?
When pita bread doesn’t puff, it’s usually due to a few common issues with dough handling, temperature, or thickness. Here’s why it might happen and how to ensure you get that perfect pocket every time.
- Incorrect Dough Consistency: If the dough isn’t soft and elastic, it may not puff well. Make sure to knead until smooth and stretchy—this helps trap air, which is crucial for creating the pocket.
- Insufficient Heat: Pita needs very high heat to form its pocket. If you’re baking in an oven, preheat to the maximum temperature and use a baking stone or preheated baking tray to mimic a hot surface. For stovetop cooking, make sure the skillet is hot before adding the dough.
- Rolling Thickness: Rolling the dough too thick or too thin can prevent puffing. Aim for about ¼ inch thickness. Much thicker than that, and the pita won’t cook through quickly enough; roll it too thin, and it won’t have the structure to create a pocket.
- Skipping the Resting Step: Letting the dough balls rest before rolling and cooking helps relax the gluten, making it easier to achieve a puffy, airy pita. A short 15-20 minute rest after shaping is essential.
By following these tips, you’ll create soft, fluffy pita bread with that signature pocket every time!
Expert Tips & Tricks

Learning how to make homemade pita bread with a perfect, fluffy pocket is simpler when you follow a few of my tried-and-true tips!
- Windowpane Test: Whether you’re baking pita in the oven, on the stovetop, or in a pizza oven, starting with the right dough consistency is essential. Aim for a soft, elastic dough to help the pita puff up beautifully during cooking. The easiest way to know if your dough is ready is to perform the windowpane test—stretch a small piece of the dough until it’s so thin you can see shadows through it. If it doesn’t tear, you’re good to go!
- Preheat Thoroughly: Whether you’re using an oven, stovetop skillet, or pizza oven, ensure your cooking surface is fully preheated. High heat creates instant steam, which is essential for forming the pocket.
- Roll to the Right Thickness: Aim for about ¼-inch thickness. Too thin may lead to a crispy consistency, while too thick might prevent the pocket from forming.
- No Puff: When you make pita bread for the first time, you might get a couple of pieces that don’t puff up—perhaps you didn’t preheat your cooking implements fully or rolled the dough too thick. If this happens, don’t fret! While they won’t be great for stuffing, they’ll be just as tasty.
- Cover Freshly Baked Pitas: After baking, cover the warm pitas with a towel. This traps steam, keeping them soft and fluffy.
- Only Bake What You Need: Fresh, homemade pitas have a short hour or so window of time when they’re at their best. I recommend refrigerating any leftover dough rounds separated by parchment to prevent sticking and kept in a zip-top bag to maintain moisture. They’ll keep well for up to 5 days. As a bonus, the longer they are left in cold fermentation, the tangier and more sourdough-like the dough will become.
Easy Meals with Pita Bread
Most often, I make pita bread sandwiches—the pockets make them ideal for stuffing! Some of my favorite fillings include:
- Chicken Gyros – Perfectly seasoned and tender, gyros are a classic choice for pita. Add some creamy Greek tzatziki and an assortment of fresh veggies for the ultimate Mediterranean wrap.
- Turkish Doner Kebab or oven-baked chicken skewers.
- Lebanese Arayes – Juicy, warmly spiced ground beef or lamb is stuffed inside pita pockets and griddled to crispy perfection.
- Homemade Falafel – Crispy on the outside and tender on the inside, homemade falafel are right at home nestled into a pita pocket. Meatless Mondays have never been so tasty!
- Homemade Hummus – Smooth, creamy hummus complements pita’s soft texture, making it ideal for dipping or using as a sandwich spread (especially when paired with crispy roasted chickpeas, cucumbers, tomatoes, and red onions!).
- Shakshuka Side Dish – This dish of eggs poached in a spicy tomato sauce is one of my favorites. The only problem? Getting every last drop of yum off your plate. Pita bread does the trick beautifully!
- Sabich – This popular Israeli street food sandwich is made with warm pita stuffed to the brim with fried eggplant, hard-boiled eggs, Israeli salad, hummus, tahini, pickles, and amba, a tangy mango pickle sauce. Originally brought to Israel by Iraqi Jews, it’s a vegetarian flavor bomb with creamy, crunchy, salty, and tangy elements in every bite.
What are your favorite ways to eat pita pocket bread? Let me know in the comments below so I can cheer your creativity on!
Storage & Reheating
To keep your homemade pita breads fresh and soft, follow these storage tips:
- Let any leftover pitas cool completely to room temperature before transferring to a zip-top bag or airtight container. This prevents condensation from forming, which can render your pitas soggy.
- Room Temperature: Place cooled pita bread in an airtight bag or container and store at room temperature for up to 2–3 days. Keeping it sealed prevents it from drying out.
- Refrigerator: For slightly longer storage, wrap pita in plastic wrap or place in an airtight container, and refrigerate for up to a week. Be aware that refrigeration can make bread a bit firmer, so warm it briefly before serving.
- Freezer: For longer storage, freeze pita by placing it in a freezer-safe bag with parchment between each piece. It’ll keep well for up to 3 months.
- How To Heat Up Pita Bread: Warm leftover pita in an oven set to 300ºF or a dry skillet over medium heat to return them to soft, fluffy perfection. Room temperature pitas will warm more quickly than frozen—about 2-3 minutes vs 8-10 minutes.
- Salvaging Stale or Over Crisp Pita: I loathe throwing away food, which is why it’s great to have some ideas up your sleeve for using up extra pitas. Lebanese Fattoush is the perfect solution, turning the pitas into crispy little croutons. You can also make homemade pita chips!

More Bread Recipes
If you like baking bread at home, try these recipes:
Fluffy Homemade Pita Bread (3 Easy Cooking Methods)
Equipment
Ingredients
- 4 cups (500 g) Bread flour
- ¾ tablespoon (7 g) Instant dry yeast
- 1 tablespoon (14 g) Sugar
- 1 teaspoon Salt
- 2 tablespoons olive oil
- 1¼ (300 ml) Water room temperature
Instructions
- Make the Dough: Sift the flour into a large mixing bowl or the bowl of a stand mixer. Add yeast, sugar, and salt. Mix to combine. Pour in olive oil and water, then mix until a rough dough forms.
- Knead by hand on a floured surface for 10 minutes, or knead with a stand mixer using a dough hook until the dough is smooth and elastic.
- First Rise: Transfer the dough to a lightly oiled bowl. Cover and let it rise in a warm spot for 1 hour, or until doubled in size.
- Shape the Dough: Punch down the risen dough to release air. Divide into 8 equal parts (about 100g each), and shape each into a smooth ball. Cover and let rest for 10–15 minutes. Then, on a floured surface, roll each ball into a ½ cm (¼ inch) thick circle.
Baking Methods:
- Regular Oven Method: Preheat your oven to 485°F (250°C) or as high as it will go. Place a baking tray upside down inside to to simulate a baking stone.
- Once hot, remove the tray, and lay 3–4 pitas on it. Bake for 3 minutes, flip, and bake another 1 minute until puffed and lightly golden. Cover immediately with a towel.
- Skillet / Stovetop method: Heat a cast-iron skillet or heavy-bottomed pan over medium-high heat until very hot. Cook one pita at a time for 1–2 minutes per side, until puffed with golden spots.
- Cover each pita as soon as it comes off the pan.
- Pizza Oven Method: Preheat your pizza oven to 600–700°F (315–370°C).
- Bake rolled pitas directly on the oven surface for 30–60 seconds, until puffed and golden. Flip and cook a few more seconds. Immediately cover with a towel.
Video
Notes
- Cover Right Away: Immediately covering pitas after baking traps steam, keeping them soft and pliable. Use a clean kitchen towel and keep them wrapped as you go.
- Don’t Over-Roll: Aim for an even ¼-inch thickness. If they’re too thick, they may not puff; too thin, and they may dry out.
- Storage: Once cooled, store pitas in an airtight bag or container at room temperature for up to 2 days. For longer storage, freeze them for up to 2 months.
- Watch the Video: For a better understanding of the recipe, I always recommend watching the video recipe, which includes a step-by-step guide to help you succeed.
- FAQs: Make sure you read the FAQs for this recipe which are located above the recipe box for additional tips and troubleshooting! For extra tips and variations read the article.
- I don’t usually write such long posts, but this blog post gives you all the information to bake the perfect pita bread using every possible method and creates a beautiful pocket.
Nutrition
Frequently Asked Questions
Greek pita bread is rolled a bit thicker, so it doesn’t get a pocket in the center like Middle Eastern pita does. They’re also softer on the outside than classic pita, which has a firmer texture. So, if your pita doesn’t puff for a dinner party? Just tell folks you were making Greek pitas! 😉
Yep! My easy pita bread recipe is a snap to make—you only need 5 ingredients and about 30 minutes of active kitchen time.
Israeli pita is known for being exceptionally soft, fluffy, and pillowy—almost like a cross between traditional Middle Eastern pita and a Greek pita. What sets it apart is its texture and thickness. Unlike some drier or thinner versions found elsewhere, Israeli pita tends to have a slightly thicker crust with a tender, almost chewy interior that’s perfect for stuffing without tearing.
One of the secrets lies in how it’s baked. In Israel, many bakeries use high-temperature ovens—sometimes wood-fired—which create that quick puff and signature golden exterior while locking in moisture. This fast bake gives the pita its characteristic pocket and ultra-soft bite. Another key factor is freshness. Pita is treated as an everyday bread in Israel and is often eaten the same day it’s made. That means locals enjoy it warm, fresh from the oven. Now you can too!
It depends—it really comes down to the ingredients and portion size. Traditional pita is often made with just a few simple ingredients: flour, water, yeast, and salt. It tends to be lower in sugar and fat than many store-bought sandwich breads, which can contain added oils, sweeteners, or preservatives. A single pita pocket is also typically thinner and lower in calories than two slices of sandwich bread, making it a lighter option for wraps and sandwiches.
")
")


")

The pan method is ideal but I have developed an alternative which I like equally well. I first baked them in the oven and then when I’m ready to eat them I reheat them in a thin steel griddle until they are nicely charred.
Can you use instant yeast ? If so , do you use the same amount ?
Thanks so much
Yours look gorgeous!
I tried the stovetop pita bread method and it worked perfectly for me, fluffy and delicious.
Glad to hear that you liked it!
so damn good! reminds me of my grandma
Glad you liked it 🙂