Medovik Recipe (Russian Honey Cake)
This post may contain affiliate links.
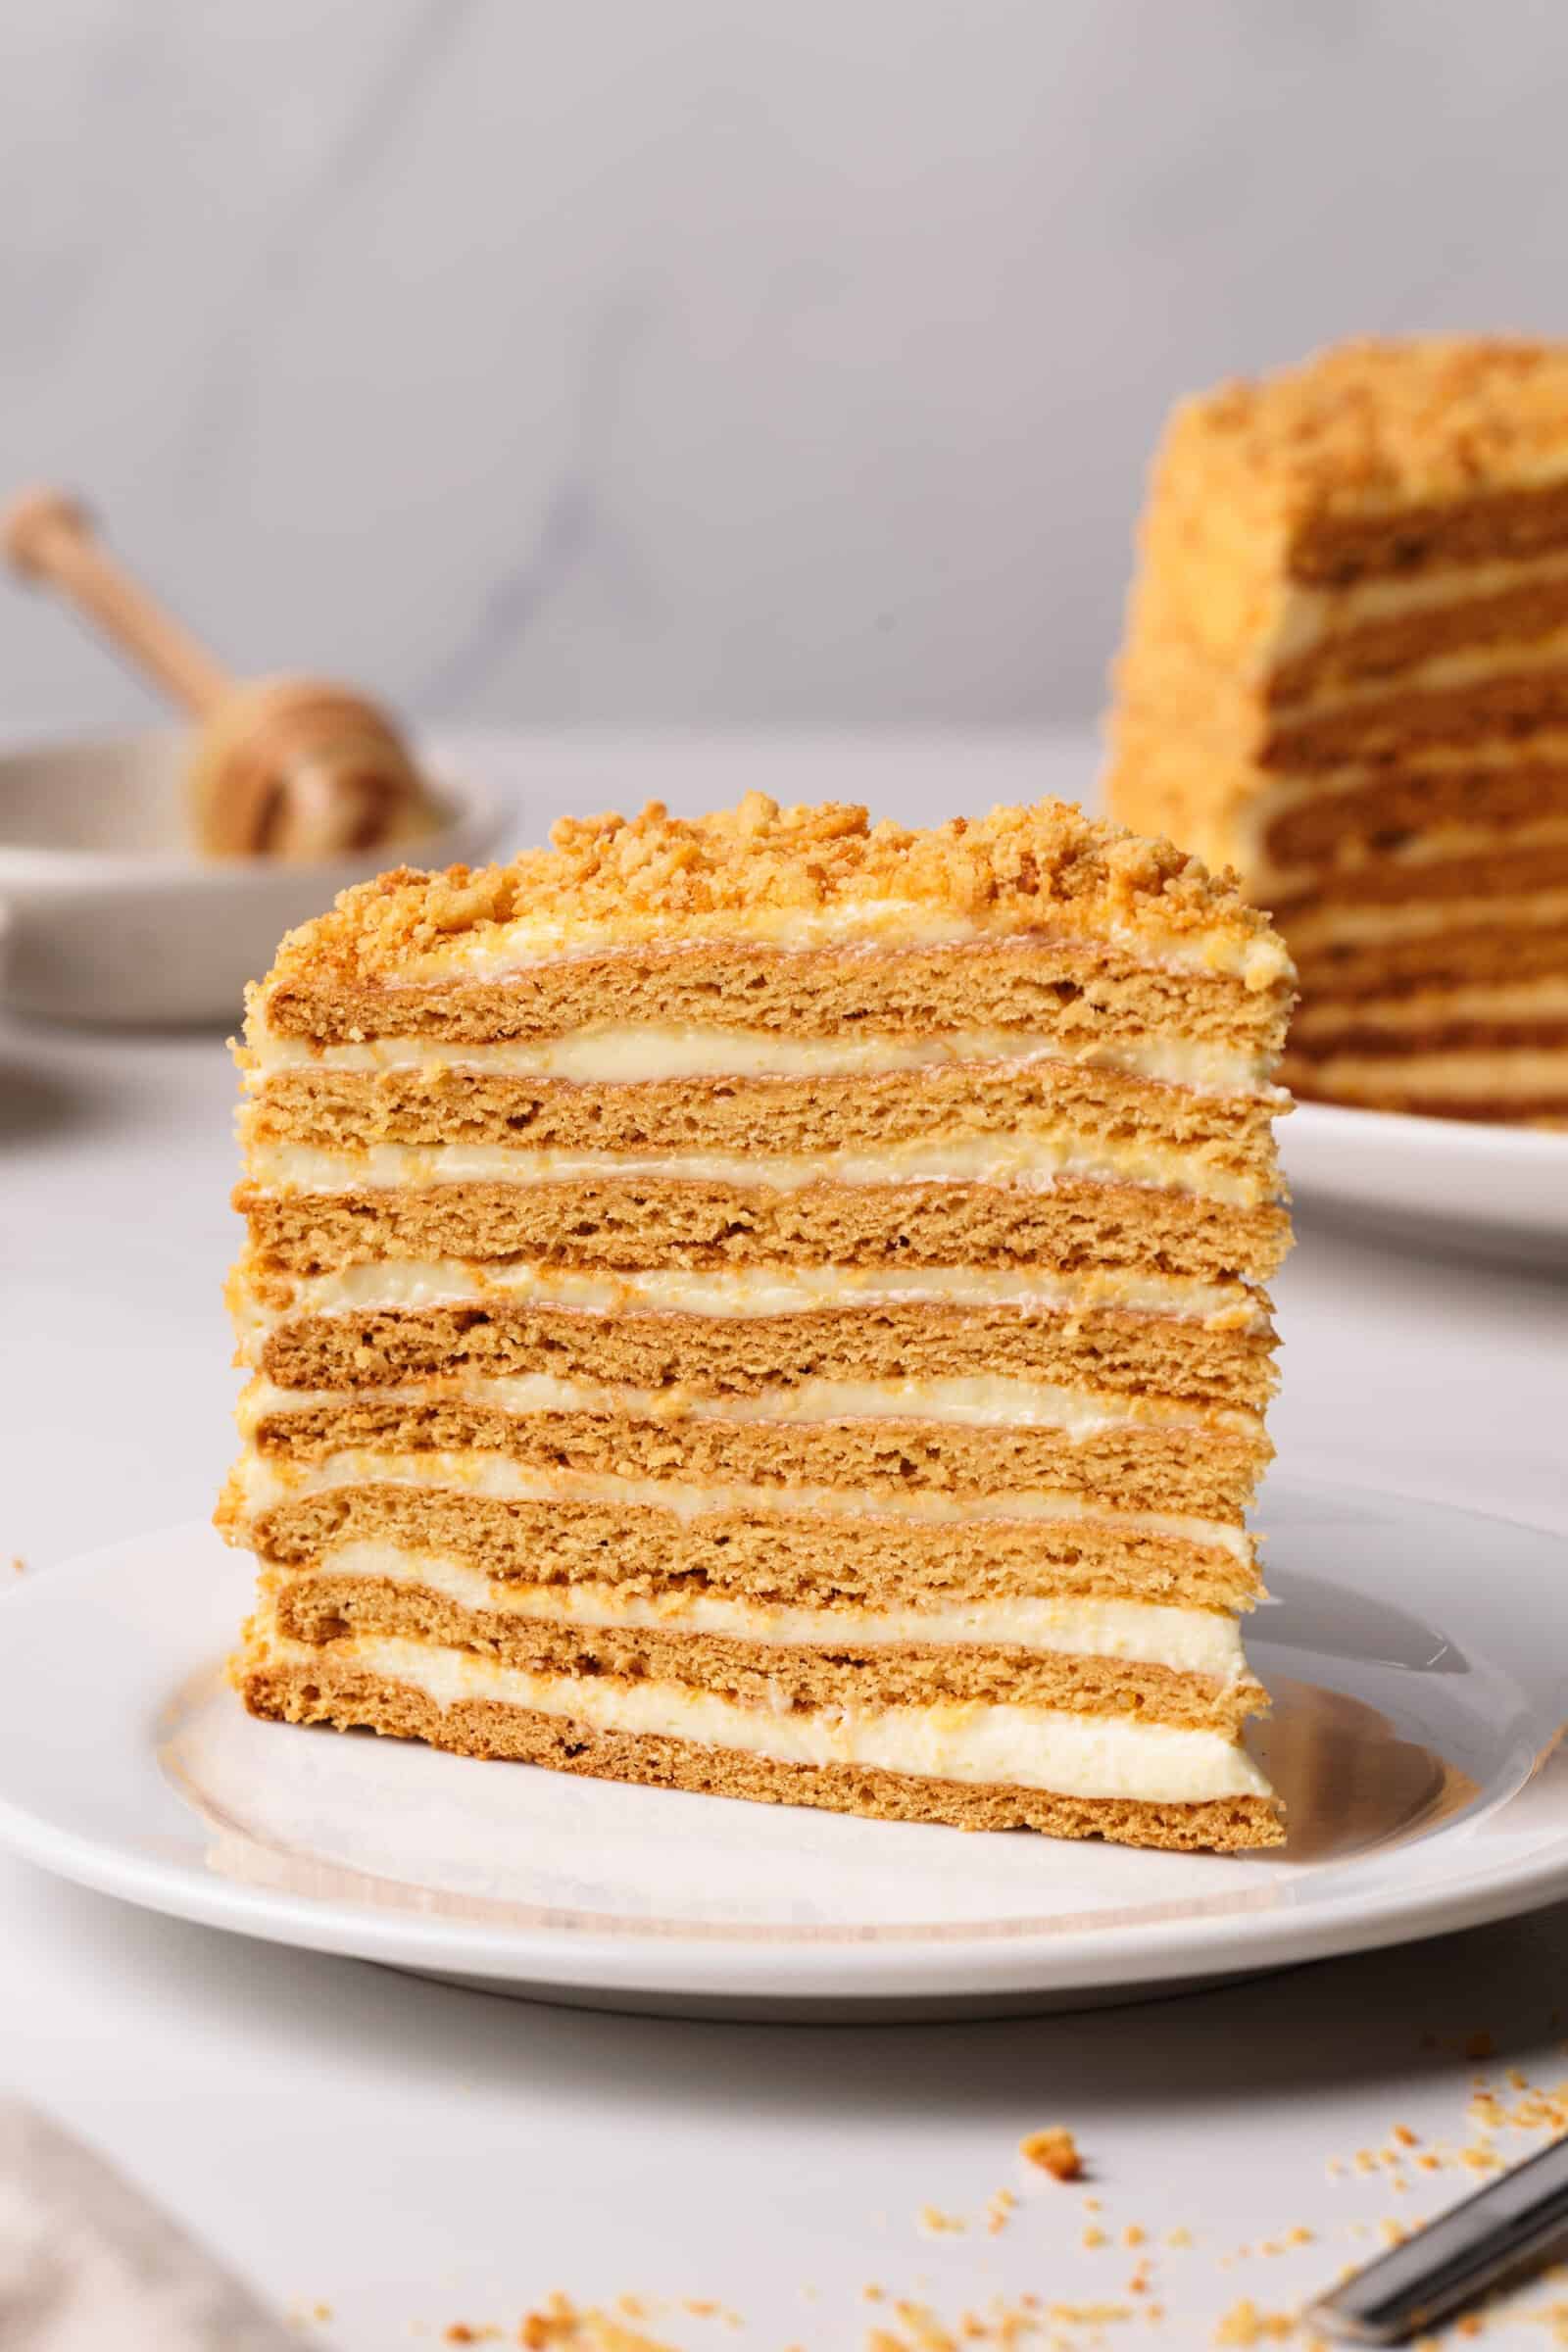
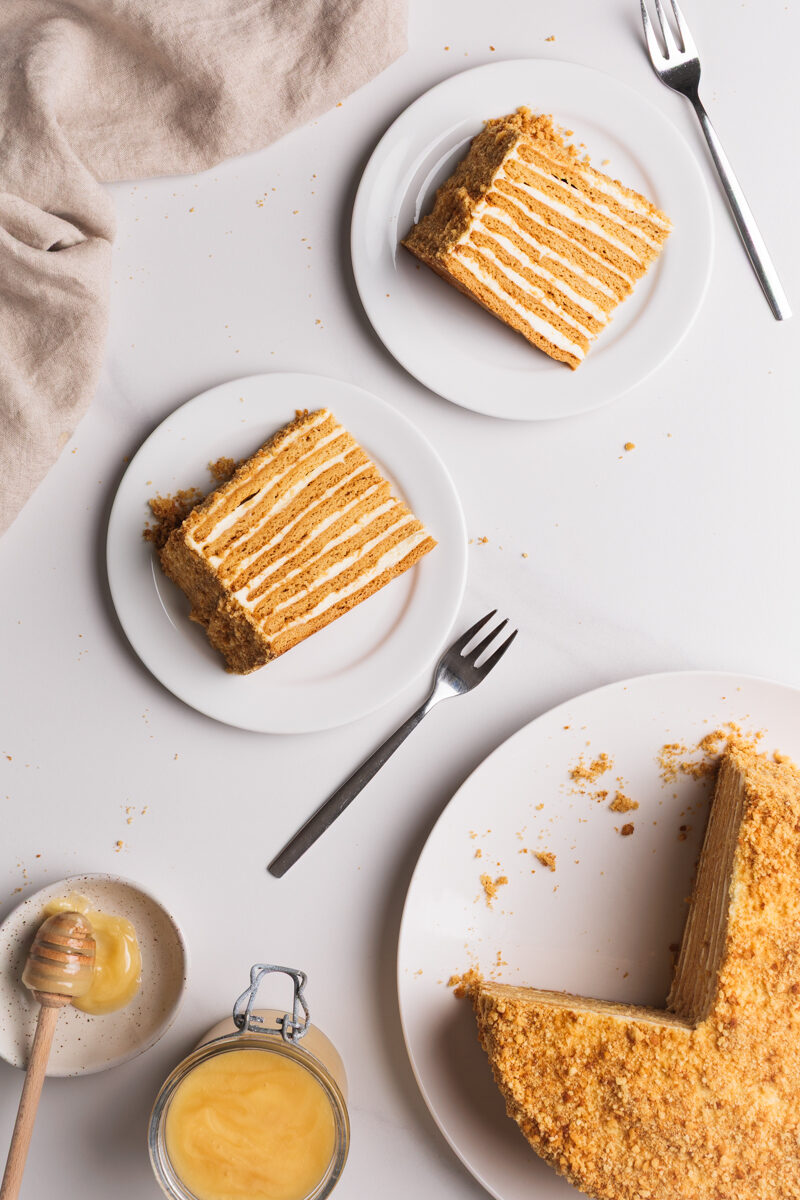
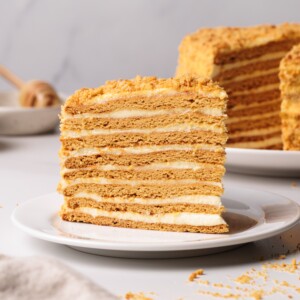
Next time you have something to celebrate, try making Medovik, a.k.a. Russian Honey Cake. This classic dessert recipe features an impressive 8 layers of fluffy, honey-scented cake with a tangy sour cream frosting, resulting in a beautiful slice.
As a kid growing up in Russia, this Medovik honey cake recipe was our go-to for special occasions. Not only is the flavor absolutely sublime, but the gorgeous layering makes it feel extra distinguished—like something you could serve to royalty. Over the many decades since then, I’ve perfected my recipe and technique and I can’t wait to share them with you!
I originally published this recipe in 2019 and have since updated it with new photos, improved instructions, and extra success tips.
Why You’ll Love This Russian Honey Cake Recipe
- Investing time and resources into a baking project sometimes feels like a gamble. Will the recipe turn out the way it should? Luckily, my accompanying YouTube Medovik recipe has over 3 million views and more than 51,000 likes from home cooks like you!
- When you’re looking to impress your guests, it’s hard to beat an 8-layer cake. Before they even taste the delicious honey cake, your baking prowess and attention to detail will be put on clear display.
- Despite its luscious flavor and exquisite appearance, you only need 10 basic ingredients to make my Medovik recipe. That means a bakery-worthy masterpiece is never far from reach!
Ingredients & Substitutions
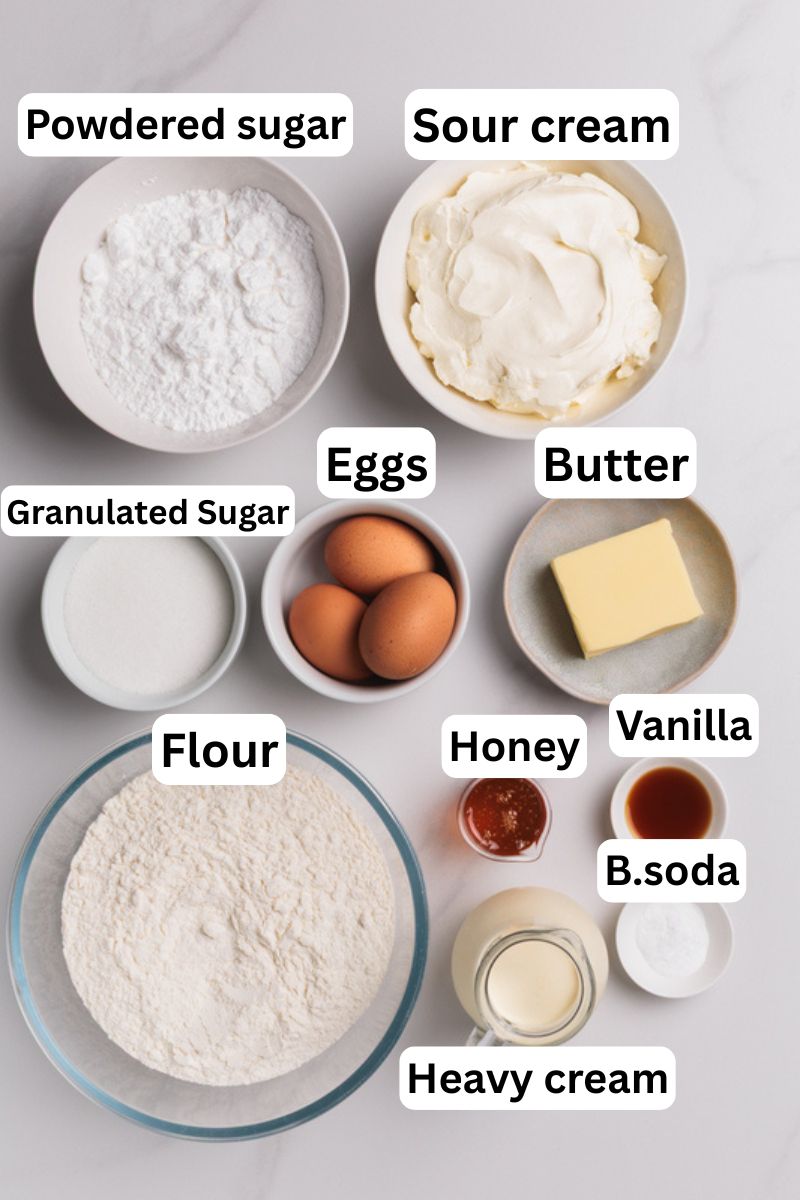
- Unsalted Butter – If you only have salted butter, it will work; your medovik cake will just have a bit more of a salty-sweet twist.
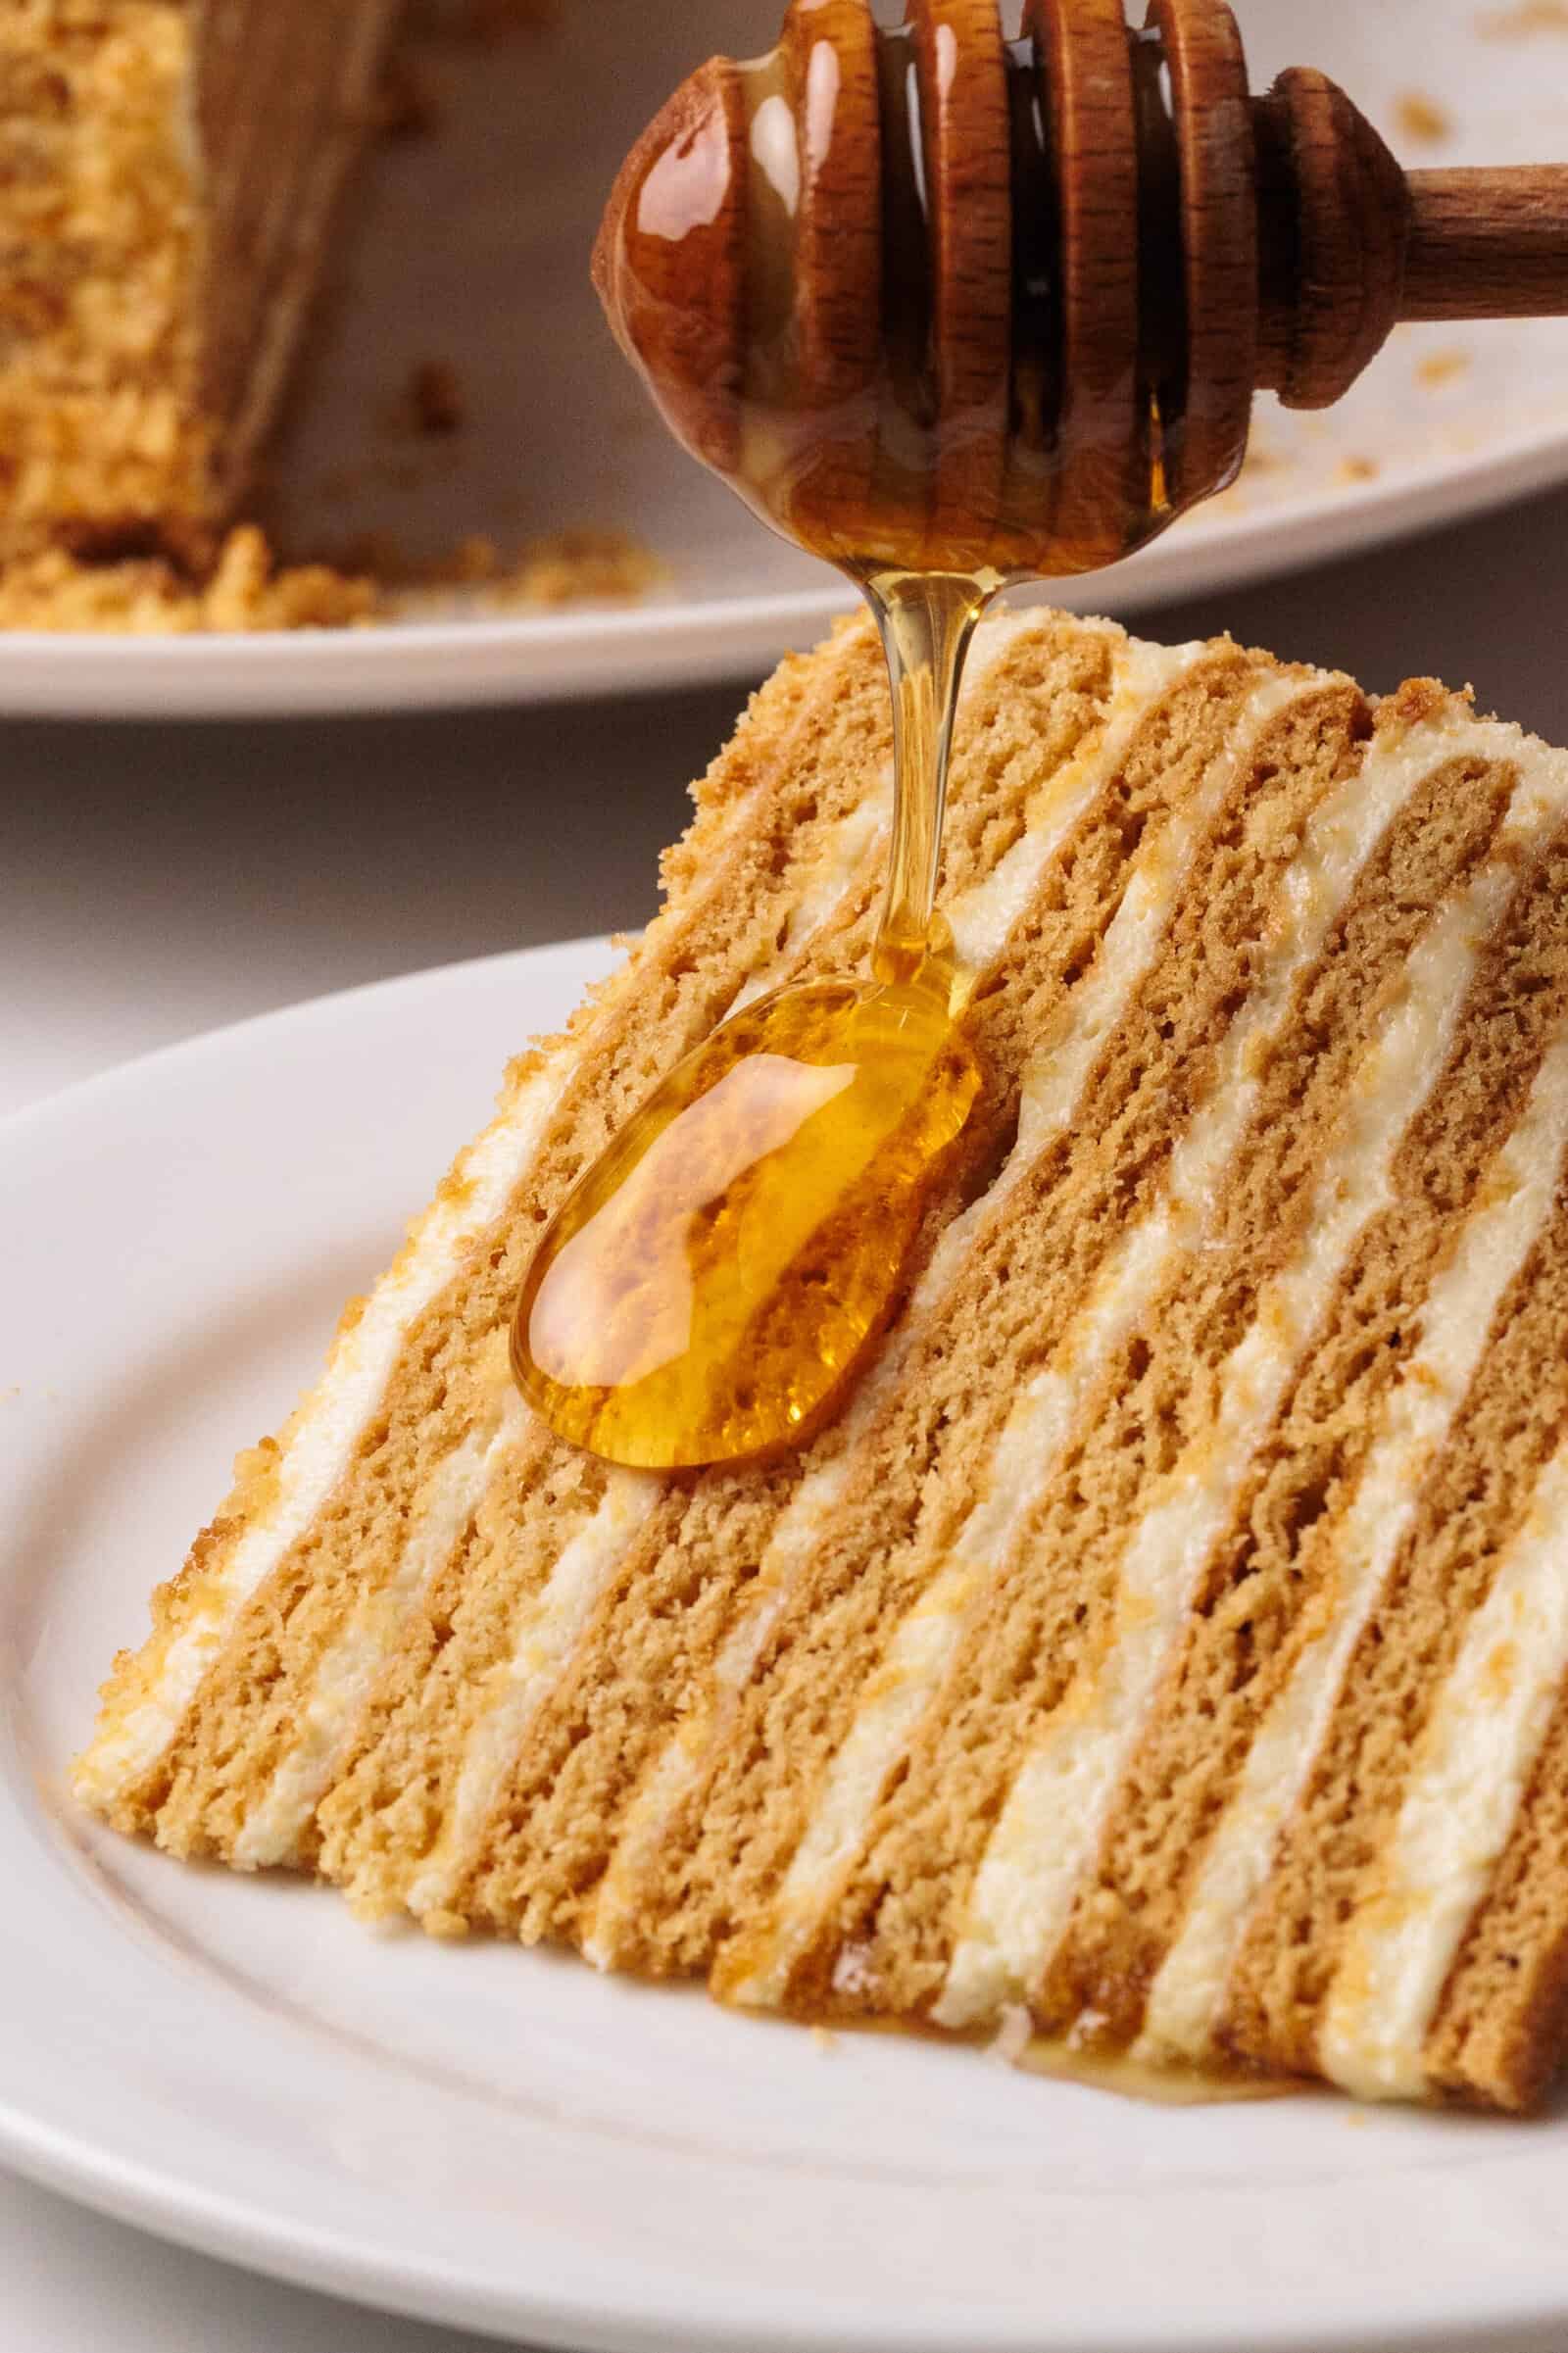
- Honey – While regular clover honey is great, this is a great place to have fun experimenting with local honey varieties. Wildflower, acacia, and orange blossom honey are all excellent choices.
- Baking Soda – Not to be confused with baking powder, this leavener is what gives the honey cake layers a light, fluffy consistency.
- All-Purpose Flour – Also known as “plain flour.”
- Large Eggs – Since we’re using multiple eggs, the size matters. If you’re using a different size, aim for a scant ¼ cup per large egg.
- Granulated Sugar – Plain white sugar has no discernible taste other than sweetness, letting the flavor complexity of honey to shine through.
- Sour Cream – For the tangy sweet filling. In a pinch, you can swap in well-drained full-fat greek yogurt, though the consistency will be less rich and creamy.
- Heavy Cream – Slightly lighter whipping cream will also work.
- Powdered Sugar – This fine, starchy sweetener ensures a perfectly thick and smooth cream filling. Don’t have any on hand? You can make your own by blitzing white sugar with cornstarch in a food processor using a 1 cup to 1 tablespoon ratio.
- Vanilla Extract – For added warmth and aromatic sweetness. You can use an equal amount of vanilla paste if you like.
This is just a short review of the ingredients; for the complete recipe, including quantities, scroll down to the recipe card 👇
The Origin of Medovik Honey Cake
Medovik, which translates to “honey cake” in Russian, is one of the most beloved desserts in Russian cuisine with a history that dates back to the 19th century.
The most popular legend credits its creation to a chef in the Imperial Russian court who unknowingly served a honey-based cake to Empress Elizabeth, wife of Tsar Alexander I. The Empress had famously disliked honey, but she was so enchanted by this delicate, multi-layered creation that it became her favorite dessert, securing its place in Russian culinary tradition.
The cake’s defining characteristics—thin, honey-infused layers alternated with rich, tangy sour cream frosting—create a unique texture that softens over time as the layers absorb moisture, similar to Russian Napoleon cake, transforming into a tender, melt-in-your-mouth delicacy.
Honey Cake Variations Across Eastern Europe
While Medovik is distinctly Russian, similar honey layer cakes are found throughout Eastern Europe. In Ukraine, a nearly identical version called medivnyk is popular, sometimes made with sweetened condensed milk or butter for a richer filling.
Poland’s tort miodowy typically features fewer, thicker layers and may include walnuts or poppy seeds. Hungarian mézes krémes uses a custard-based filling instead of sour cream, creating a sweeter flavor profile. In the Balkans, honey cakes often incorporate spices such as cinnamon and cloves, along with nuts.
Despite these regional differences, they all share the same caramelized honey flavor that develops when honey is heated with baking soda, creating a beautiful golden color and subtle toffee-like notes.
Medovik: Video Recipe
Watch the full video recipe to learn how to make the BEST Russian Honey Cake recipe.
Prefer the written recipe? Scroll down to the recipe box 👇
How to Make Medovik Cake: Step-By-Step
While Medovik looks impressive, the process is simple when you break it into four parts: making the honey dough, baking the layers, preparing the cream, and assembling the cake.
Make the Honey Dough
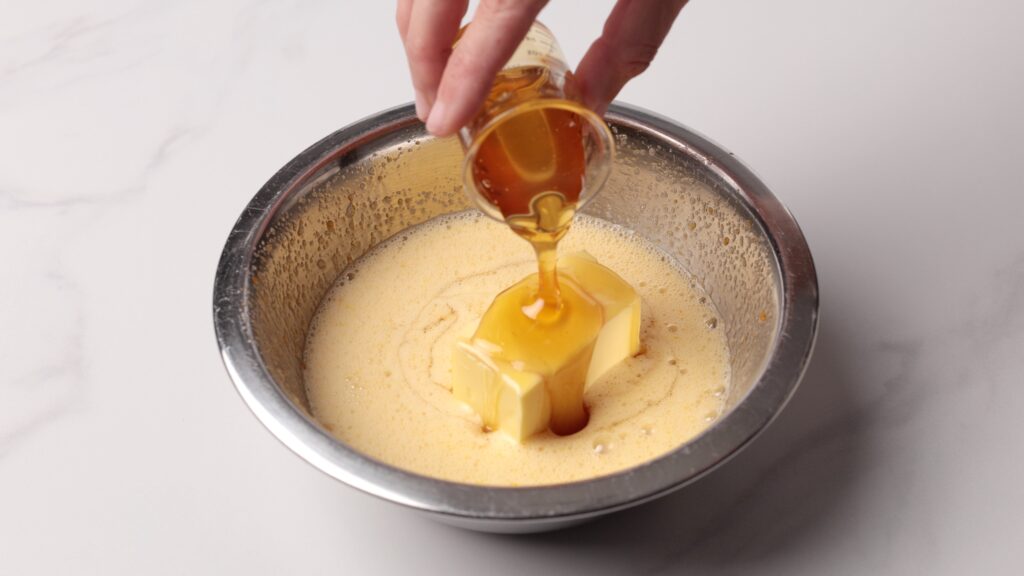
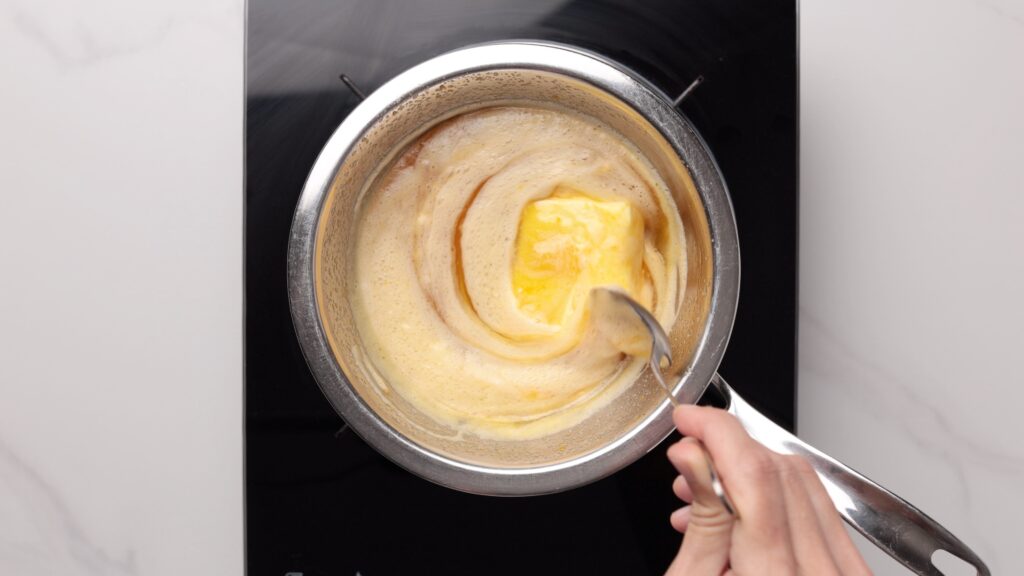
- Whisk the eggs and sugar until pale, then add the butter and honey. Place the bowl over a bain-marie and stir until the butter melts and the sugar dissolves.
- Add the baking soda while the mixture is still very hot; it should foam slightly.
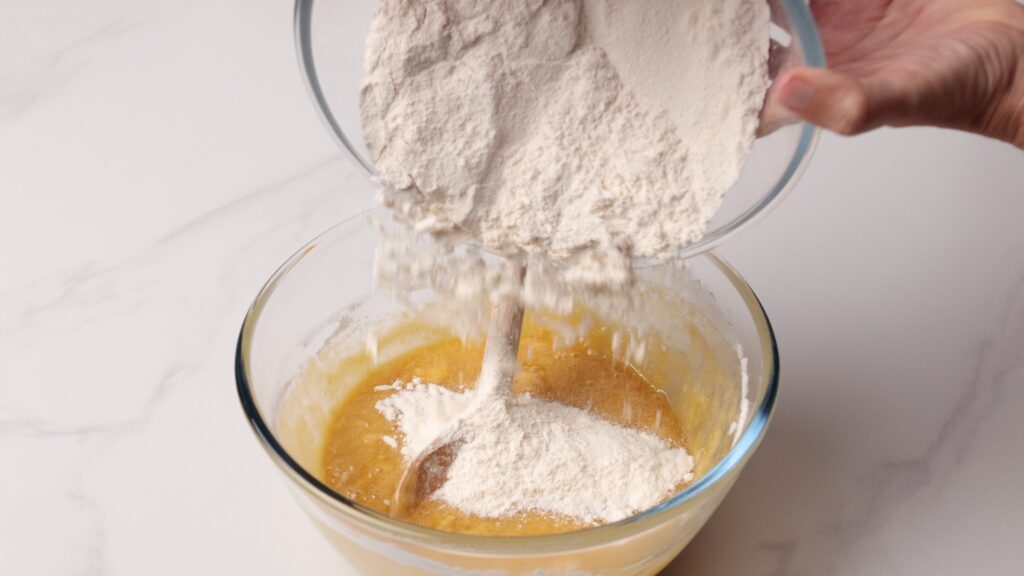
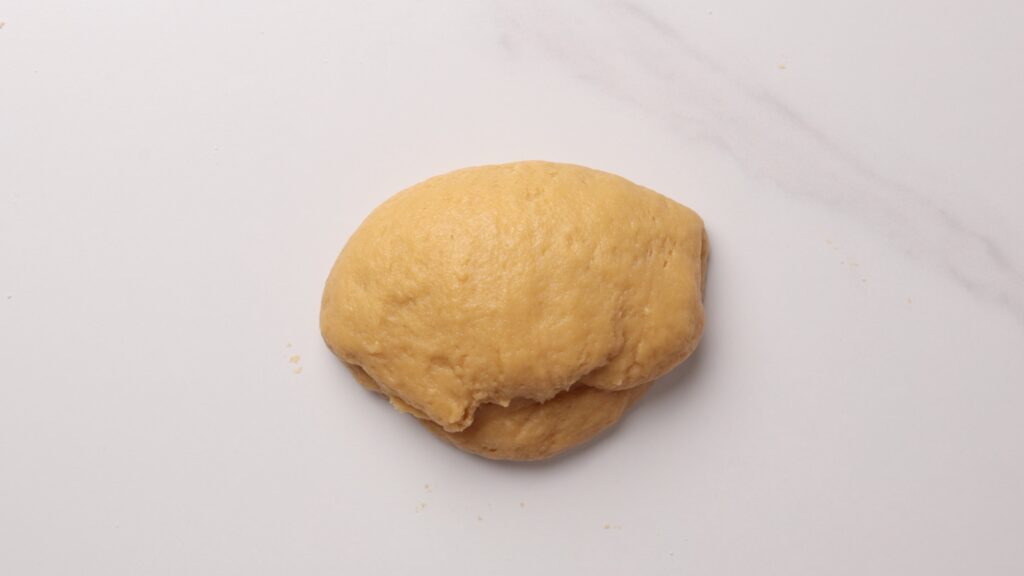
- Remove from the heat, then gradually mix in most of the flour until a soft, slightly sticky dough forms. Let it rest for 20–30 minutes.
Roll & Bake the Cake Layers
- Divide the dough into 8 equal pieces.
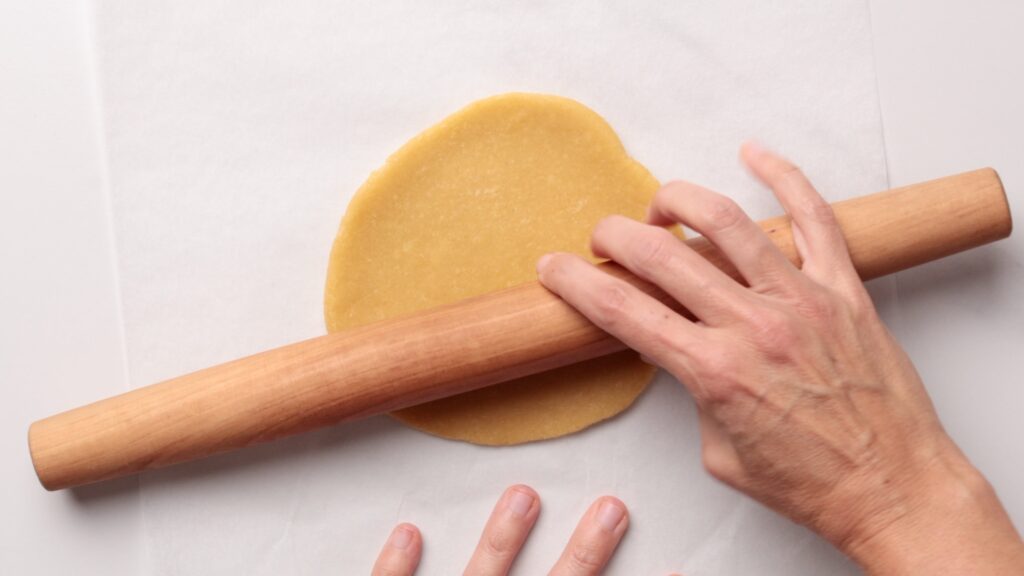
- Roll each portion into a very thin circle directly on parchment paper using a long rolling pin.
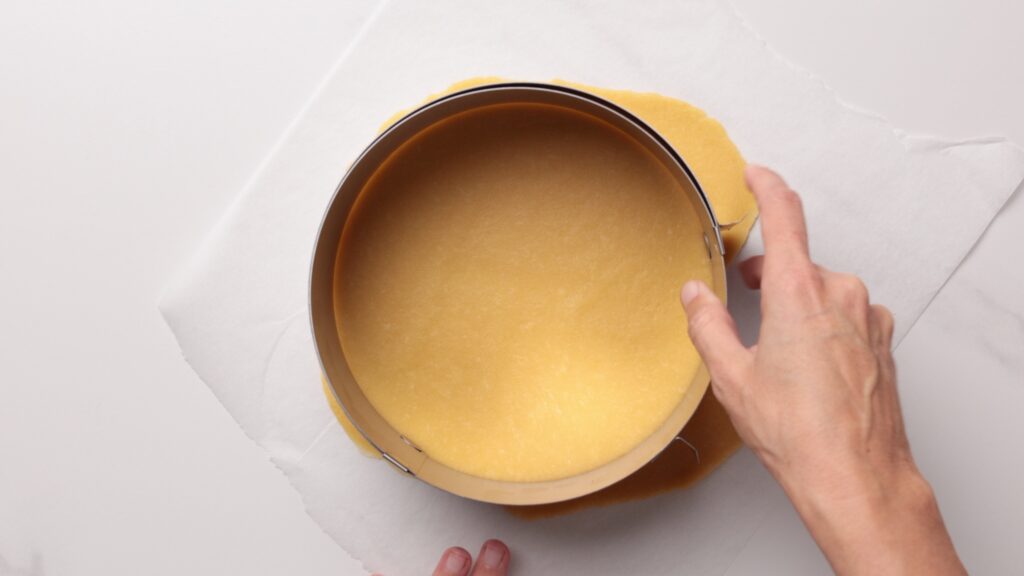
- Trim using a 7-inch (18cm) plate or adjustable cake ring and prick with a fork.
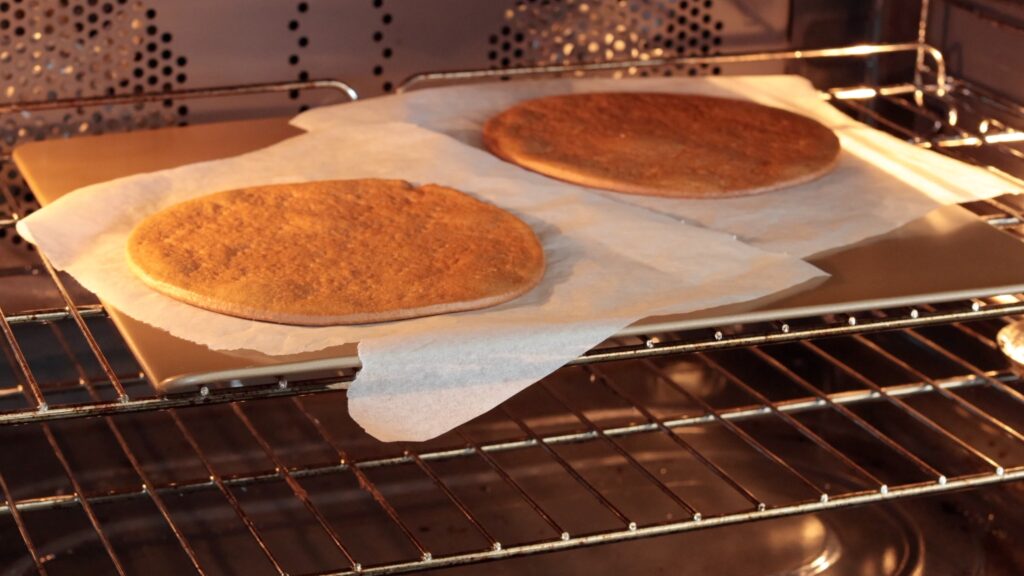
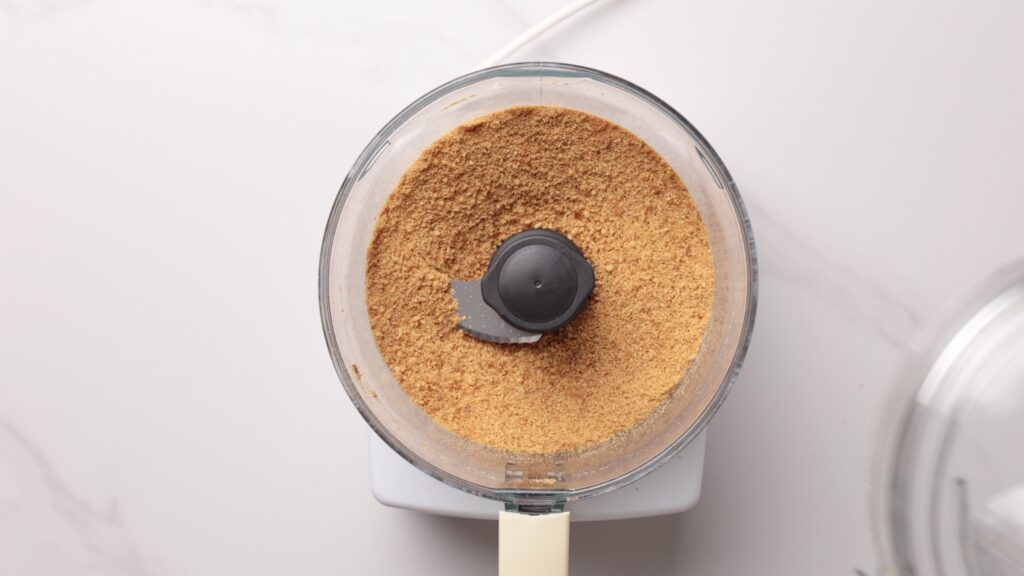
- Bake until lightly golden. Bake the scraps as well, they’ll become the crumb coating later.


Make The Cream
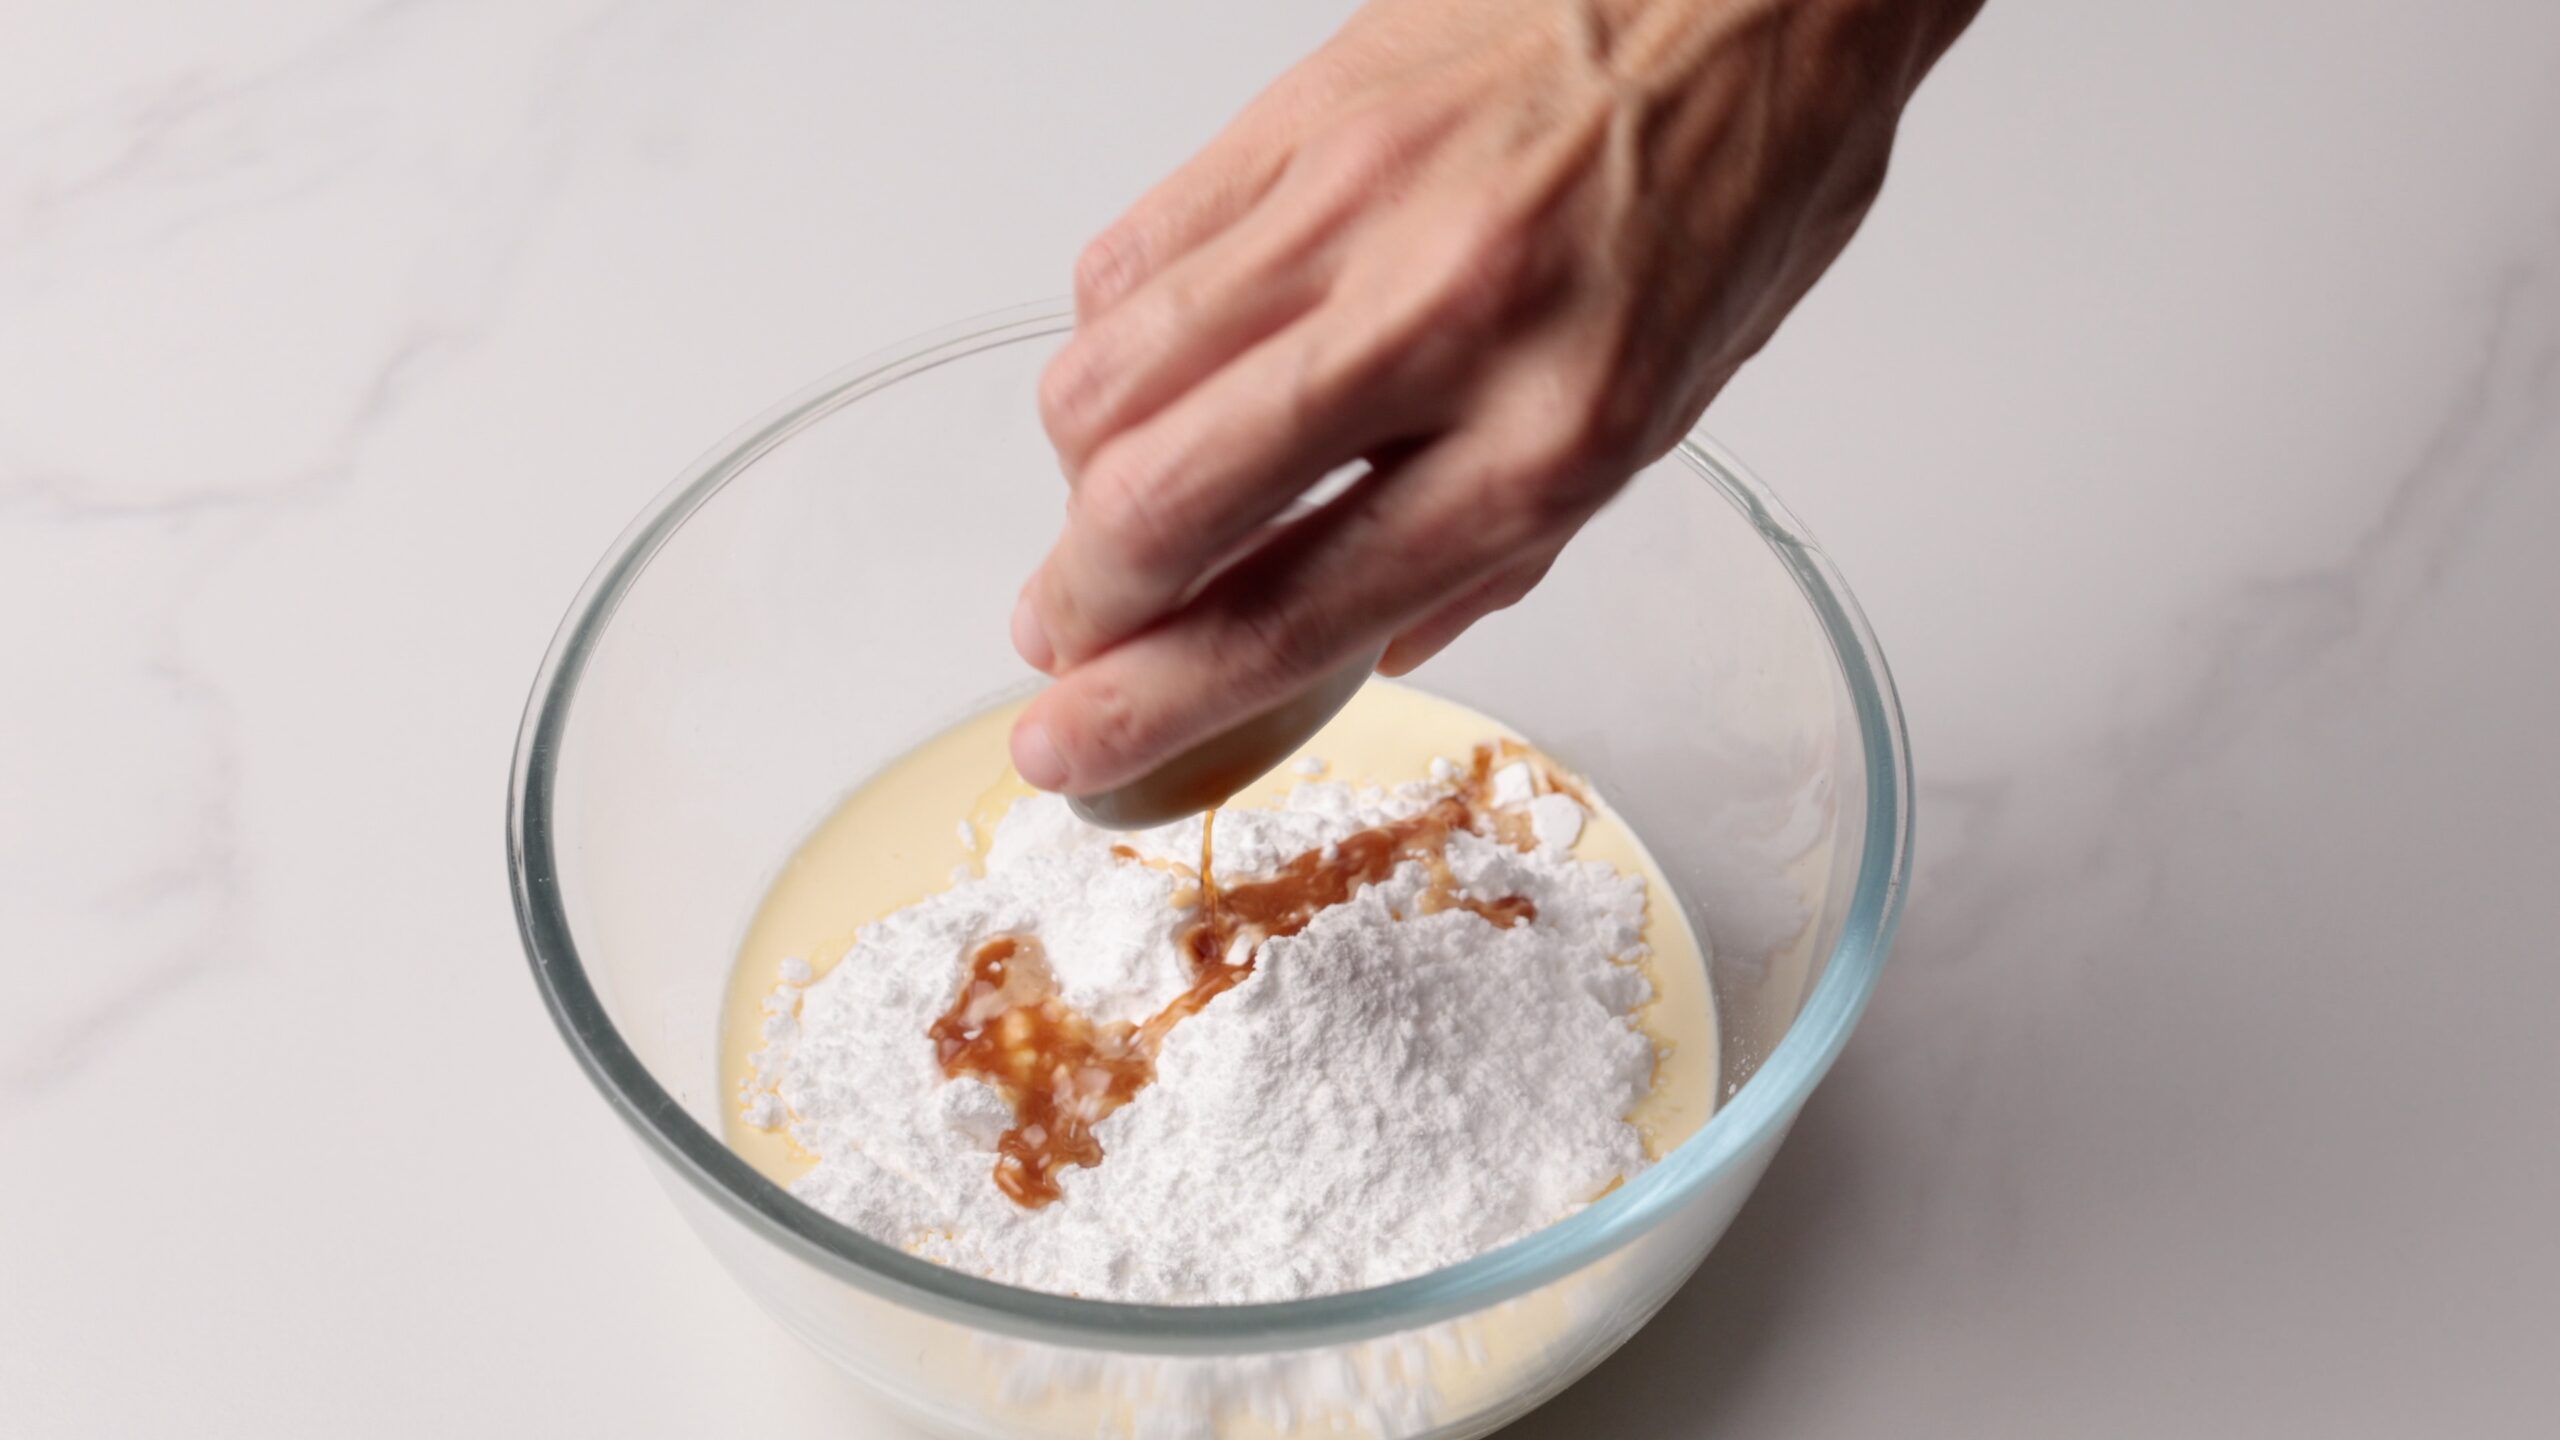
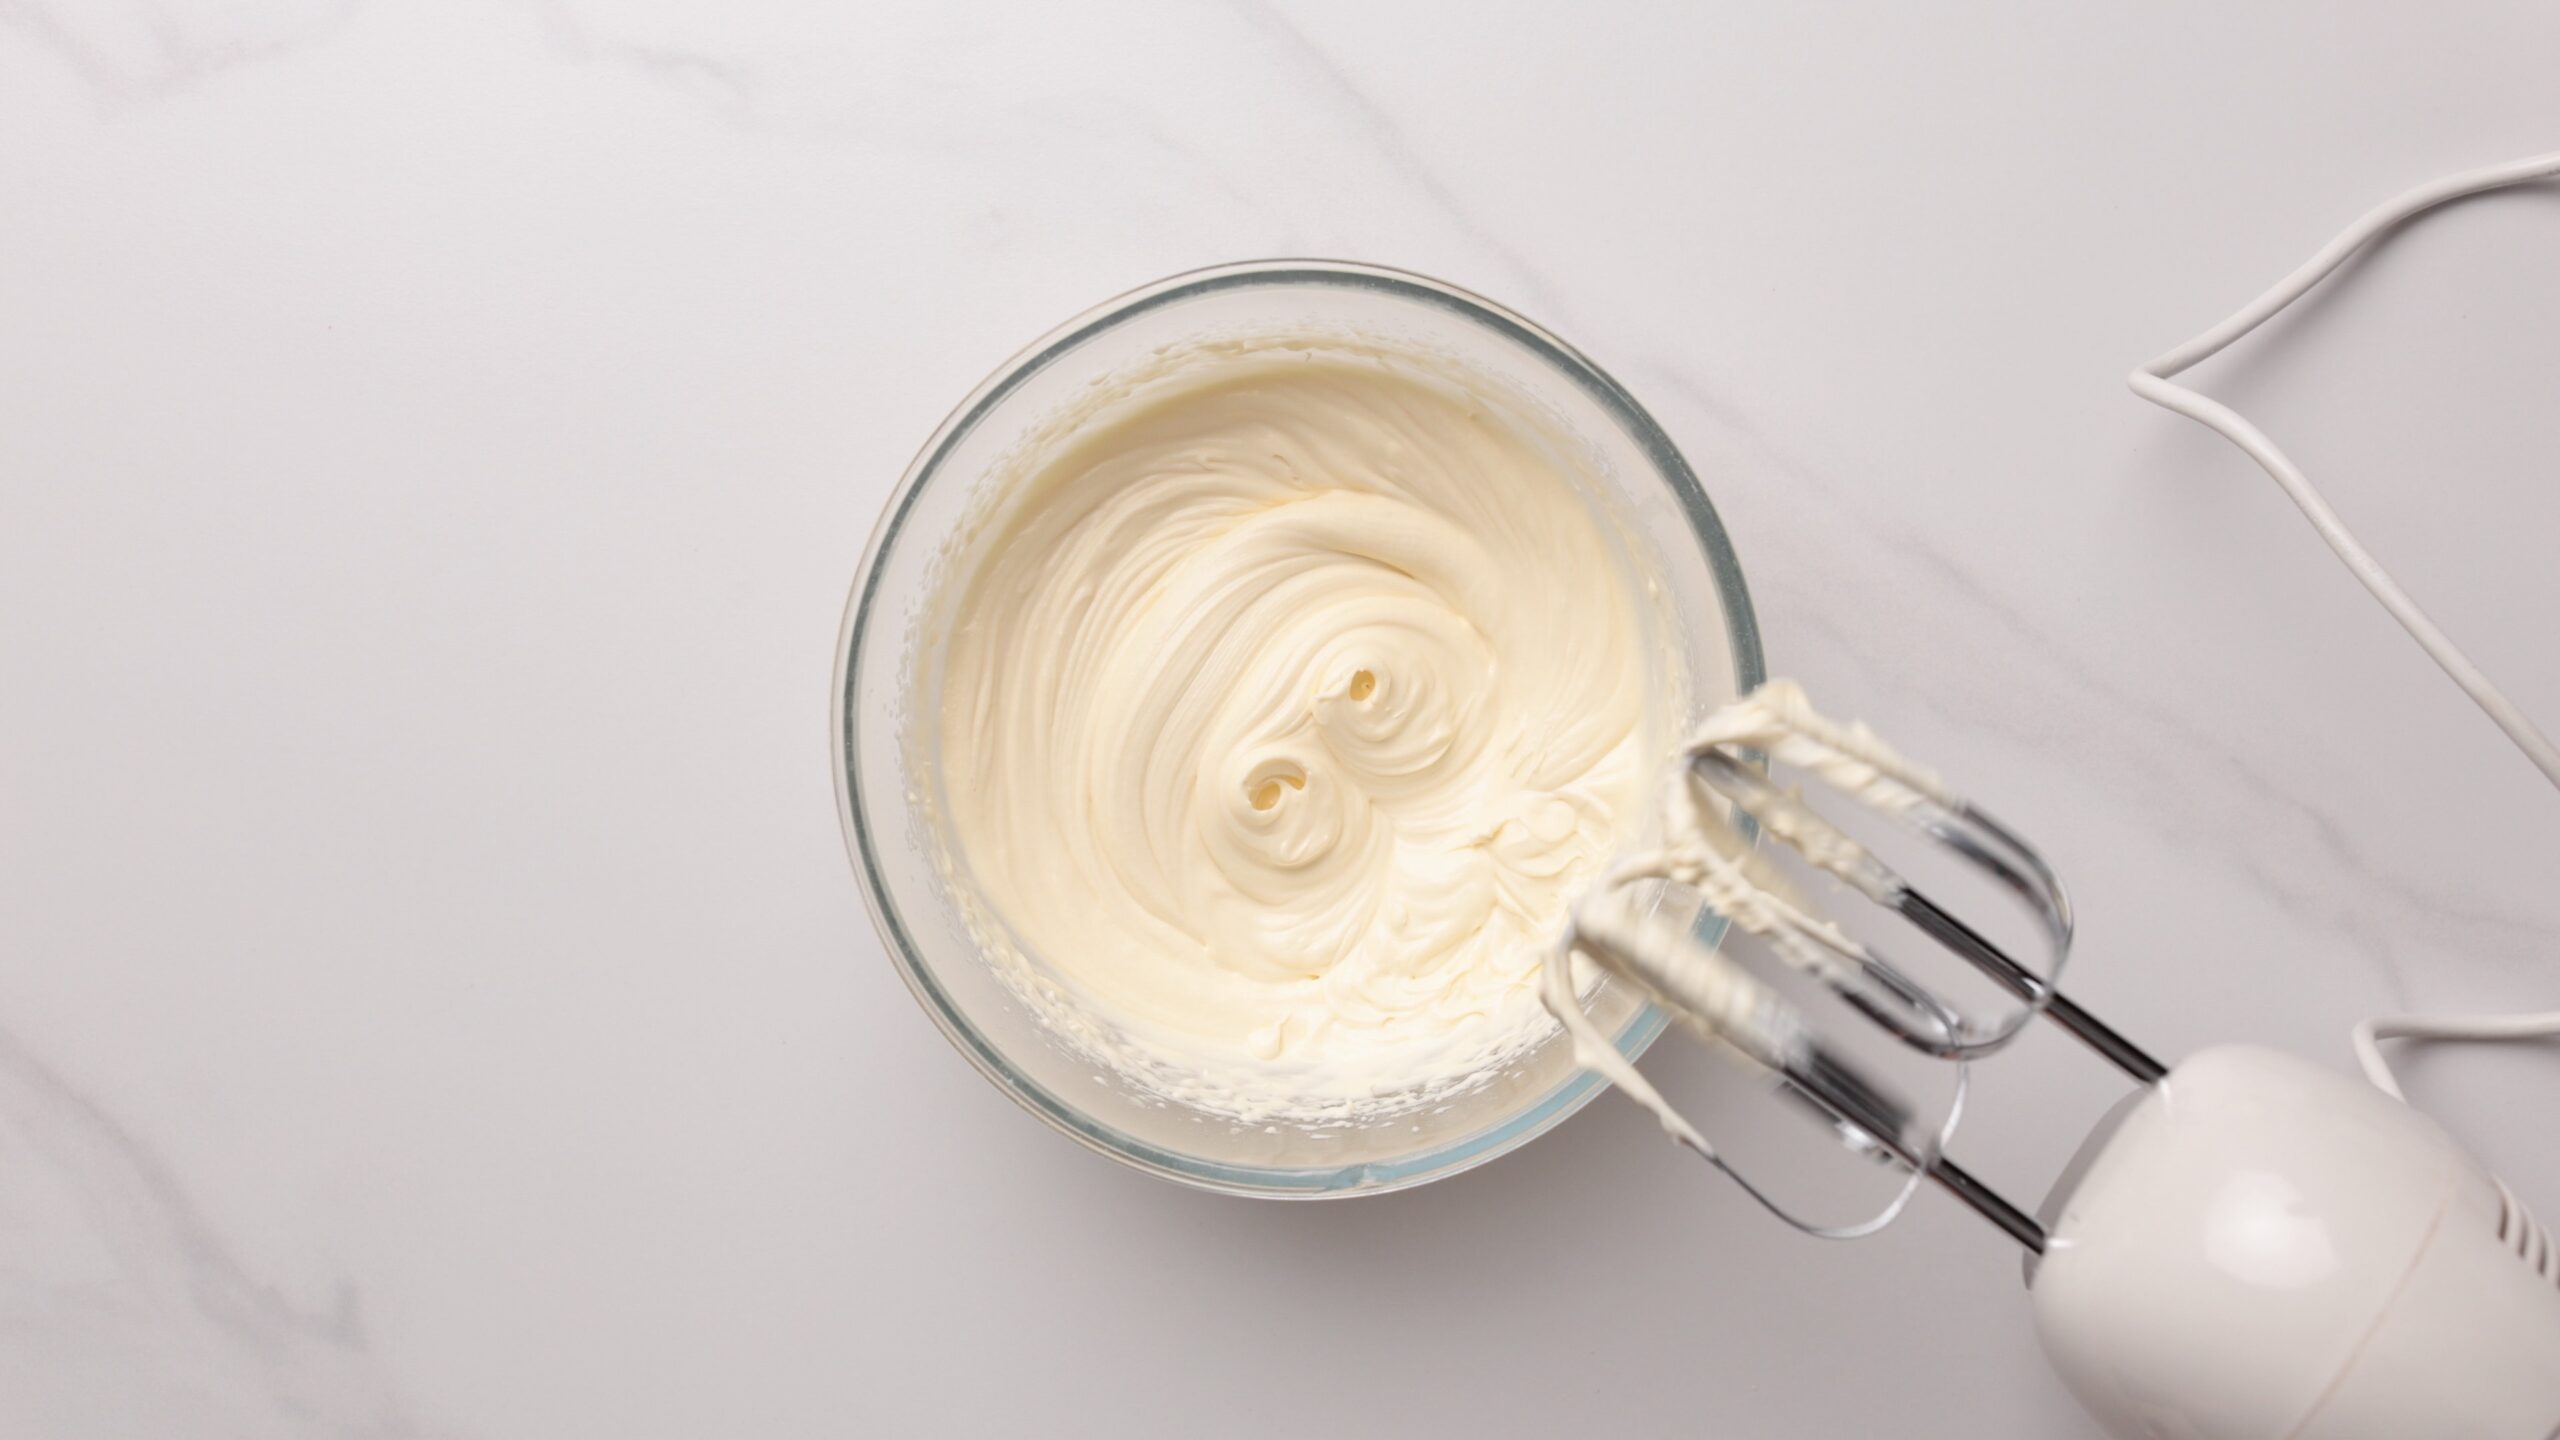
- Whisk the sour cream until smooth and lump-free. In a separate bowl, whip the heavy cream, powdered sugar, and vanilla until medium-stiff peaks form.
- Gently fold the whipped cream into the sour cream until smooth and fluffy. If your sour cream is loose, strain it first for a thicker, more stable filling.
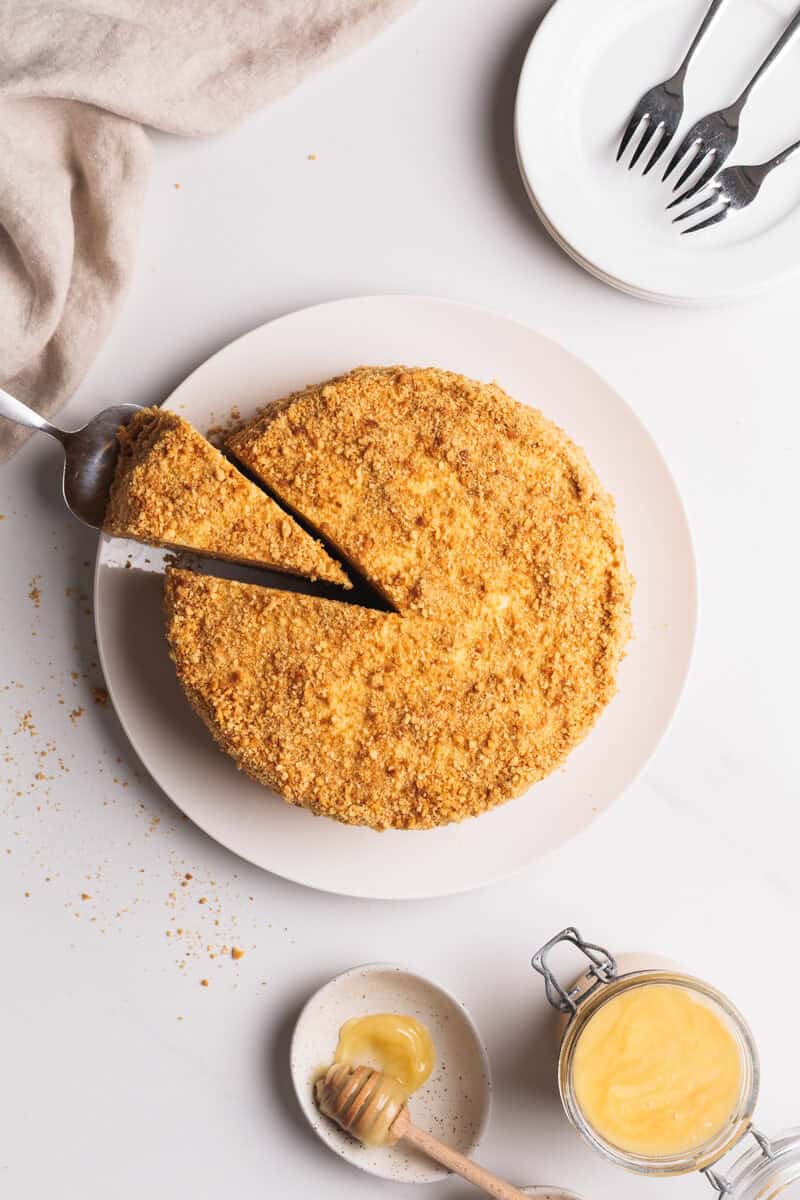
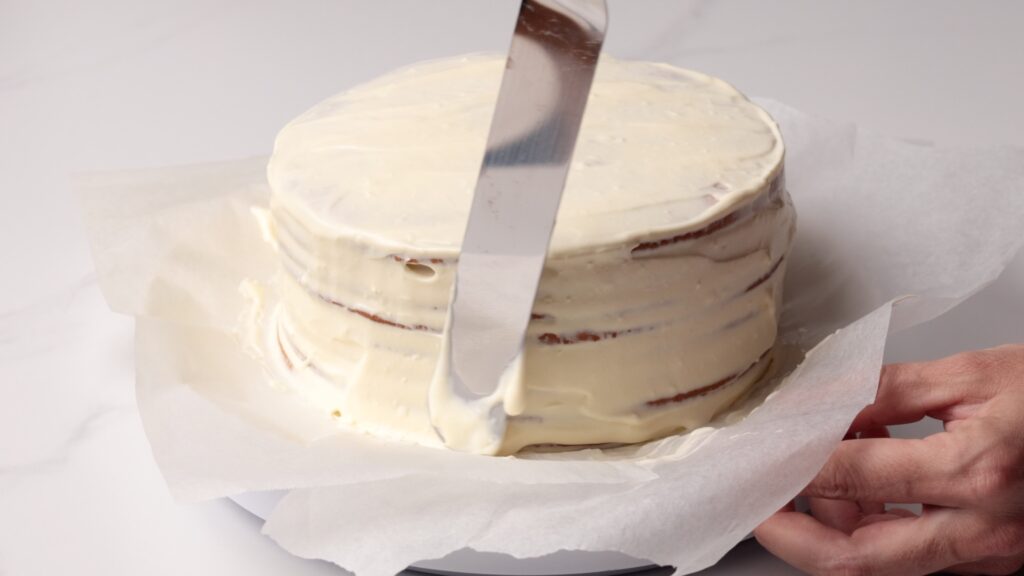
How to Assemble Medovik
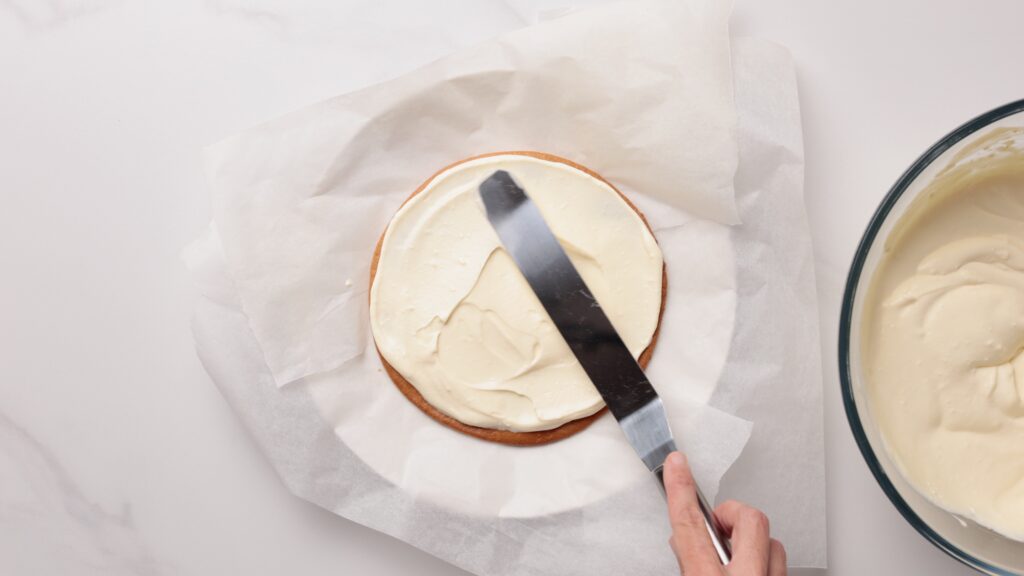
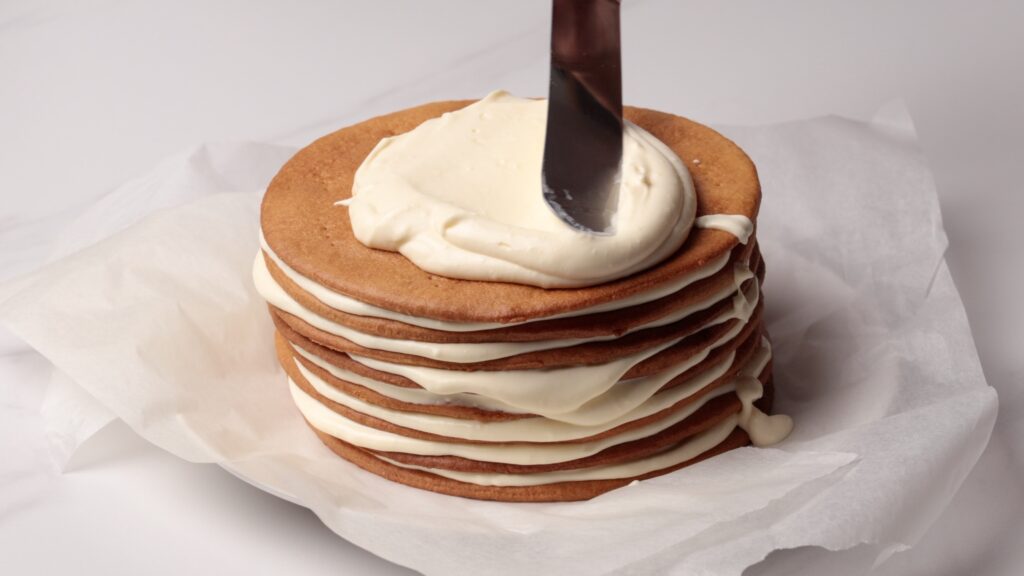
- Spread 4–5 tablespoons of cream between each cake layer using a small offset spatula for even coverage.
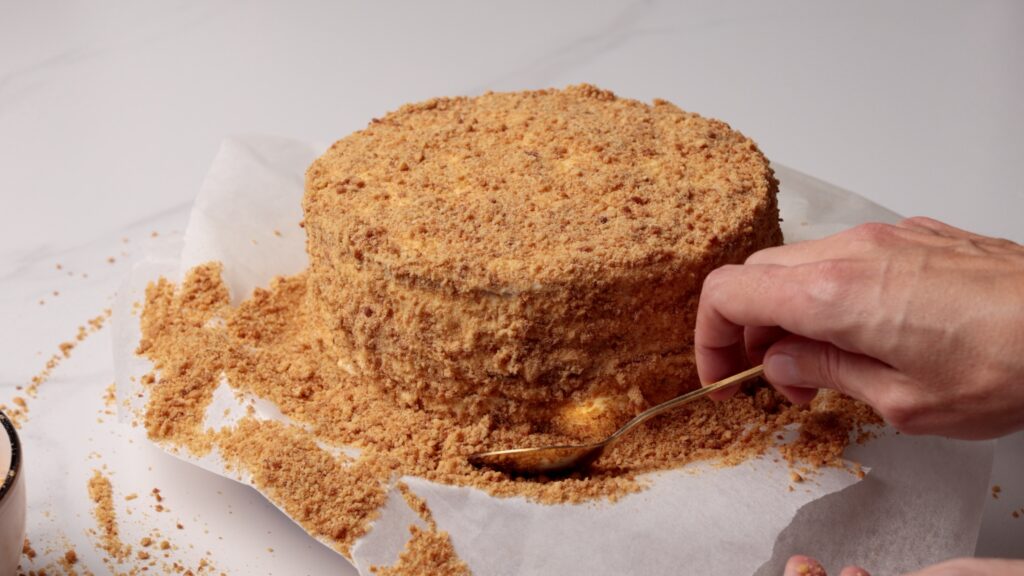
- Cover the top and sides with the remaining cream, then coat the cake with the crushed baked scraps. Refrigerate for at least 8–12 hours, preferably overnight, before serving.
Optional Variations & Dietary Adaptations
- Lower-Fat – If needed, you can swap in full-fat greek yogurt instead of sour cream. Just make sure it’s thoroughly drained so the frosting stays thick.
- Gluten-Free – I haven’t tried it, but this Russian cake recipe seems like a good spot for swapping in a high-quality gluten-free cup-for-cup baking mix. If you go this route, opt for a mix with xanthan gum and give the batter 30 minutes to rest before baking to prevent a gritty texture.
- Dairy-Free – Feel free to swap in vegan butter, cream and sour cream if desired.
Expert Tips & Tricks
- Flour: Start with about 85–90% of the flour, then gradually add more only if needed. The dough should be soft and slightly sticky, not dry, adding too much flour will make the layers tough.
- Work Quickly with the Dough: The honey dough is easiest to work with when it’s still warm and pliable. Once it cools, it becomes firm and difficult to roll. Roll out each portion immediately after removing it from the heat, or briefly rewarm it over a double boiler if it stiffens up. Have your rolling surface, rolling pin, and parchment paper ready before you start cooking the dough so you can move efficiently.
- Roll Thin and Even: The magic of medovik lies in its delicate, crispy layers. Aim to roll each layer as thin as possible—about 1/8 inch or even thinner if you can manage it. Thinner layers create more surface area for the cream to penetrate, resulting in that signature tender, melt-in-your-mouth texture. Use a plate or cake pan as a guide to trace and trim uniform circles, and save those scraps! Bake them alongside the layers, then crush them into crumbs for decorating the top and sides of the cake.
- Bake efficiently: If your oven allows, bake 2–3 layers at the same time to speed up the process. Just make sure they bake evenly.
- Easy Assembly (Pro Tip): For a clean, professional look, assemble the cake inside an adjustable cake ring. Chill for a few hours to set, then remove the ring and finish coating the cake with cream and crumbs.
- Alternative (No-Mess Method): Place strips of parchment paper around the edges of your serving plate, slightly under the first cake layer. Assemble the cake as usual, and once finished, simply pull the papers out, you’ll have a perfectly clean serving plate with zero mess.
Don’t Slice It Yet! Why Medovik Gets Better Overnight
Unlike most cakes, Russian honey cake is actually better the next day. As the cake rests in the refrigerator, the cream slowly softens the honey layers, transforming them from slightly crisp and chewy into the signature tender, melt-in-your-mouth texture that makes this cake so special.
For the best results, refrigerate the cake for at least 8–12 hours, preferably overnight, before slicing and serving.
How to Store Medovik Cake
- Make Ahead: This cake is best made 1 day in advance. The layers soften and absorb the cream, creating the classic Medovik texture.
- Storage: Keep Russian honey cake covered in the refrigerator for up to 4-5 days. The cake actually improves with time as the layers continue to soften and the flavors deepen. Bring it to room temperature about 30 minutes before serving for the best flavor and texture, or enjoy it cold for a firmer, more refreshing experience. Freezing is not recommended due to the high dairy content of the frosting.
More Honey Desserts
More Celebration Cake
Medovik (Russian Honey Cake)
Ingredients
For the cake layers:
- 7 tablespoons (100 g) Butter unsalted
- 4 tablespoons (80 g) Honey
- 1 teaspoon (5 g) Baking soda
- 3½ cups (440 g) All-purpose flour see notes
- 3 Eggs large
- ¾ cup (150 g) Sugar
For the cream:
- 2¼ cups (515 g) Sour cream
- 1 cup (240 ml) Heavy cream
- 1½ cups (190 g) Powdered sugar
- 1 teaspoon Vanilla extract
Instructions
- Prep: Preheat oven to 350°F (175°C).
- Make the dough: In a heatproof bowl, whisk eggs and sugar until pale. Add butter and honey, then place over a bain-marie (double boiler). Stir until butter melts and sugar dissolves.
- Add baking soda while the mixture is still over the bain-marie or very hot and mix; the mixture will foam slightly, which is essential for the cake’s texture.
- Remove from heat. Gradually add about 85–90% of the flour, mixing until a soft, slightly sticky dough forms. Add the remaining flour only if needed.
- Cover and let the dough rest for 20–30 minutes.
- Roll and bake: Divide dough into 8 equal pieces. Roll each piece very thin (about 2mm), preferably on parchment paper or a lightly floured surface. Trim using a 7-inch (18 cm) ring.
- Pierce with a fork. and bake each layer for 7–8 minutes, until golden.
- When finished baking the layers, bake the scraps as well, then crush into fine crumbs. Cool completely.
- Make the cream: In a bowl, whisk the sour cream until smooth and lump-free.
- In a separate large bowl, whip heavy cream, powdered sugar, and vanilla to medium-stiff peaks. Gently fold into the sour cream until smooth.
- Tip: If your sour cream is loose, strain it slightly for a thicker, more stable cream.
- Assemble: Spread 4–5 tablespoons of cream between each layer. Stack all 8 layers.
- Coat the top and sides with remaining cream, then cover with cake crumbs.
- Chill: Refrigerate at least 8–12 hours (preferably overnight) before serving.
Video
Notes
Nutrition
FAQs
Medovik is Russian in origin, with its creation dating back to 19th-century Imperial Russia. However, Ukraine has its own nearly identical version called “medivnyk,” and both countries consider honey layer cakes part of their culinary heritage.
Medovik offers deep, caramelized honey flavor with toffee-like notes from the baked layers, balanced by the tangy richness of sour cream frosting. The texture is remarkably tender and melt-in-your-mouth, with each bite revealing delicate layers that have softened into an almost custard-like consistency while retaining subtle hints of their original crispness.
No, Napoleon and Medovik are distinct cakes. French Napoleon (also called Mille-Feuille, or “1000 layers”) features flaky puff pastry layers with pastry cream or custard filling, while Russian Medovik uses honey-based cake layers with tangy sour cream frosting.
")
")


As others have mentioned, I also had to add about half a cup of flour for it to form a cohesive dough.
Third time making this recipe. I had to use a bit more flour as I kneaded it due to it being super sticky, not sure if this was due to kitchen temperature etc. once you get the hang of it, this recipe is really yummy. The mascarpone frosting is really good as well.
this was an….AMAZING RECEPI ! love how you didnt add to much or too less honey but i had a smallll problem 🙂 the dough is sticky and i want to make this recepi again so how much is the limit i can add bcs when i made this i added to TOOO much flour and it wasnt as good :/
thanks! :]
Why is it important to pierce each layer with a fork?
So the cake layers can cook evenly
Hi. Tried this recipe. Had a problem. The dough circles were shrinking and became much smaller when baked. How can i stop taht from happening?
the dough turned out very sticky and had to add atleast half a cup More of flour . But i think that was because the liquid was warm . Once the dough cooled it was less sticky and more manageable . Thanks for the good video on This .
Best ever recipe!
Thanks for sharing I’ll be making this for Christmas lunch 🙂 How many does this recipe serve? How long does it keep?
Oops sorry I see it serves 10. Could I simply double the ingredients to make a larger size or would you suggest making two separate portions of dough?
before you put the baking soda, I see you removed the egg and butter mix from the stove. do you let the mixture cool before putting baking soda? if so, how long?
No, I remove the mixture from the stove and adding immediately the baking soda.
Great recipe and video!
I am by no means a baker of any sort but decided to give it a go as the ingredients and method seemed reasonable for a beginner. It IS a lot of work but manageable if you plan properly. I did watch a few other videos on the techniques used and your video in particular was pretty informative.
I got stuck (literally) with the dough but managed to reduce the stickiness by adding another cup of flour.
Also, I did not have enough leftovers to make the crumbs but substitute
My comment was truncated somehow. Anyway, i substituted the cookie crumbs by whizzing a few Danish Butter Cookies in the food processor. Thank you!
Hey I was just trying to figure out how many bread crumbs you need I couldn’t figure it out and I just need to find the substitute for bread crumbs because I have an assignment where I have to make a recipe that incorporates waffles into another culture food but you know, those darn measurements