Red Velvet Cupcakes with Cream Cheese Frosting
This post may contain affiliate links.
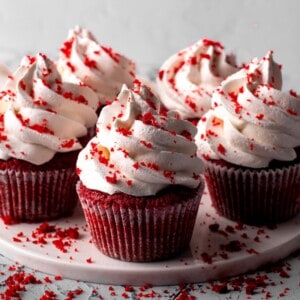
My sweet, celebratory, and perfectly portioned Red Velvet Cupcakes with Cream Cheese Frosting are built for sharing. All the classic cocoa and tangy cream cheese flavor of the beloved layer cake, but with no slicing required!

I originally published this recipe in 2019 and have since updated it with new photos, improved instructions, and extra success tips.
When it comes to Valentine’s Day recipes that’ll steal your heart, red velvet is a tough flavor to beat. From these red velvet cupcakes and red velvet cheesecake cake to red velvet truffles and red velvet chocolate chip cookies, there are plenty of ways to get in on the chocolatey, ruby-hued fun.
Why You’ll Love This Homemade Red Velvet Cupcakes Recipe

- As they say, there’s safety in numbers. With over 1.5 million views and more than 24,000 likes on my accompanying YouTube video recipe, it’s safe to say that these sweet treats are a real crowd-pleaser!
- I’m the kind of person that shows my love through food and edible gifts. Making a batch of these deliciously moist red velvet cupcakes is a surefire way to make their recipients feel extra special.
- If you love the flavor and texture of classic red velvet cake with cream cheese frosting but don’t want to fuss with a layer cake, these cupcakes are the perfect low-lift solution. There’s no fiddling with trimming the layers, doing a crumb coat, or needing a cake table. Just bake, pipe on a swirl of fluffy icing, and dig in!
Ingredients & Substitutions

- All-Purpose Flour – Also known as “plain flour.” Cake flour will work, too!
- Unsweetened Cocoa Powder – Feel free to use any variety you prefer. Conventional will give you the most classic flavor, while Dutch-processed offers a smoother, less tangy alternative.
- Baking Soda – Not to be confused with baking powder, this is what helps our cupcakes rise to perfection.
- Salt – Because even sweet treats need a little seasoning!
- Granulated Sugar – You’re welcome to use an equal amount of either pure cane sugar or caster/superfine sugar.
- Butter & Neutral Oil – Using both ensures you get the best of both worlds, rich flavor from the butter and a fluffy consistency from the oil. Any neutral-flavored oil (e.g. canola, vegetable, avocado) will do the trick.
- Large Egg – Make sure to let it come to room temperature for easier mixing. I haven’t tried it, but I think a flax egg (1 tablespoon of flax + 3 tablespoons of water + 5 minutes after stirring to congeal) should work here.
- Buttermilk & White Vinegar – Using both buttermilk and an extra splash of vinegar helps achieve a super soft crumb and red velvet’s signature tang. If you don’t have buttermilk on hand, mix ½ cup of milk (dairy or plant-based) with 1½ teaspoons of acid, then let it rest a few minutes to curdle. White vinegar, apple cider vinegar, or lemon juice all work well.
- Red Food Coloring – I recommend using gel-based food coloring for the most intense pigmentation. You can also swap in natural options like beet powder if you prefer.
- Vanilla Extract – An equal amount of vanilla paste will work, but note that it’ll leave pretty black flecks in your frosting.
- Cream Cheese – Reach for block-style, full-fat cream cheese for the best results. For a slightly lighter option, use Neufchatel cheese. Alternatively, mascarpone can be used for a less tangy, sweeter option.
- Powdered Sugar – Also aptly known as “icing sugar,” this ensures a silky smooth frosting consistency. You can easily make your own by blitzing white sugar and cornstarch/potato starch in a food processor using a 1 cup to 1 tablespoon ratio.
This is just a short review of the ingredients; for the complete recipe, including quantities, scroll down to the recipe card 👇
Buttermilk: What It Is (And Why Red Velvet Cupcakes Love It)
Traditionally, buttermilk was the tangy liquid left behind after churning butter, but most modern buttermilk you’ll find at the store is cultured buttermilk, regular milk that’s been fermented with friendly bacteria to create a thicker texture and a pleasantly tangy flavor. It’s not super sour, but it has enough bite to make baked goods taste richer and more balanced.
How? First, it adds moisture and helps create a soft, tender crumb. Second, its natural acidity reacts with baking soda, helping your cupcakes rise properly while keeping them light and fluffy. The gentle tang also enhances the cocoa and vanilla flavors in red velvet, giving the cupcakes that classic “red velvet” taste that’s hard to describe but easy to love.
Buttermilk Substitutes (When You Don’t Have Any)
Buttermilk is a “secret weapon” ingredient that makes red velvet cupcakes taste extra special. But, if there’s no buttermilk in the fridge? Don’t fret. Here are some easy options that’ll do the trick:
- Milk + Acid: Mix 1 cup milk + 1 tablespoon vinegar or lemon juice, then let it sit for 5-10 minutes before using. It will thicken slightly and mimic the acidity of buttermilk.
- Powdered Buttermilk: A pantry-friendly option that’s great for baking. Follow the package instructions (some brands have you mix it with the dry ingredients and add water separately).
- Plain Kefir: This drinkable yogurt is very similar to buttermilk, but has a tangier, less salty flavor.
- Plain Yogurt or Sour Cream (Thinned): Mix with a splash of milk to create a pourable consistency. This works well when you want extra richness and moisture.
How to Make Red Velvet Cupcakes From Scratch
Watch the full video recipe to learn how to make the BEST Red Velvet Cupcakes with Cream Cheese Frosting.
Prefer the written recipe? Scroll down to the recipe box 👇
Optional Variations & Dietary Adaptations
- Vegan Red Velvet Cupcakes – Use non-dairy milk mixed with acid (instructions in the ingredients section above), vegan butter or neutral oil, and use a flax egg. Finish with a vegan cream cheese frosting made with plant-based cream cheese.
- Gluten-Free Red Velvet Cupcakes – Replace the all-purpose flour with a 1:1 gluten-free baking flour blend (look for one that includes xanthan gum). The cupcakes will still bake up soft and tender, but be sure not to overmix the batter, and let it rest for 30 minutes before baking to help the flour hydrate.
- Stuffed Red Velvet Cupcakes – Turn them into a surprise-center treat by filling them after baking! Once the cupcakes are cool, cut out a small core and fill with cream cheese frosting, chocolate ganache, or raspberry jam, then pop the top back on and frost as usual. It’s an easy upgrade that makes them feel extra celebratory.


Expert Tips & Tricks
- Don’t overmix once the flour goes in. Mix just until combined; overmixing can make cupcakes dense or tough instead of light and fluffy.
- Measure flour the right way. If you don’t have a kitchen scale, spoon flour into your measuring cup and level it off. Too much flour is one of the quickest ways to end up with dry cupcakes.
- Use gel food coloring for the boldest red. Gel coloring gives you a vibrant red velvet look without needing to add a lot of liquid to the batter.
- Fill the cupcake liners evenly. Aim for about ⅔ full so they rise nicely without overflowing.
- Bake just until set. The tops should spring back lightly when touched, and a toothpick should come out with a few moist crumbs (not wet batter). Overbaking = dry cupcakes = 💔.
- Cool completely before frosting. Even slightly warm cupcakes will melt cream cheese frosting and make it slide right off.
- For neat frosting, chill the frosting briefly. If your cream cheese frosting feels too soft, refrigerate it for 15-20 minutes so it pipes and spreads more cleanly.
- Want extra moisture? Don’t skip the buttermilk + vinegar combo. The acidity helps tenderize the crumb and gives red velvet that classic subtle tang.

Storage & Reheating
- Room Temperature: Unfrosted cupcakes can be stored in an airtight container at room temperature for up to 2 days.
- Refrigerator: Once frosted, store the cupcakes covered in the refrigerator for 4-5 days, then bring them back to room temperature before serving for the best texture and flavor.
- Freezing: You can freeze red velvet cupcakes for up to 2-3 months. For best results, freeze them unfrosted. Let the cupcakes cool completely, then wrap each one tightly in plastic wrap and place in a freezer-safe bag or container.
- To thaw: Unwrap and thaw at room temperature for 1-2 hours, or thaw overnight in the fridge. Once thawed, frost and serve.
- Freezing frosted cupcakes (optional): It works, but the frosting texture can change slightly. Freeze cupcakes on a tray until the frosting is firm, then wrap and store. Thaw in the fridge, then bring to room temp before serving.


More Red Velvet Recipes
More Cupcake Recipes
Red Velvet Cupcakes with Cream Cheese Frosting
Ingredients
For the cupcakes:
- 1¼ cups (155 g) All-purpose flour
- 1½ tablespoons (12 g) Cocoa powder
- ½ teaspoon Baking soda
- ½ teaspoon Salt
- ¾ cup (150 g) Sugar
- ¼ cup (60 g) Butter
- ½ cup (120 ml) Vegetable oil
- 1 Egg large
- ½ cup (120 ml) Buttermilk room temperature
- ½ teaspoon White Vinegar
- 1 teaspoon Red food coloring or more if needed
- 1 teaspoons Vanilla extract
For the frosting:
- ¼ cup (100 g) Butter, softened, unsalted
- 8 oz (225 g) Cream cheese Room temperature
- 2 cups (250 g) Powdered sugar
- ½ teaspoon Vanilla extract oe vanilla bean paste
Instructions
- Prepare the pan & oven: Preheat oven to 350°F (180°C). Line a muffin tin with cupcake liners.
- Mix the dry ingredients: In a bowl, whisk together the flour, cocoa powder, baking soda, and salt. Set aside.
- Cream butter & sugar: In a large bowl, beat the butter and sugar until smooth and slightly fluffy.
- Add wet ingredients: Beat in the egg, then add the oil, buttermilk, vinegar, vanilla, and food coloring. Mix until fully combined.
- Combine: Add the dry ingredients in two additions, mixing just until smooth (do not over-mix).
- Fill & bake: Divide the batter between cupcake liners (about ¾ full). Bake for 18–20 minutes, or until a toothpick comes out clean.
- Cool completely on a wire rack.
- Make the frosting: In a mixing bowl, beat the butter and cream cheese until smooth and creamy, about 3–4 minutes. Add powdered sugar and vanilla and beat until thick, smooth, and pipeable.
- Transfer to a piping bag and pipe or spread onto cooled cupcakes.
Video
Notes
- Don’t skip the buttermilk: It reacts with baking soda and vinegar to create a soft, tender crumb, a classic “red velvet” flavor, and a better color.
- Vinegar: The vinegar reacts with the baking soda and buttermilk, helping the cupcakes rise higher, stay softer and fluffier, and develop a brighter red color — without adding any sour taste.
- Should I add baking powder? You don’t need it, the classic red velvet reaction of buttermilk + vinegar + baking soda already provides enough lift, but if you prefer slightly more dome on top, you can add ¼ teaspoon baking powder (optional).
- Why both oil & butter? Butter adds rich flavor while oil keeps the cupcakes extra moist and soft, together they create a tender, bakery-style crumb that stays fresh longer.
- Storage: Unfrosted cupcakes can be stored in an airtight container at room temperature for up to 2 days; frosted cupcakes should be refrigerated for 4–5 days and brought back to room temperature before serving.
- Frosting stability tips:
- Use full-fat block cream cheese (not spreadable tub)
- Chill frosting 30-60 minutes before piping in warm weather.
- Refrigerate frosted cupcakes if the environment is hot.
- Get more tips: Cream Cheese Frosting Recipe for Cakes & Cupcakes
Nutrition
FAQs
You can fill red velvet cupcakes with cream cheese frosting, chocolate ganache, homemade Nutella, raspberry or strawberry chia seed jam, vanilla pastry cream, or even a hidden Oreo!
Red velvet cupcakes have a mild cocoa-chocolate flavor with a hint of vanilla and a subtle tang from buttermilk and vinegar. They’re not as rich as chocolate cupcakes—more like a soft, slightly chocolatey cake with cream cheese frosting.
The secret to perfect red velvet is balance: just a little cocoa for flavor (not too much), buttermilk + vinegar for its signature tang and tender crumb, and not overmixing or overbaking so it stays soft and moist. And honestly, cream cheese frosting is the finishing touch that makes it taste truly “red velvet”.
")
")

")


They are so soft and yummy, I also love the cream cheese frosting. So good, thank you for the recipe.
Do you have this also in German?
Why no baking powder is added
hi you the best cook and i love your vids and thnks for all the recipes love you
my all-time (and the kids) favorite recipe!