
Best Apple Pie: The Ultimate Guide
This post may contain affiliate links.
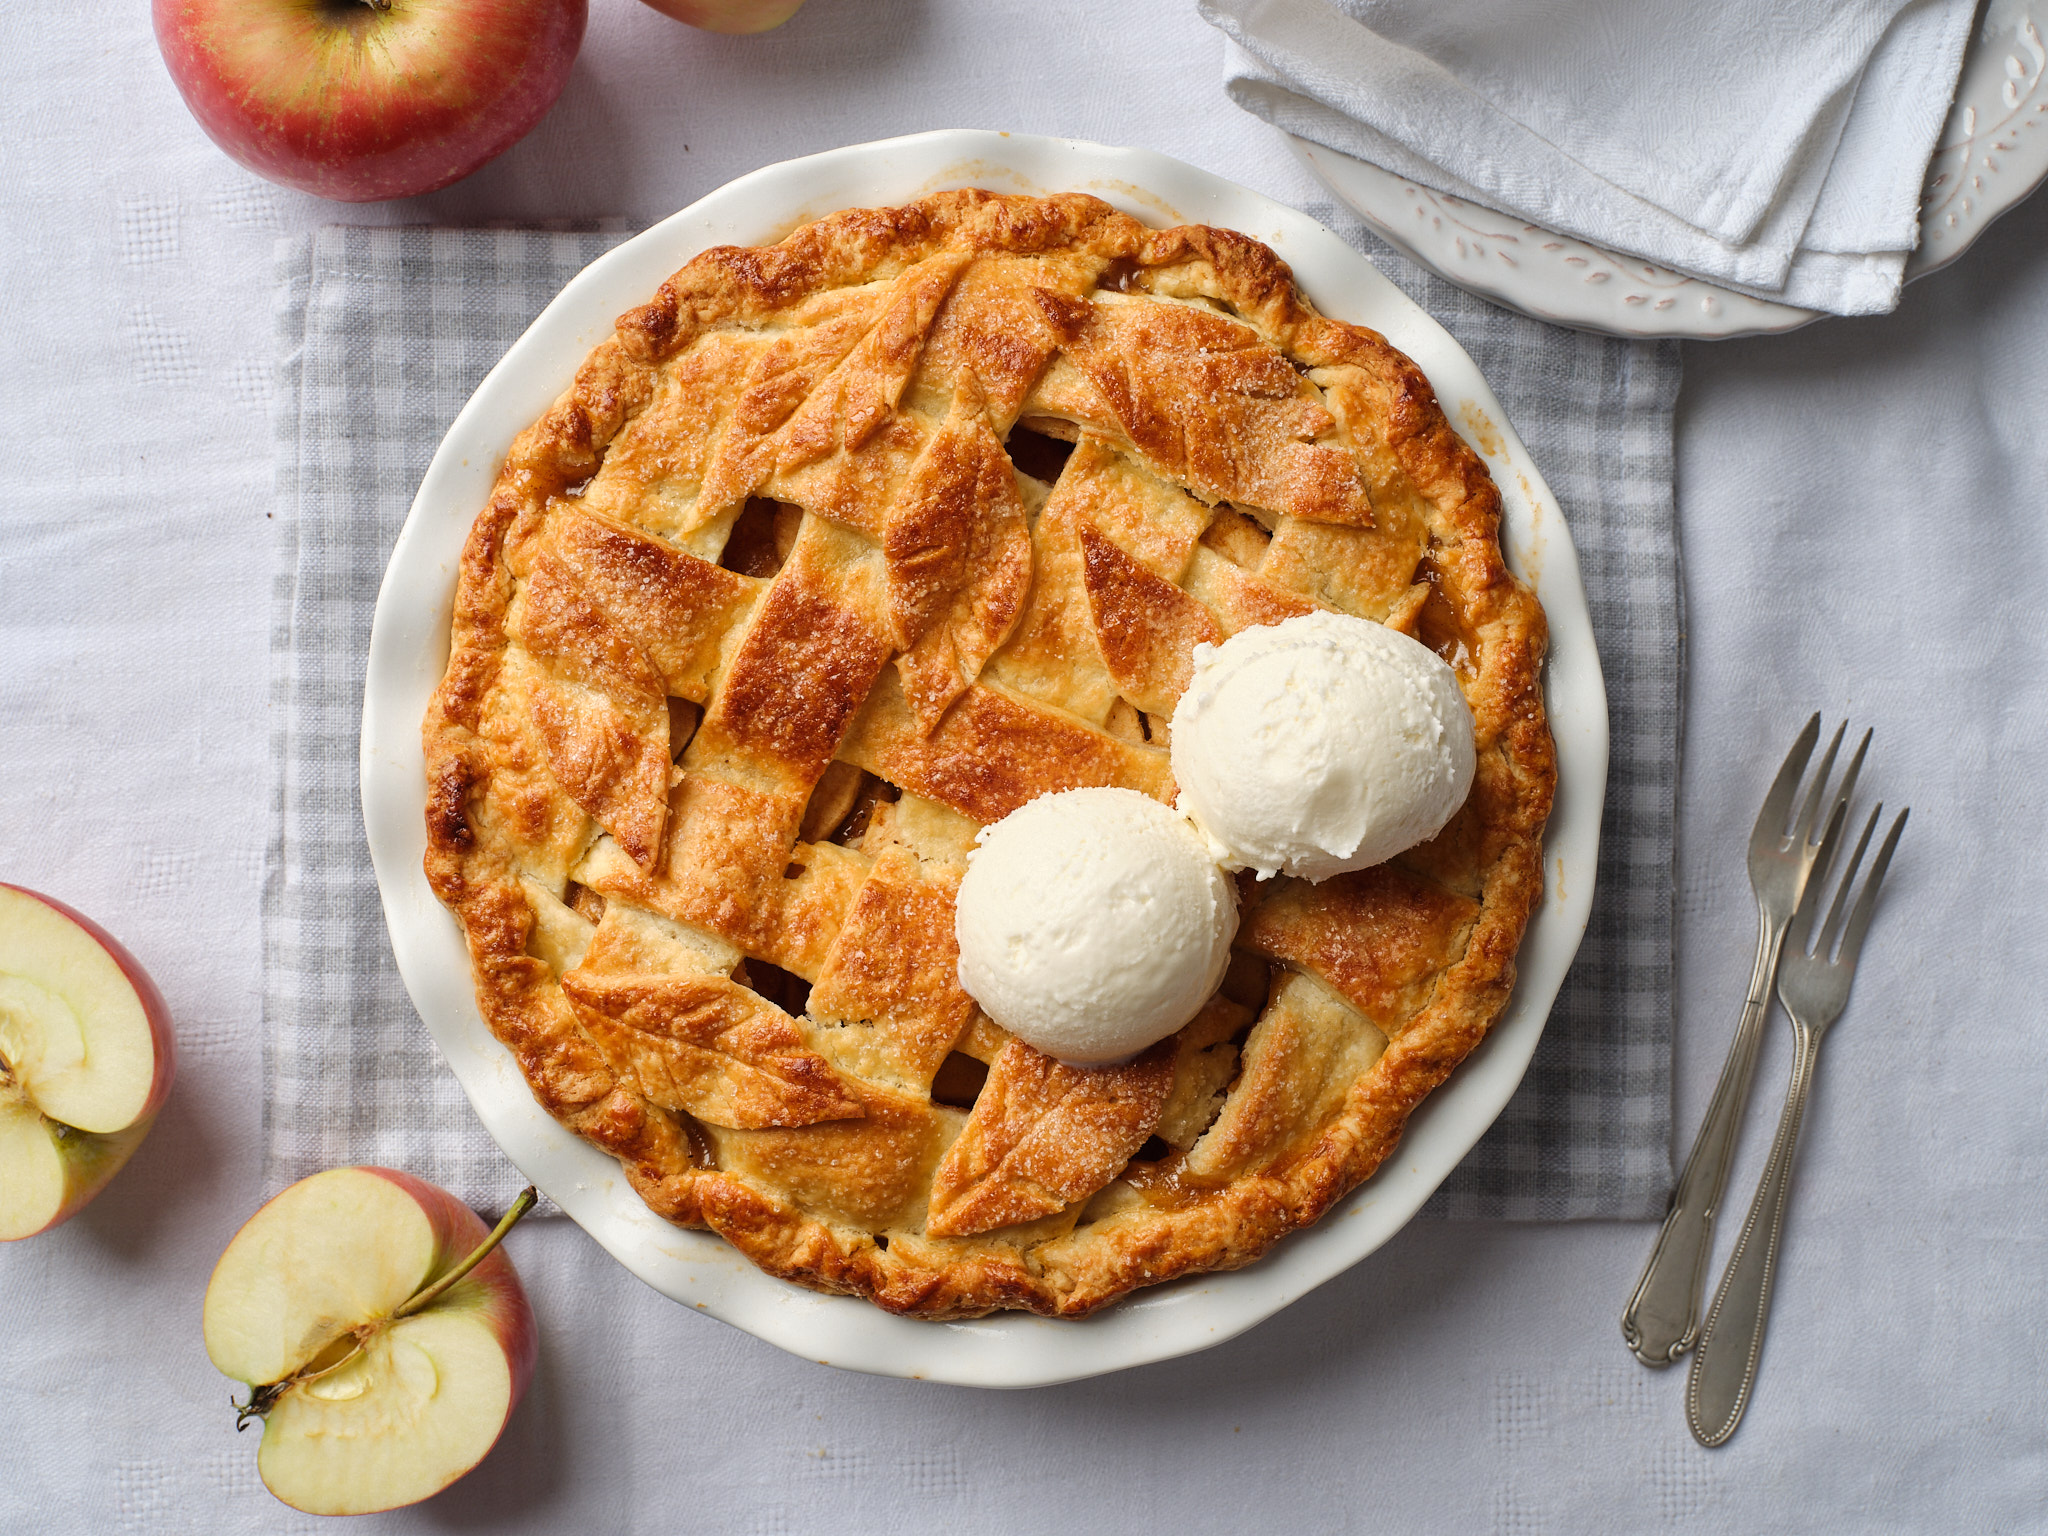
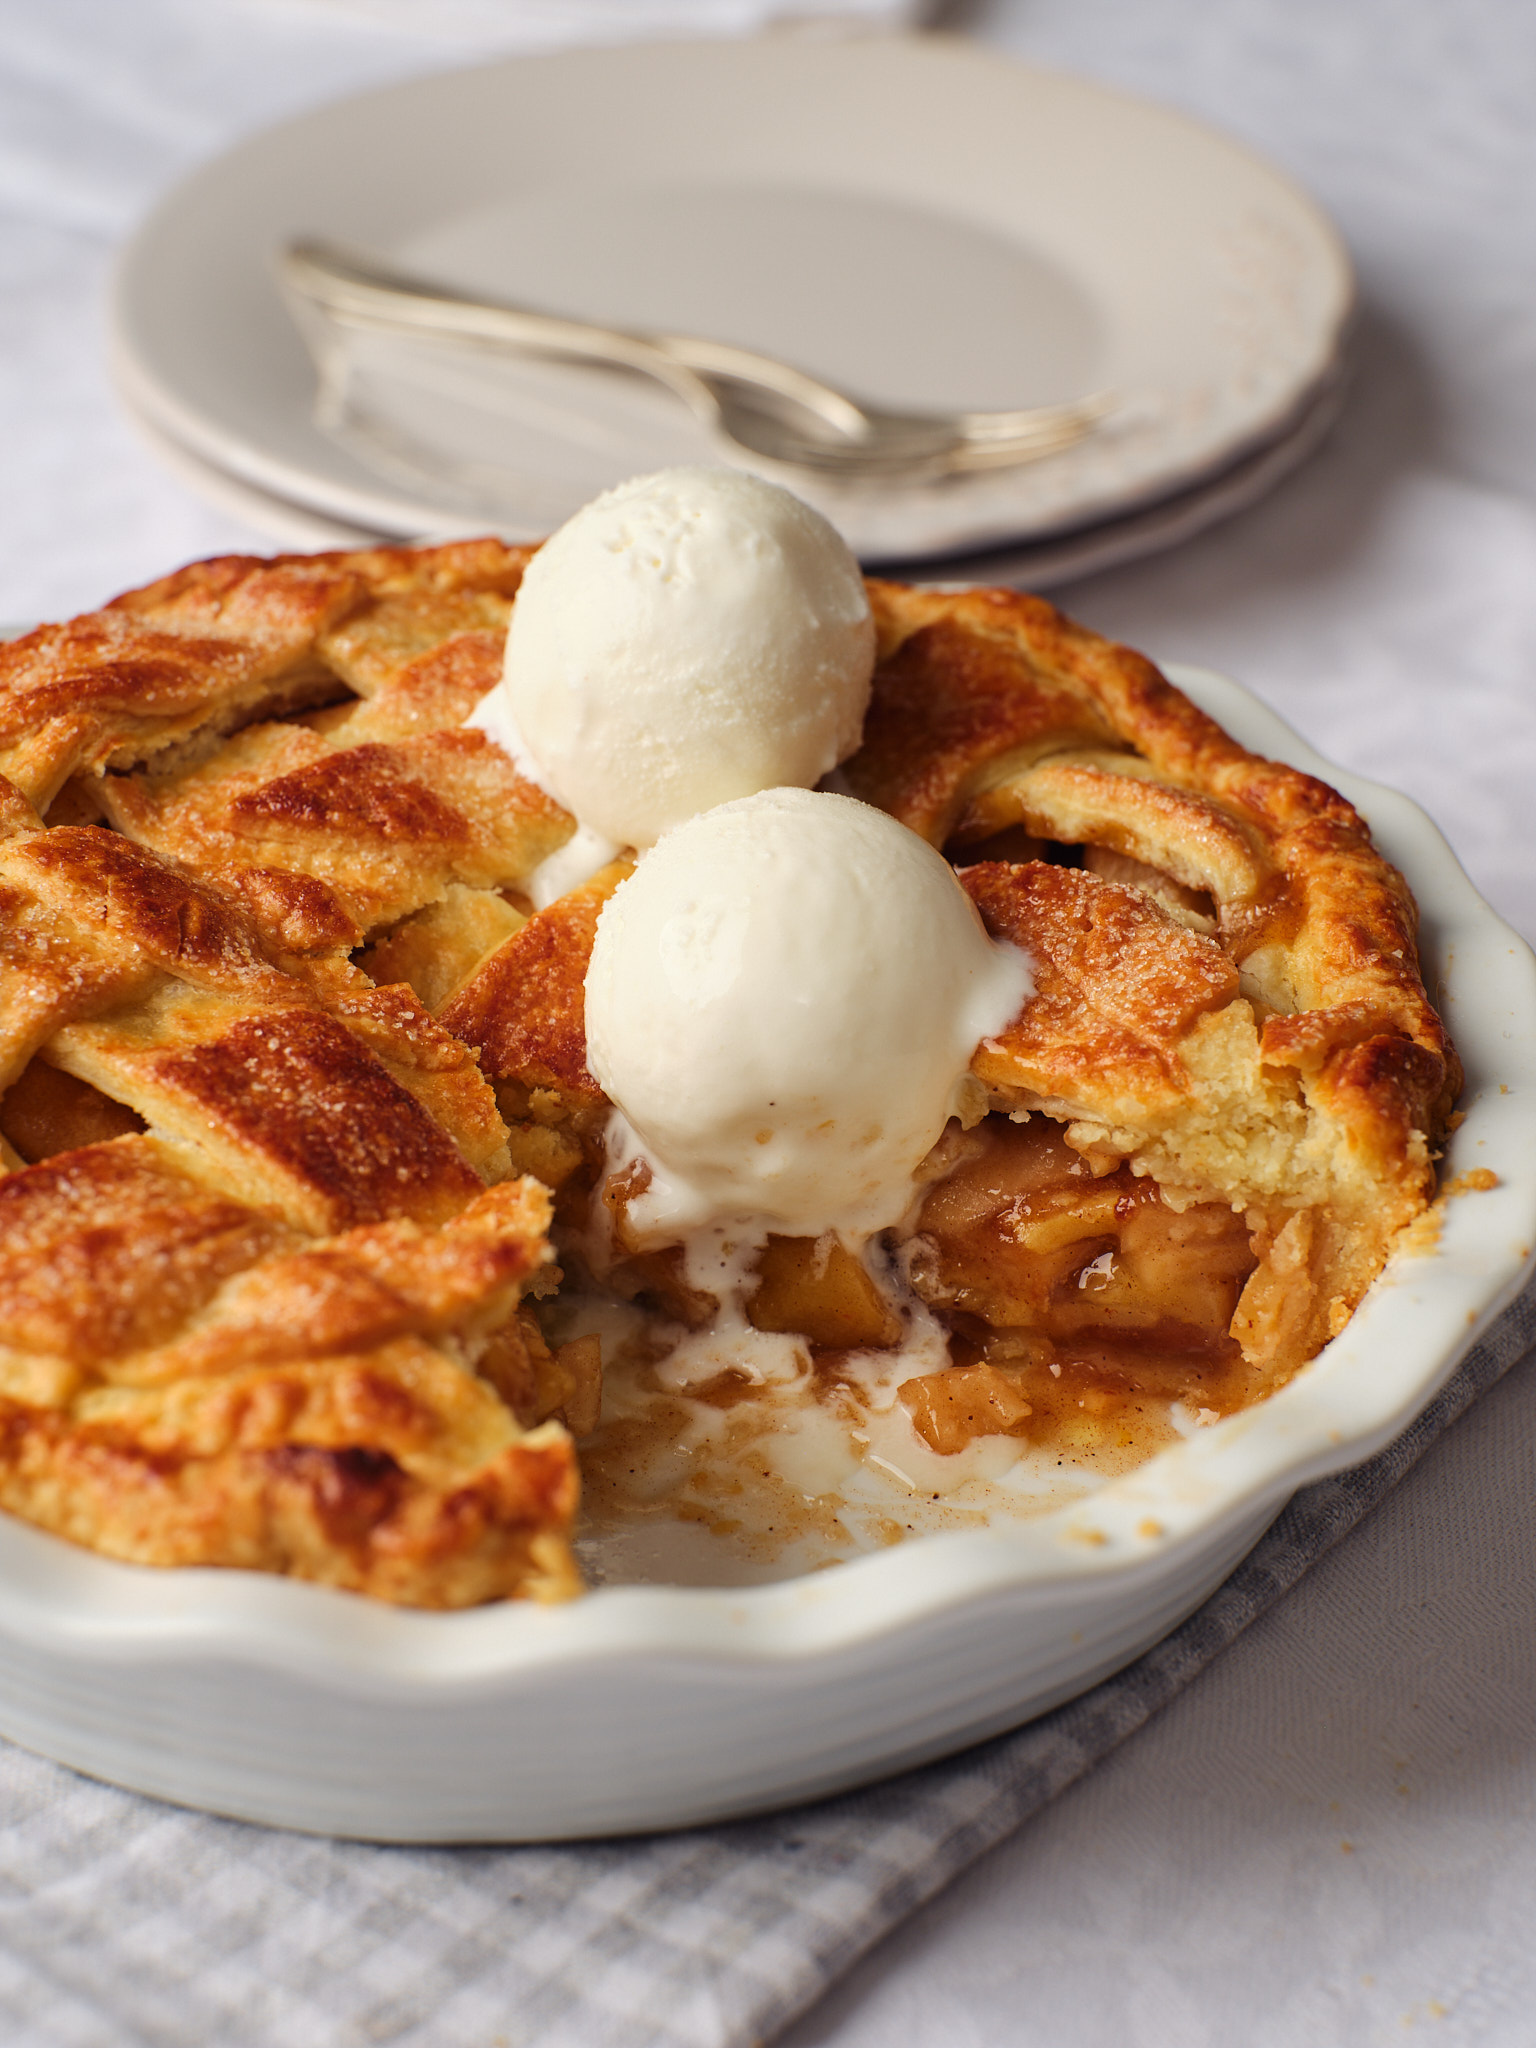
This homemade apple pie has a flaky, buttery crust, tender cinnamon apples, and a golden lattice top. I’ll show you how to make it from scratch, with the little details that help the filling set and the bottom crust bake properly.
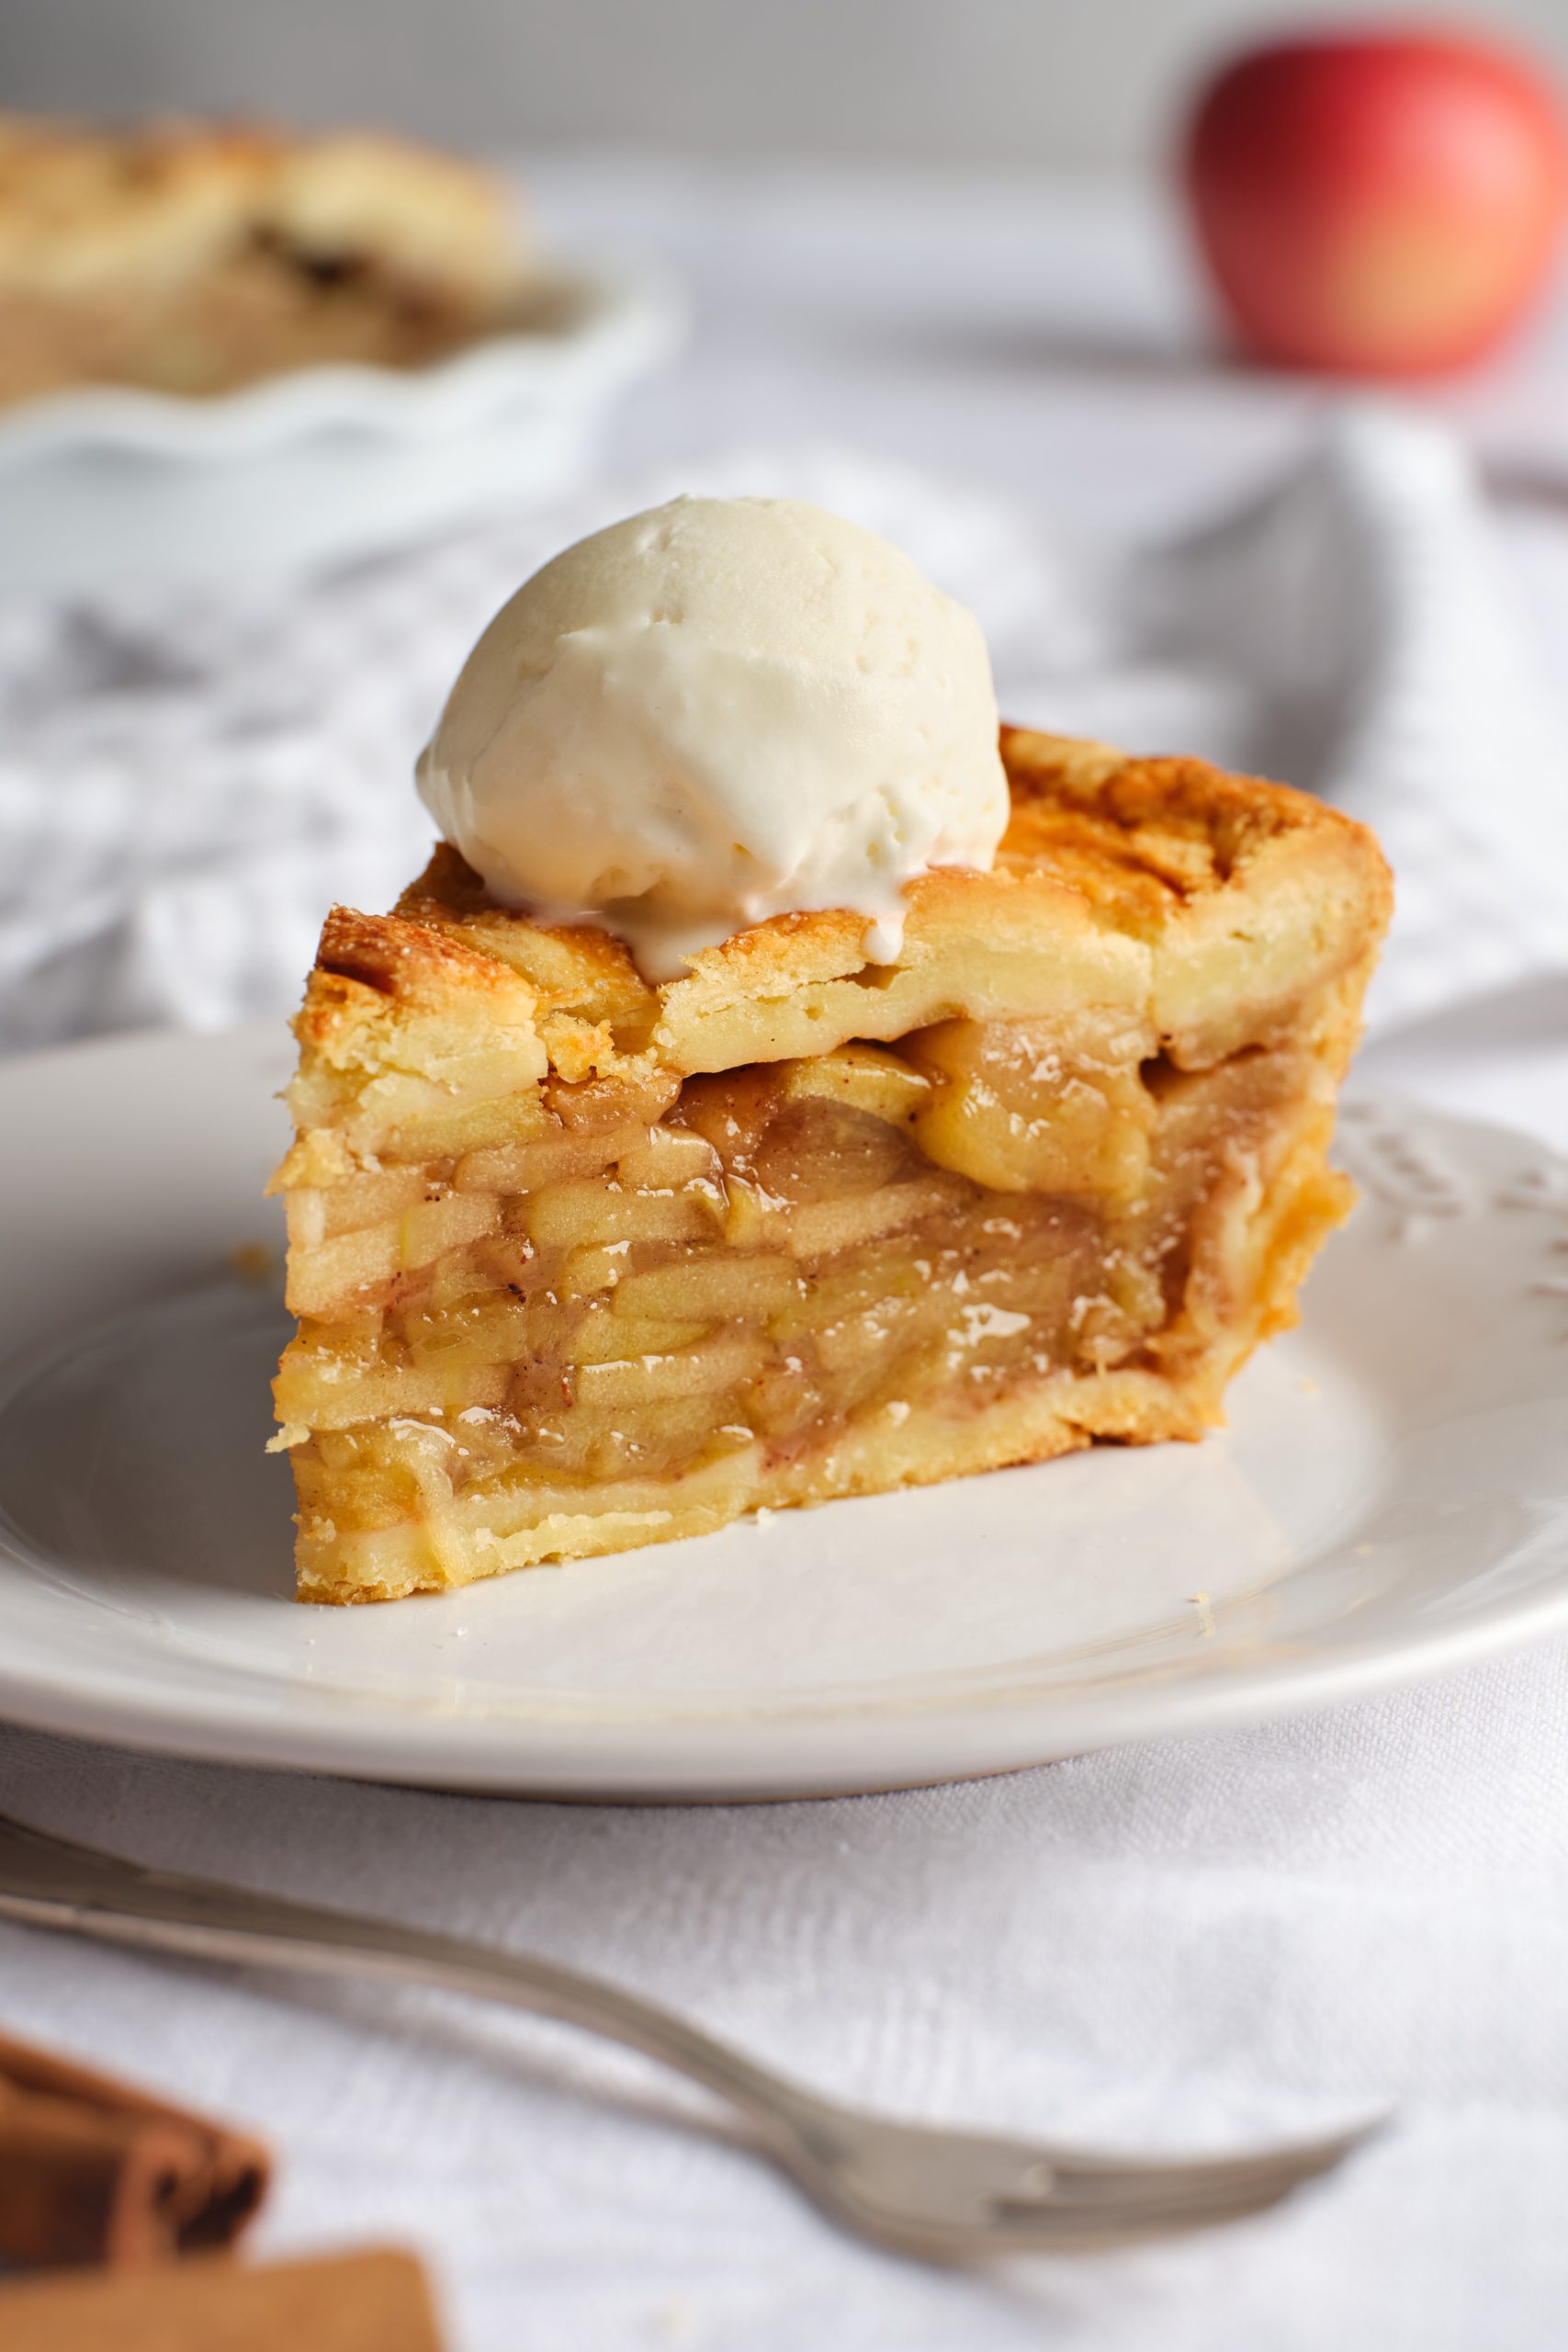
Every baker has their own apple pie. This is my tried-and-tested version, made dozens of times over more than a decade, with a flaky, buttery crust, juicy cinnamon apples, and a little lemon to balance the sweetness.
I’ve put that experience into one complete guide, from how the dough should feel to weaving the lattice and knowing when the filling is ready. Whether it’s your first pie or your fiftieth, I’ll walk you through it.
And if you’re making the most of apple season, explore my apple dessert recipes and fall baking recipes for more ideas.
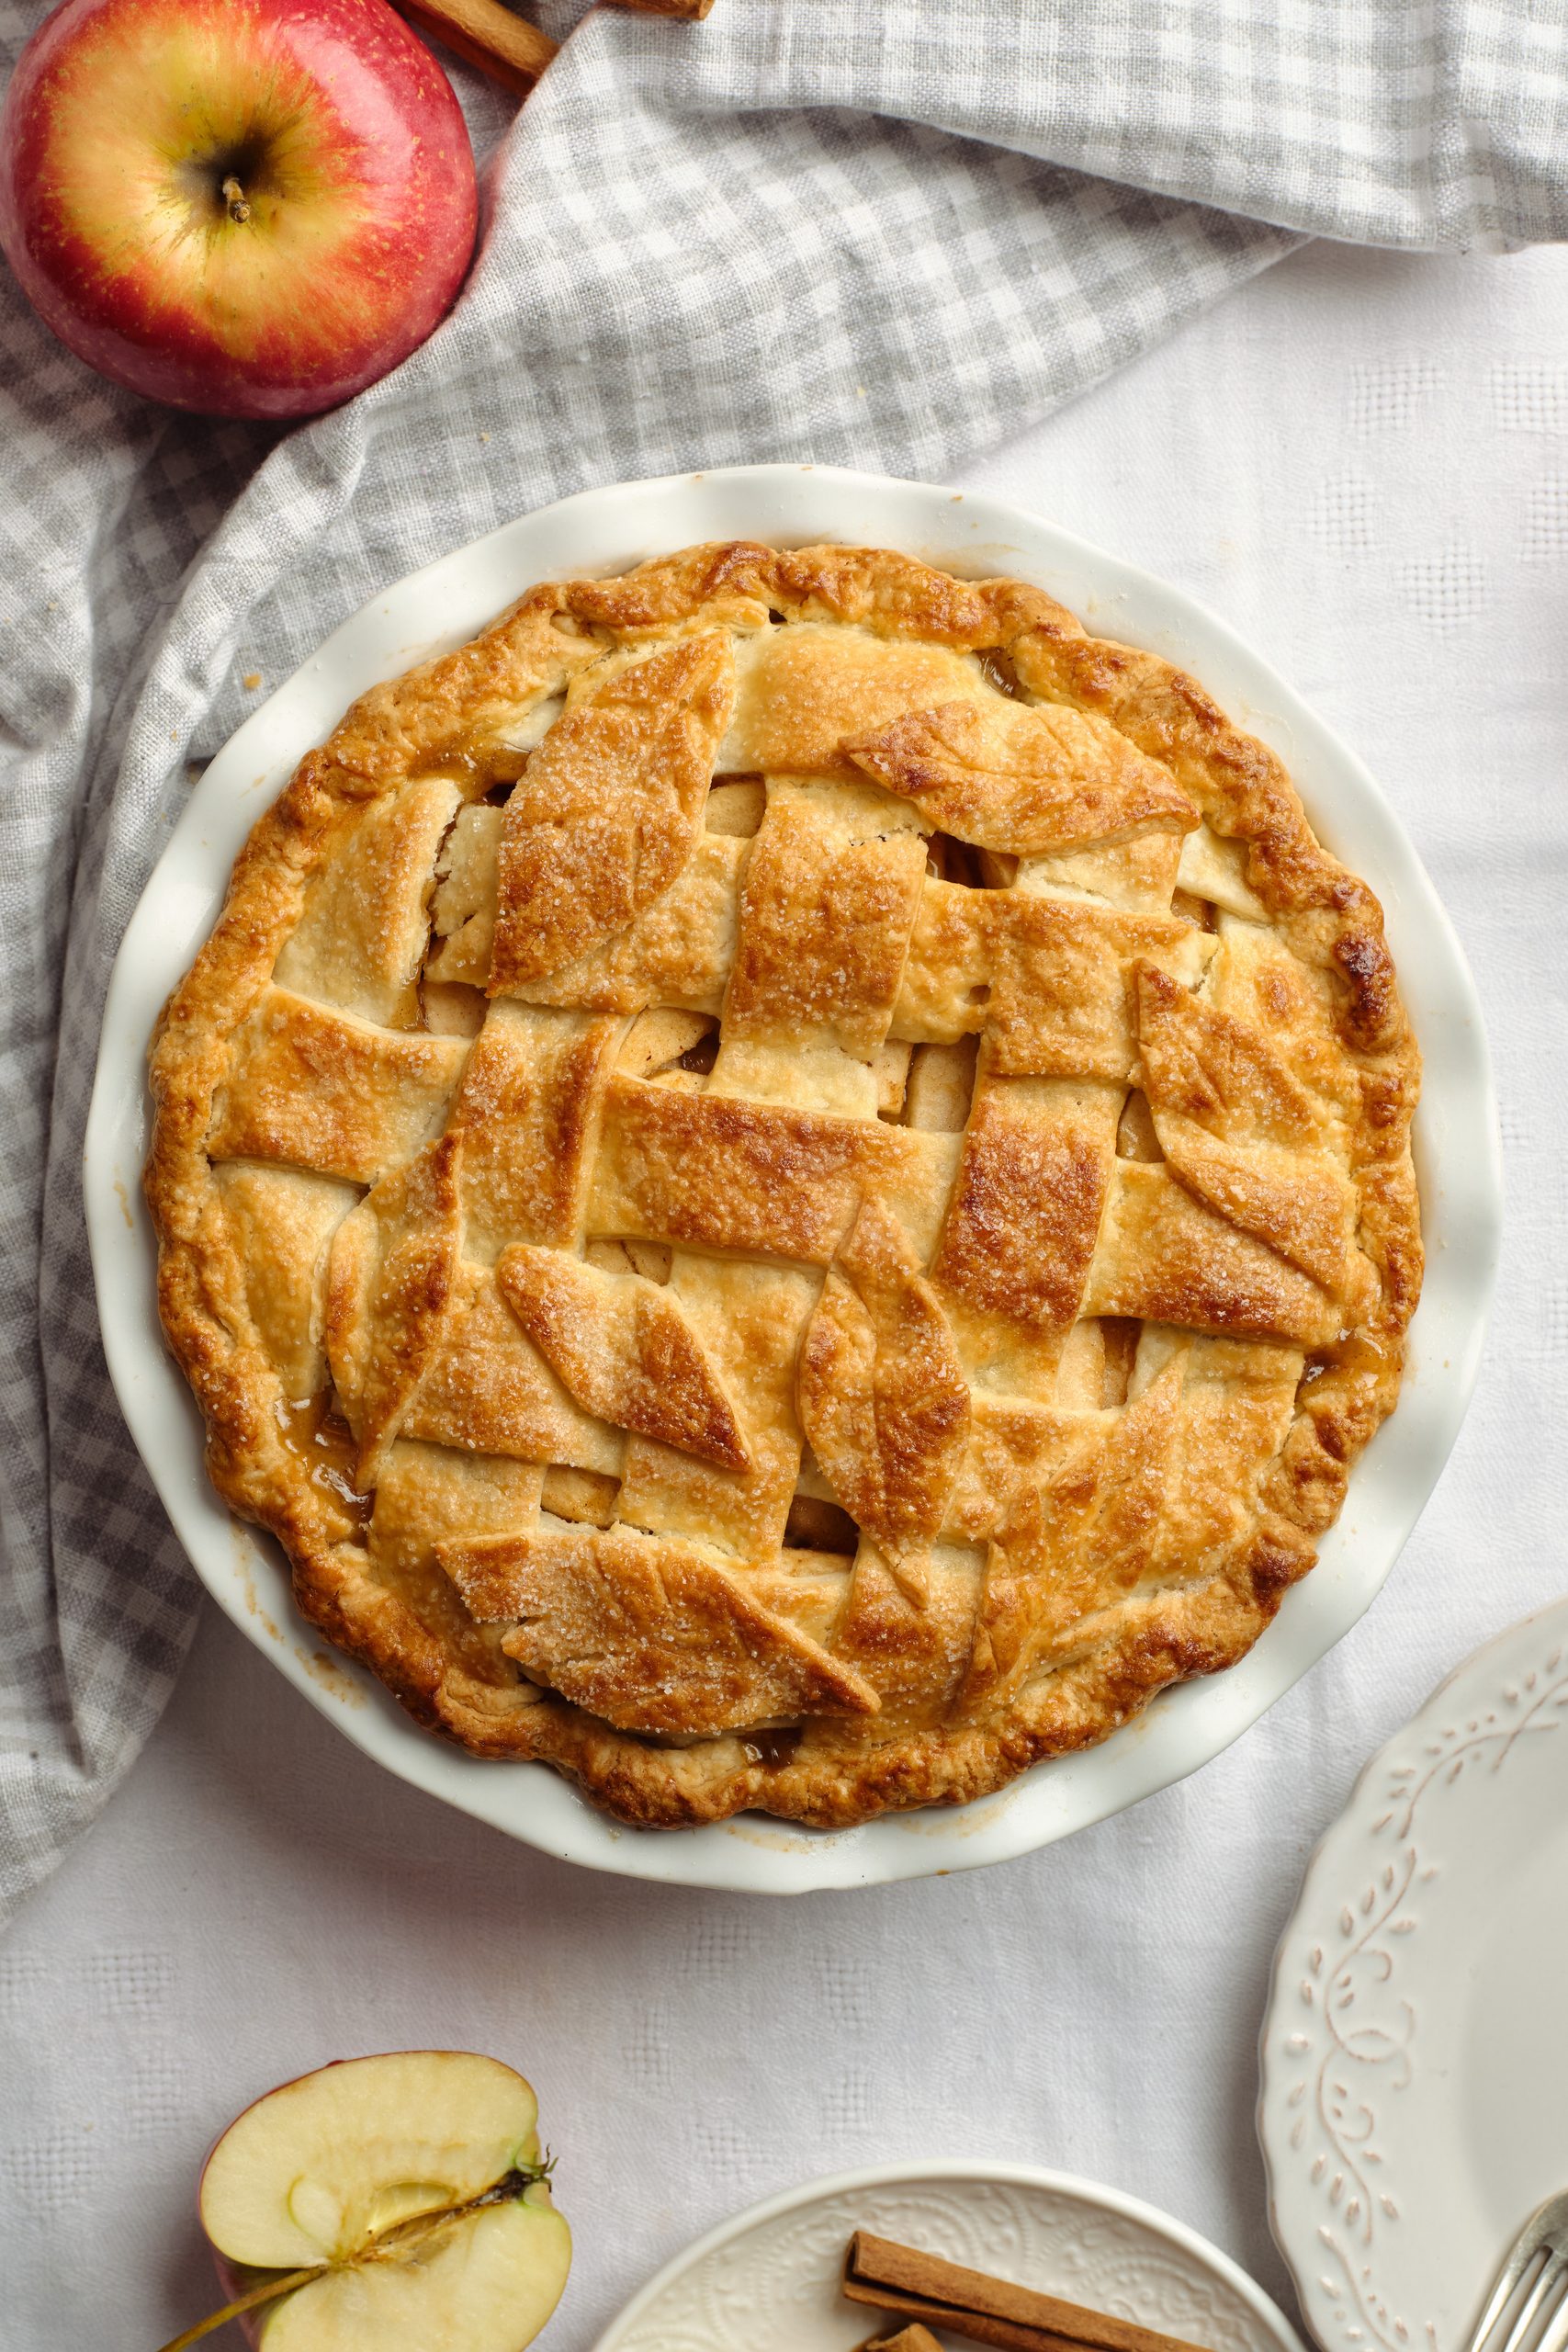
I originally published this recipe in 2018 and have since updated it with new photos, improved instructions, and extra success tips.
Apple Pie Video Tutorial
Watch my full video to see how the dough should look, how I pack the apples, and how to weave the lattice. I especially recommend it if this is your first homemade pie.
Prefer the written recipe? Scroll down to the recipe box 👇
Apple Pie Ingredients & Notes
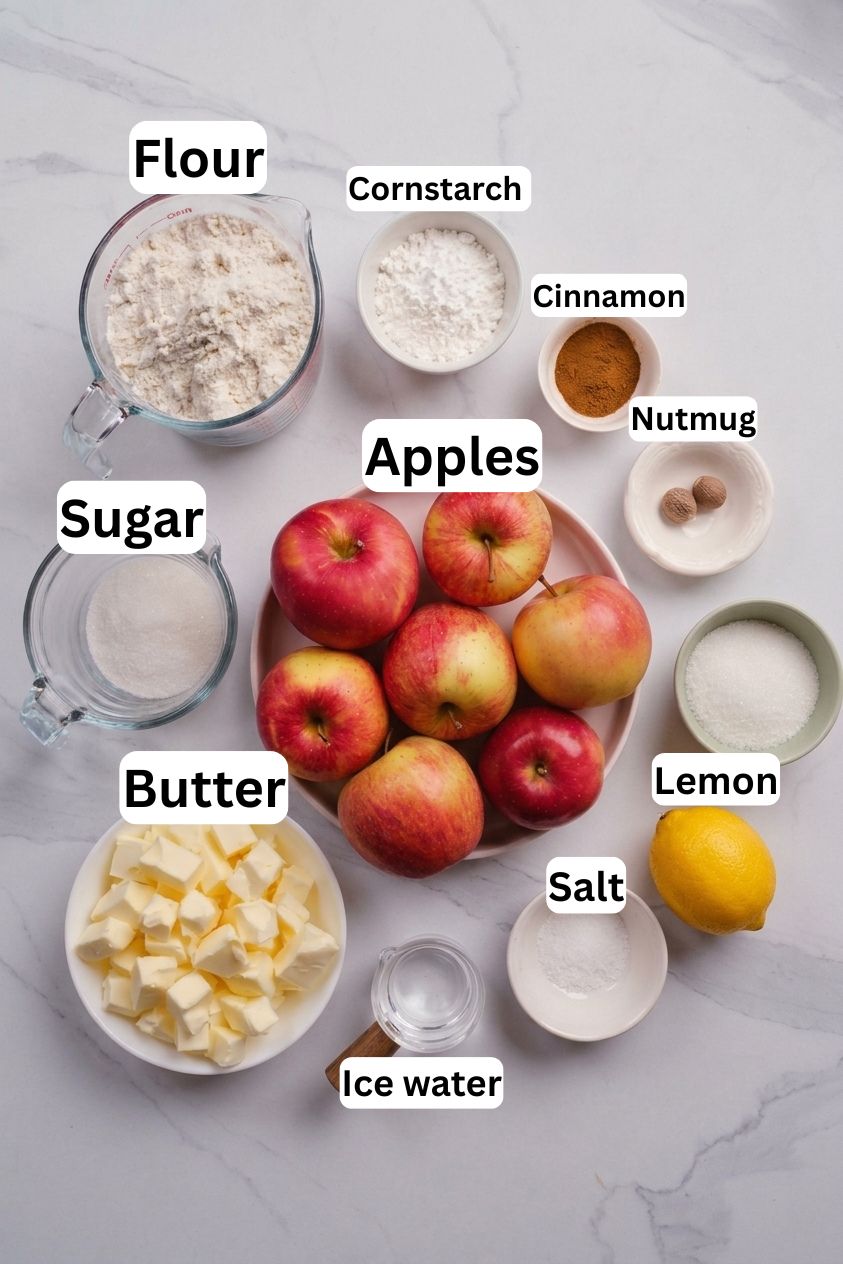
- Apples: Use firm baking apples. The recipe calls for 900 g (about 2 lb) after peeling, coring, and slicing. That’s roughly 6–8 medium apples, but their size varies a lot, so buy a little extra.
- All-purpose flour: This gives the crust its structure. I recommend a kitchen scale for the flour and apples. A packed measuring cup can give you much more flour than you intended, which changes the dough before you’ve even started.
- Cold unsalted butter: You’ll use it in the pastry and dot a little over the filling before adding the lattice.
- Granulated sugar: There’s some in the dough and some in the filling. The coarse sugar on top adds a little crunch.
- Cornstarch: This thickens the juice the apples release during baking. Toss it through thoroughly so it coats the fruit evenly.
- Cinnamon, nutmeg, and salt: A simple combination that gives the filling warmth without burying the apples.
- Lemon juice and zest: These balance the sweetness and brighten the filling.
- Egg and water: Whisked together for a light egg wash over the pastry.
This recipe makes one pie in a 9-inch pie dish. All the quantities are in the recipe card.
Best Apples for Apple Pie
I recommend mixing a tart apple with a sweeter one. You get a more rounded flavor, and you don’t have to rely on extra sugar to balance a very tart filling.
| Apple | What it brings to the pie |
|---|---|
| Granny Smith | Tart flavor and firm slices that hold up well in the oven. |
| Honeycrisp | Sweetness, a little tartness, and a firm texture. A good partner for Granny Smith. |
| Pink Lady, Braeburn, or Jonagold | Other good baking choices with a balance of sweetness and acidity. |
A roughly half-and-half mix of Granny Smith and Honeycrisp is an easy place to start. Taste a piece while you’re preparing the apples; it tells you much more about their sweetness than their color does.
How to Make Apple Pie
I’ve made this apple pie dozens of times over the past decade. The details I always pay attention to are keeping the dough cold, packing the apples closely, and giving the pie enough time to bake and cool.
How to Make Apple Pie Dough
This all-butter dough makes both the bottom crust and the lattice. I recommend using a kitchen scale, especially for the flour, it makes the results much more consistent.
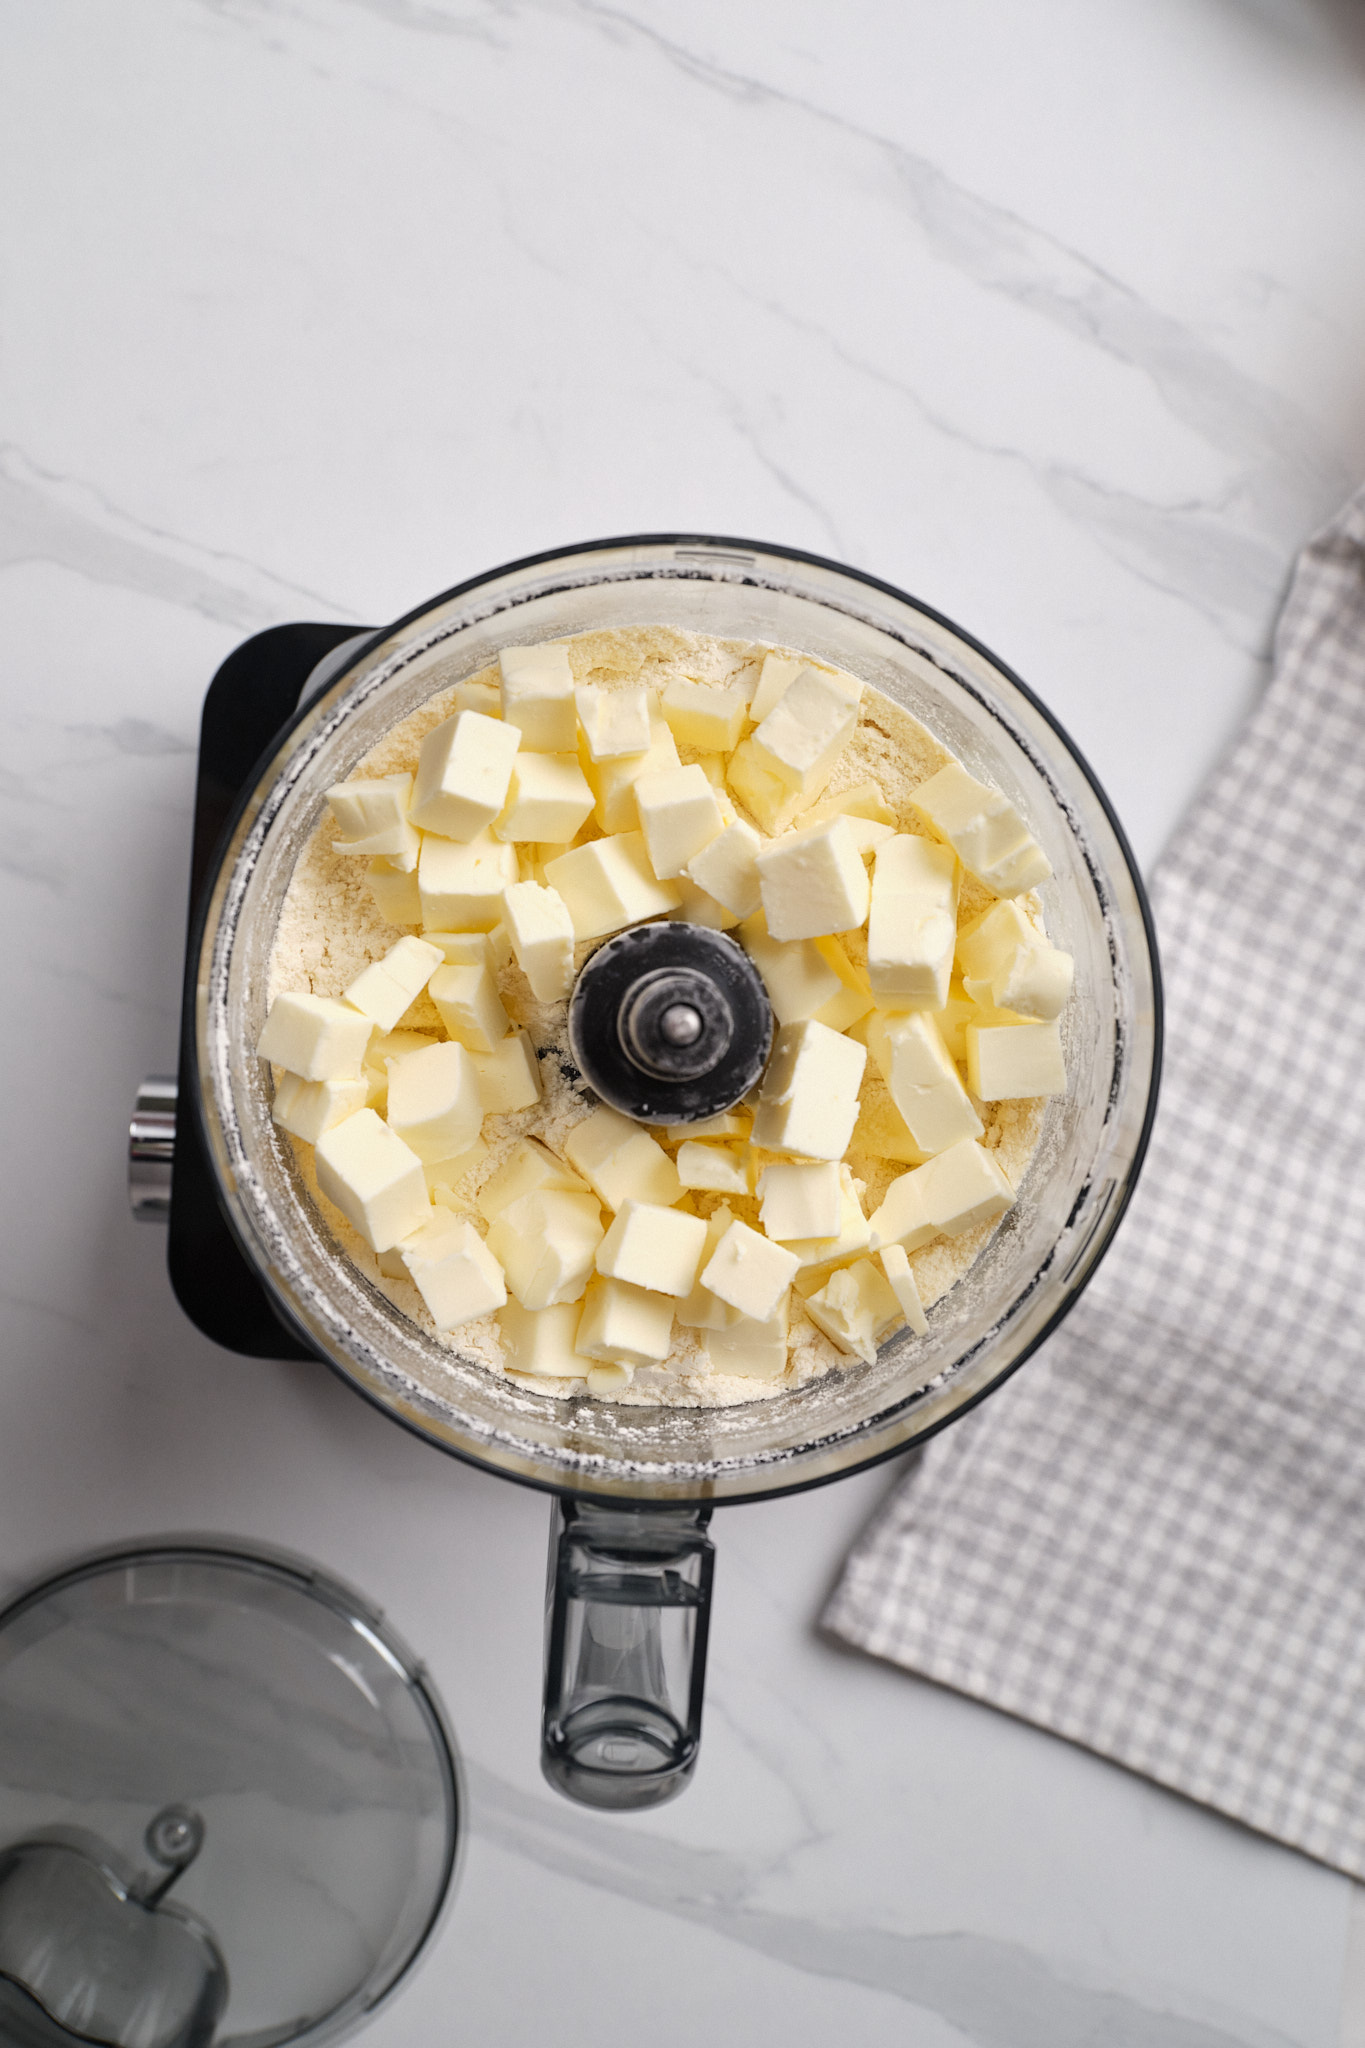
1. Pulse the flour, sugar, and salt in a food processor, then add the cold, cubed butter. Stop when the mixture resembles coarse crumbs with some pea-sized butter pieces remaining. Those pieces help create flaky layers, so don’t blend them away.
2. Start with ¼ cup (60 ml) ice-cold water, adding it gradually while pulsing briefly. Squeeze a little mixture between your fingers: if it holds together, you’ve added enough. If it crumbles apart, add more water 1 teaspoon (5 ml) at a time, up to approximately 80 ml total. Use the chilled water without adding any ice cubes.
The dough should hold when pressed without feeling wet or sticky. Flour absorbs water differently, which is why I give a range rather than asking you to pour everything in.
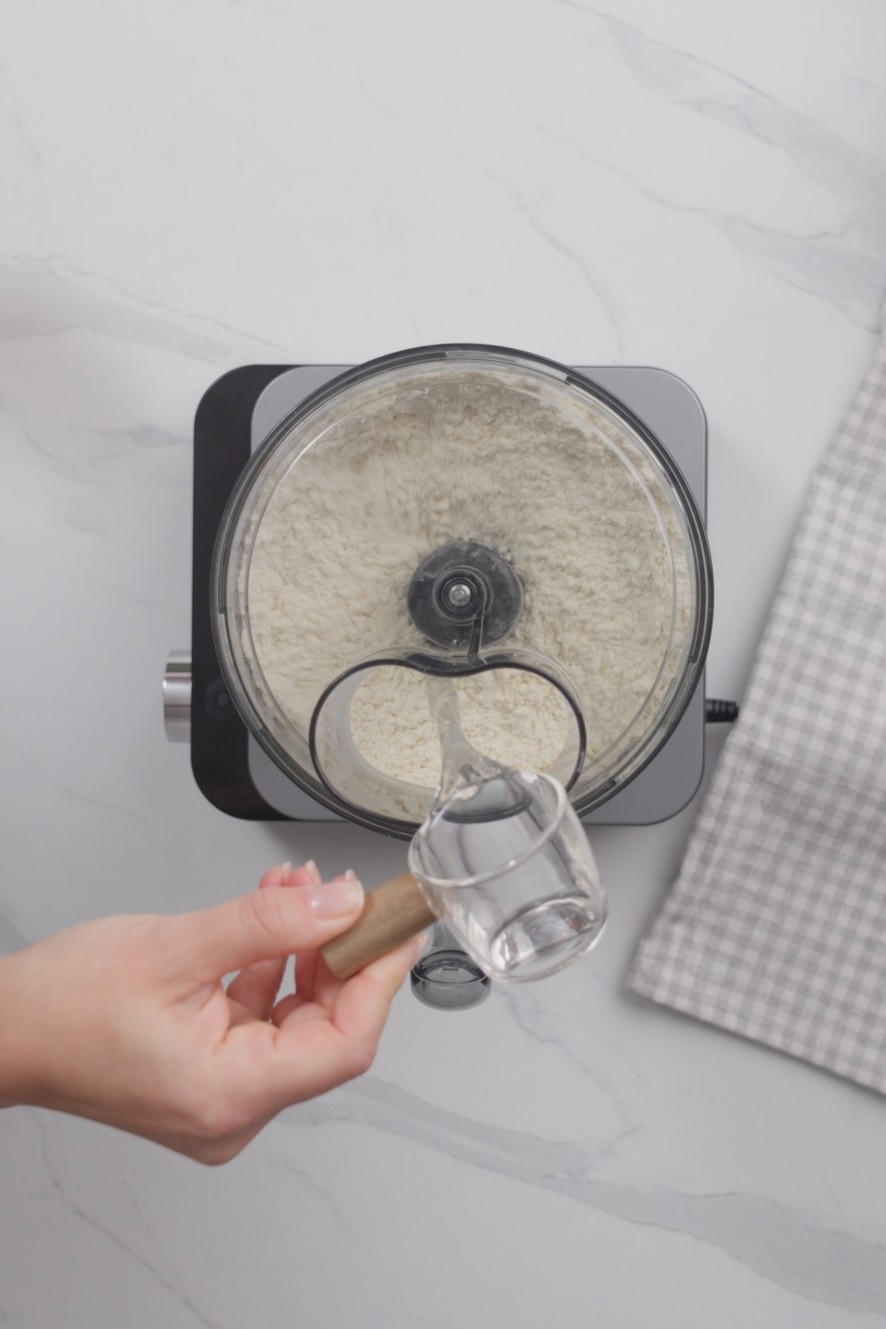
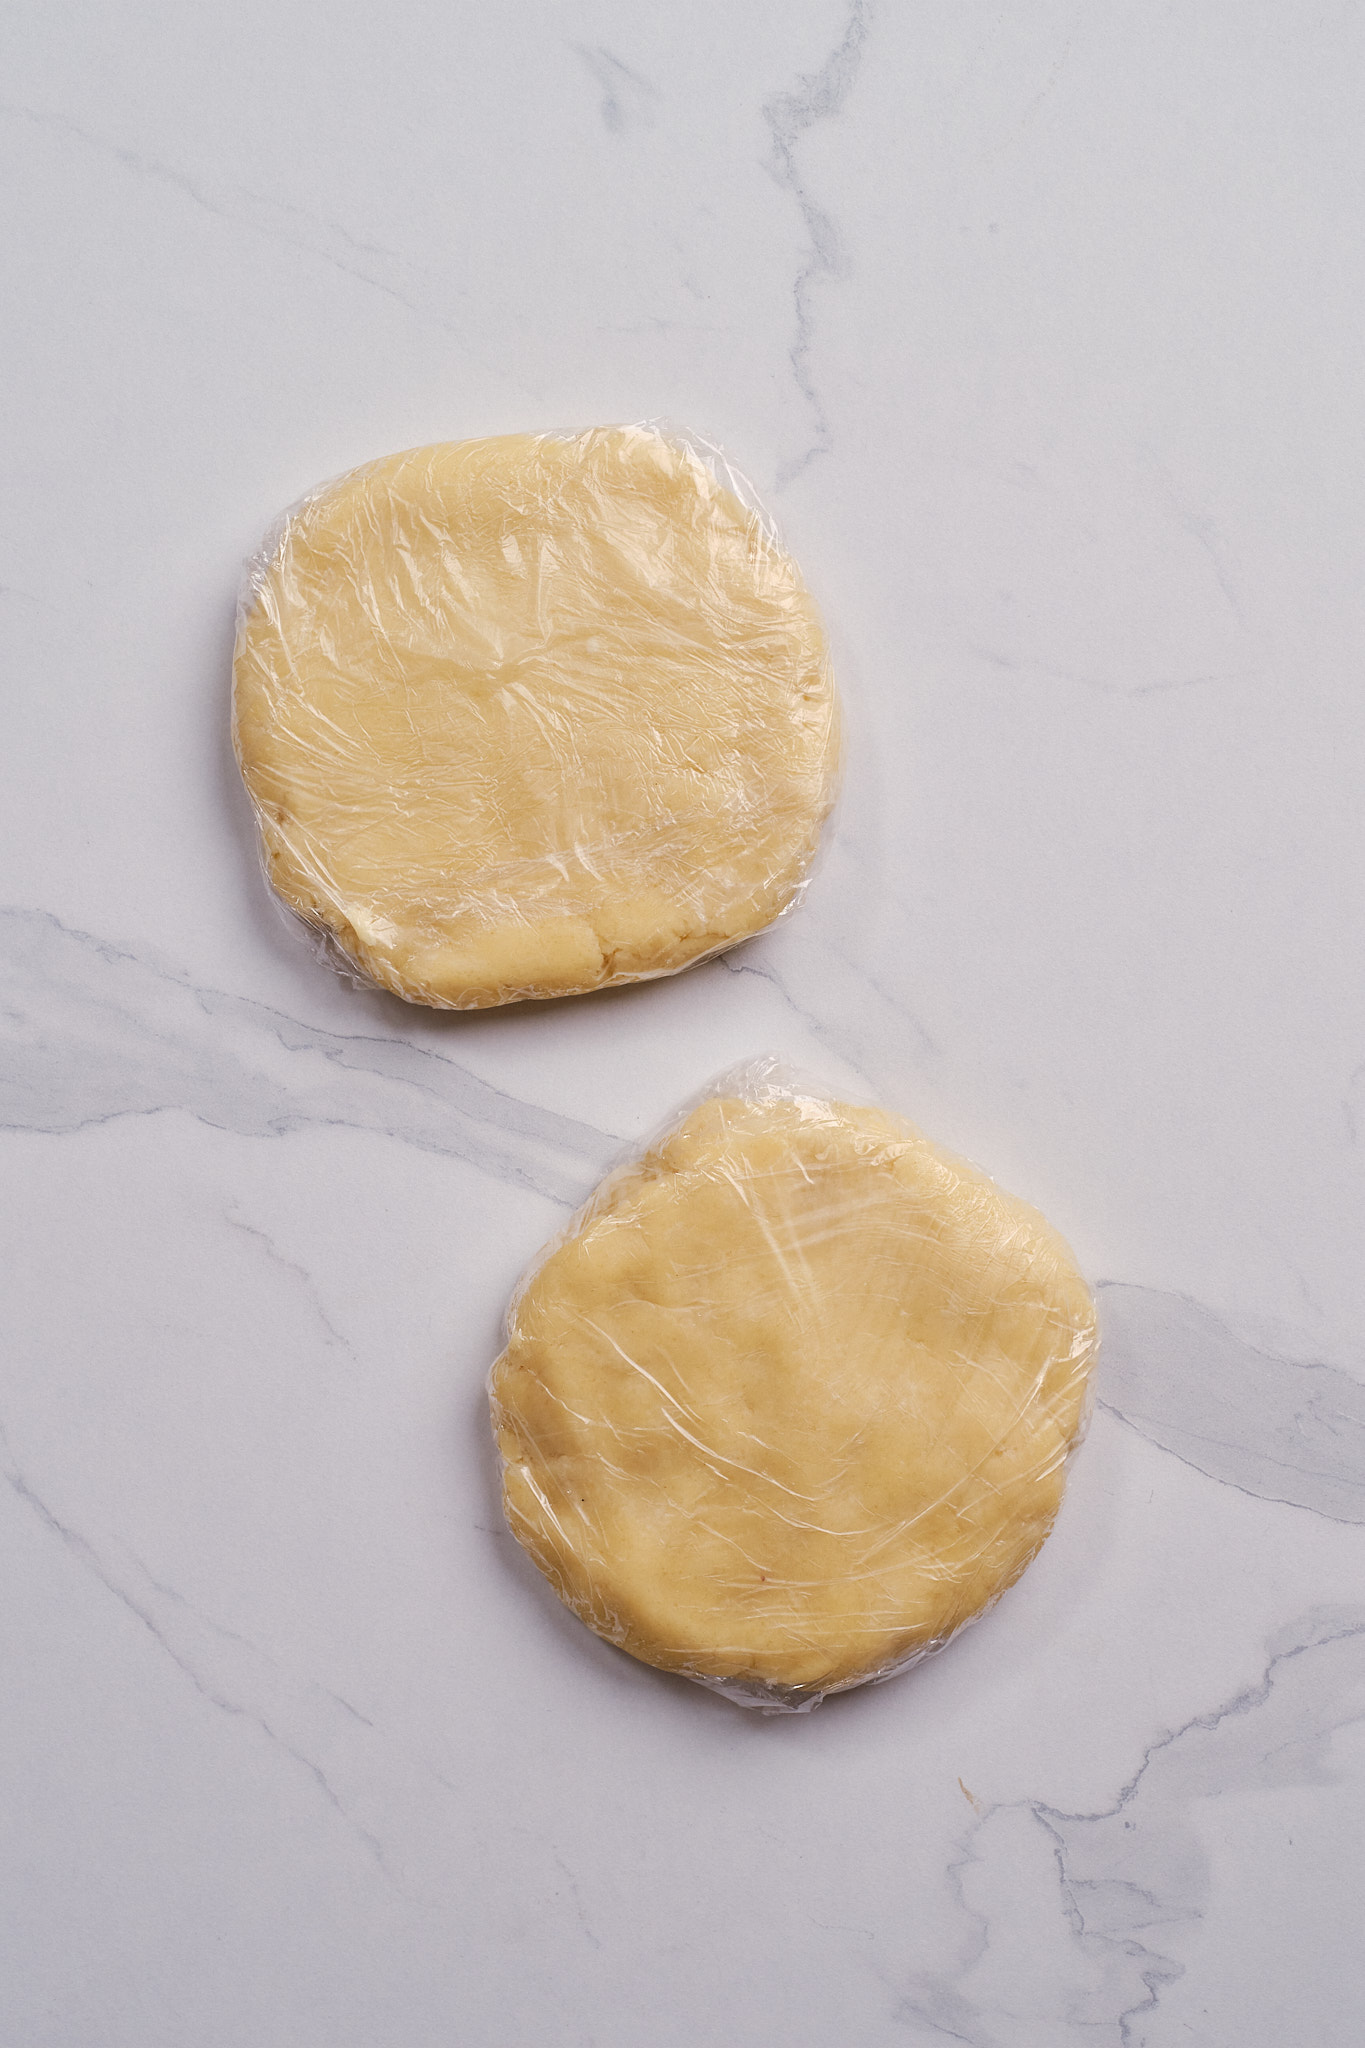
3. Gently gather the dough into two disks, wrap, and refrigerate for at least 1 hour. Roll one disk into an 11–12-inch circle and ease it into a 9-inch pie dish without stretching. Refrigerate while you prepare the filling.
How to Make Apple Pie Filling
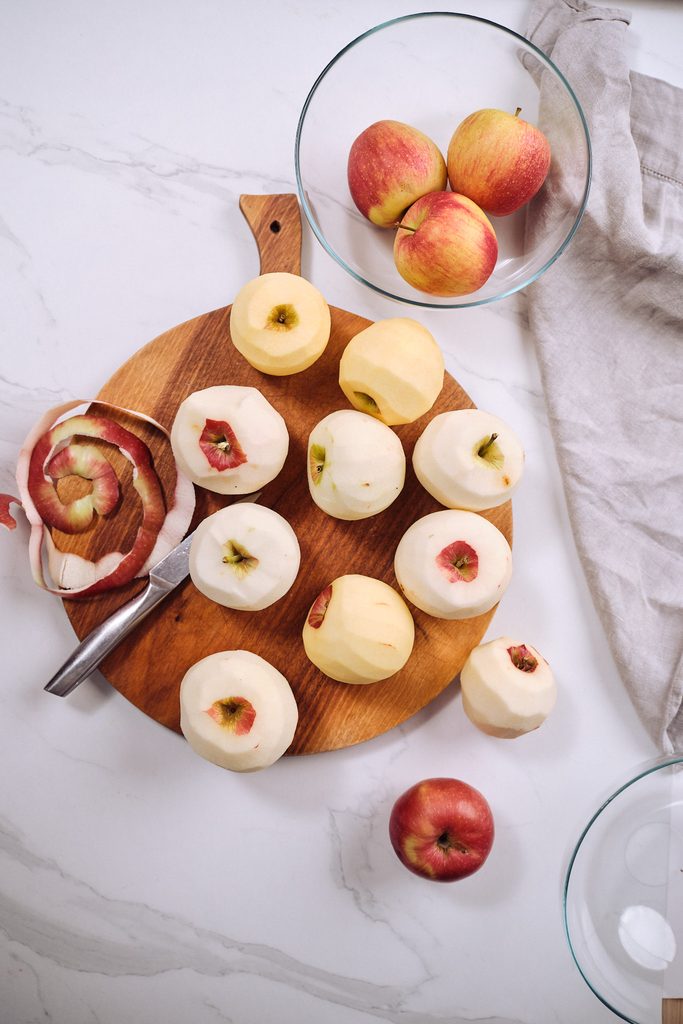
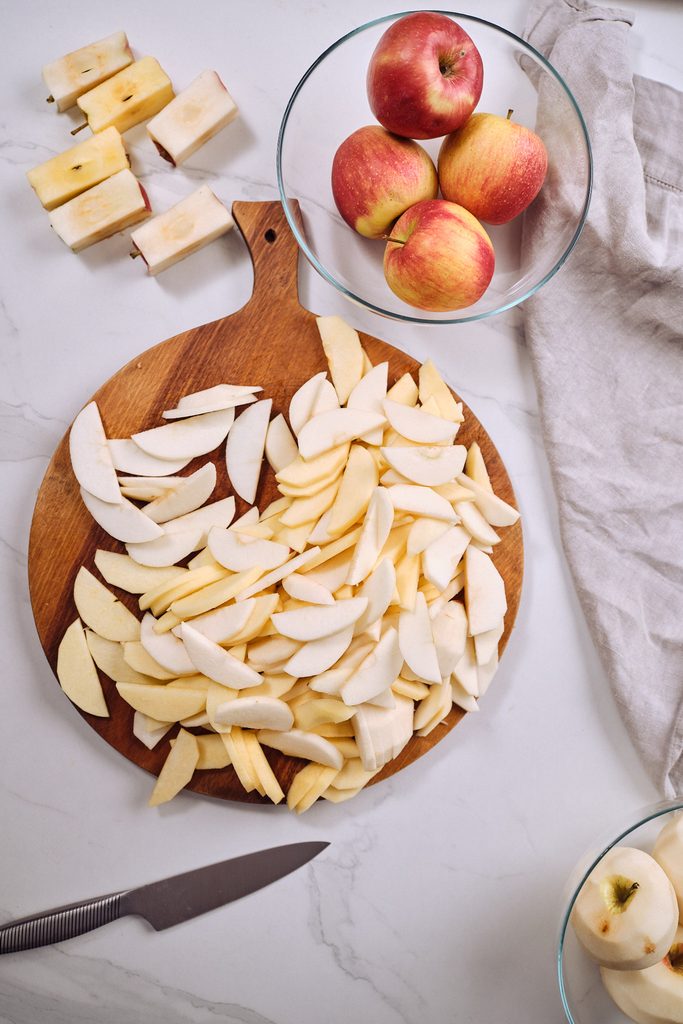
1. Peel, core, and slice the apples about ¼ inch (5–6 mm) thick. You’ll need 900 g of prepared apples; weighing them is more reliable than counting them.
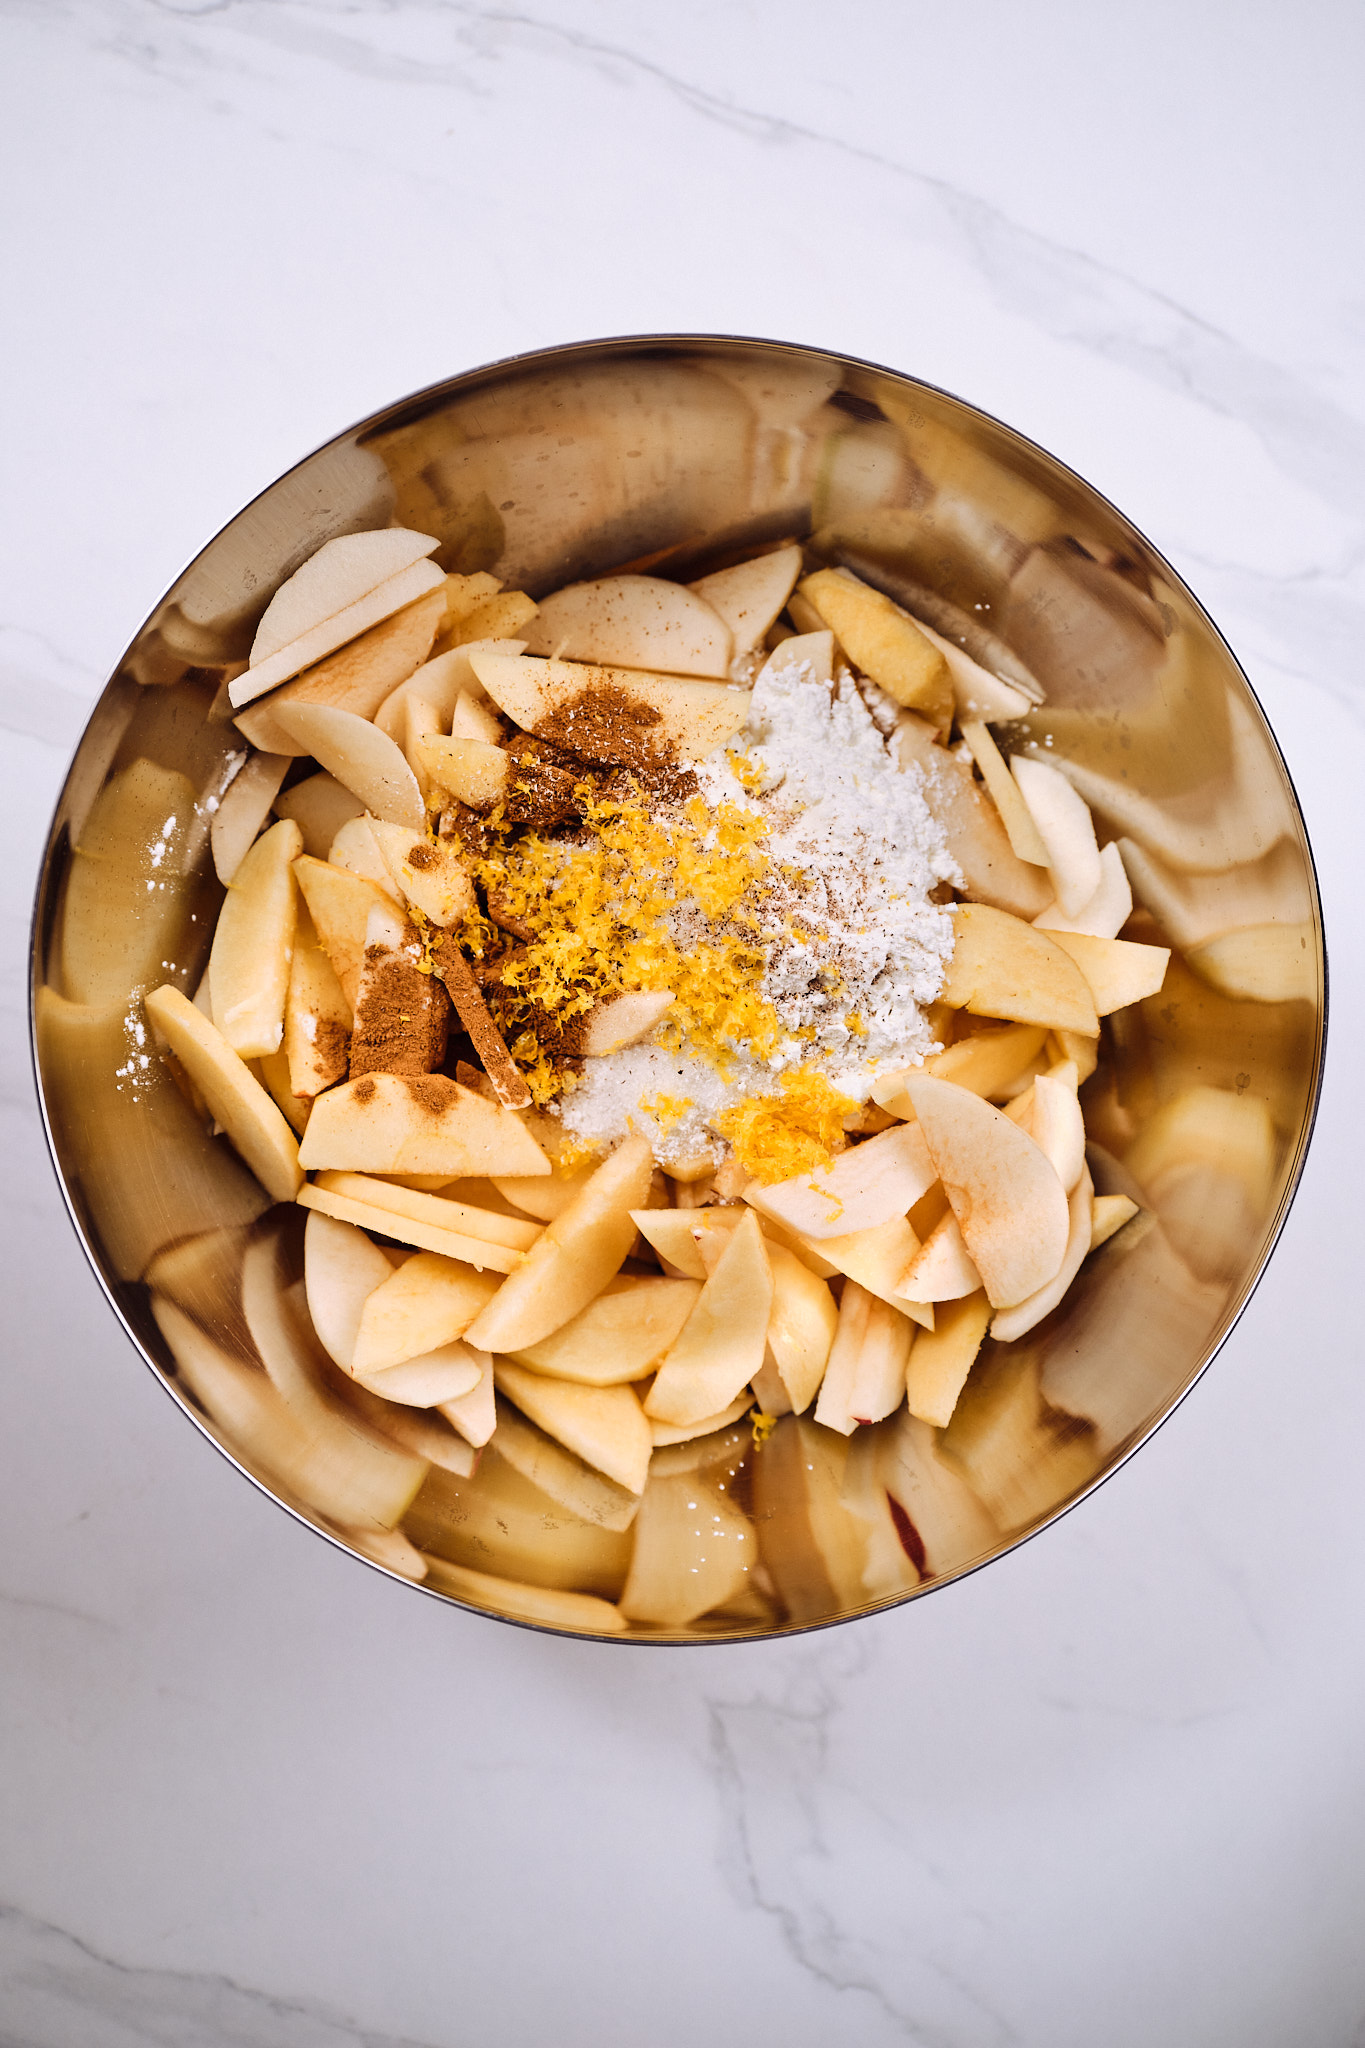
2. Toss with the sugar, cornstarch, cinnamon, nutmeg, salt, lemon juice, and zest until evenly coated. Mix the filling when you’re ready to assemble rather than leaving the sugared apples sitting for a long time.
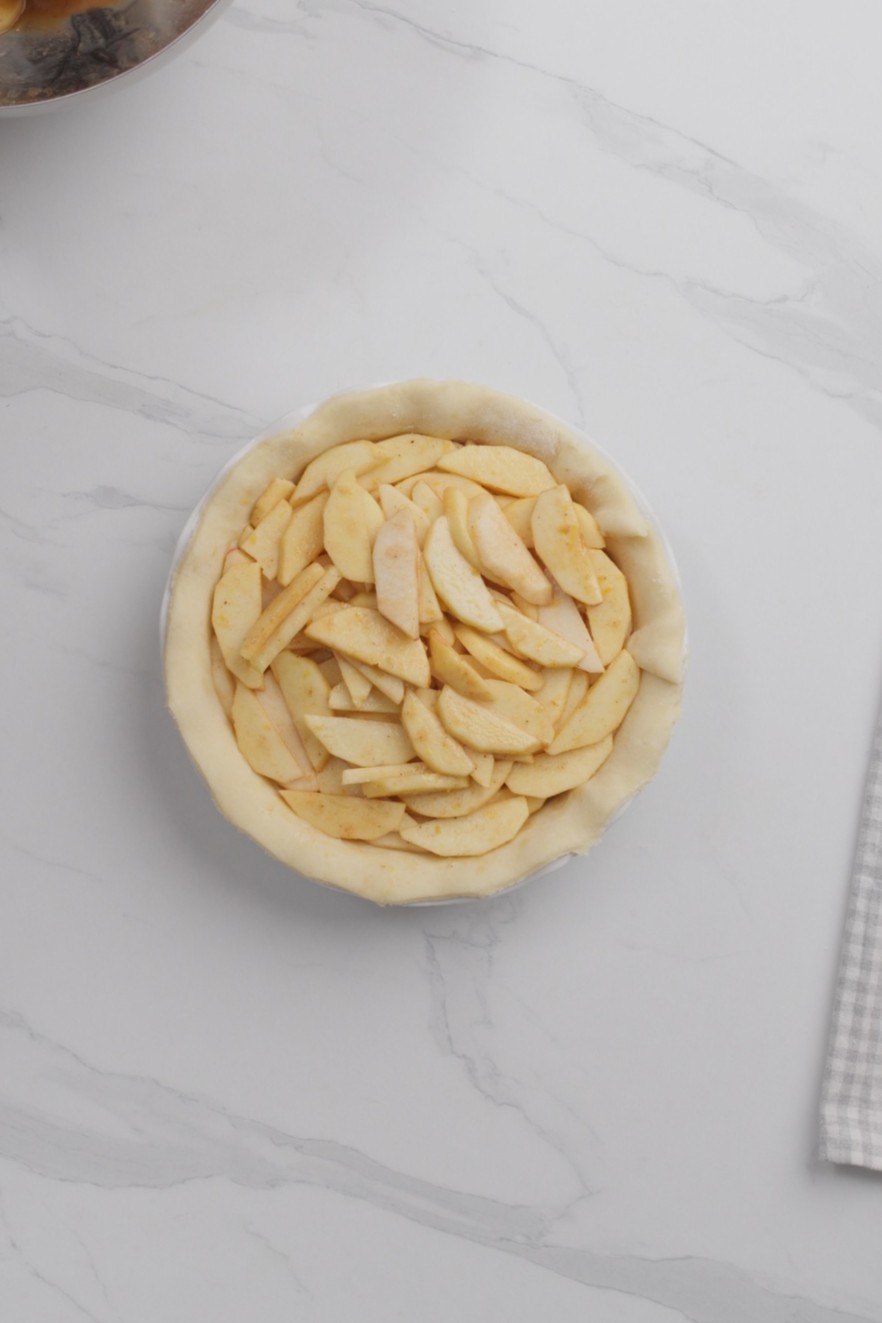
3. Spoon the filling into the chilled bottom crust, settling the slices into gaps rather than tipping them in loosely. Mound slightly in the center and dot with the cold butter.
💡Should you cook the apples first?
You don’t have to, the main recipe uses raw apples. For a softer filling with less shrinkage, cook the mixture in a large skillet over medium heat for 5–7 minutes, stirring gently, until the slices just begin to soften. Let it cool completely before filling the crust.
How to Make a Lattice Pie Crust
I highly recommend watching the full video in the recipe card below for this part. Seeing which strips to fold back makes the lattice much easier to follow.
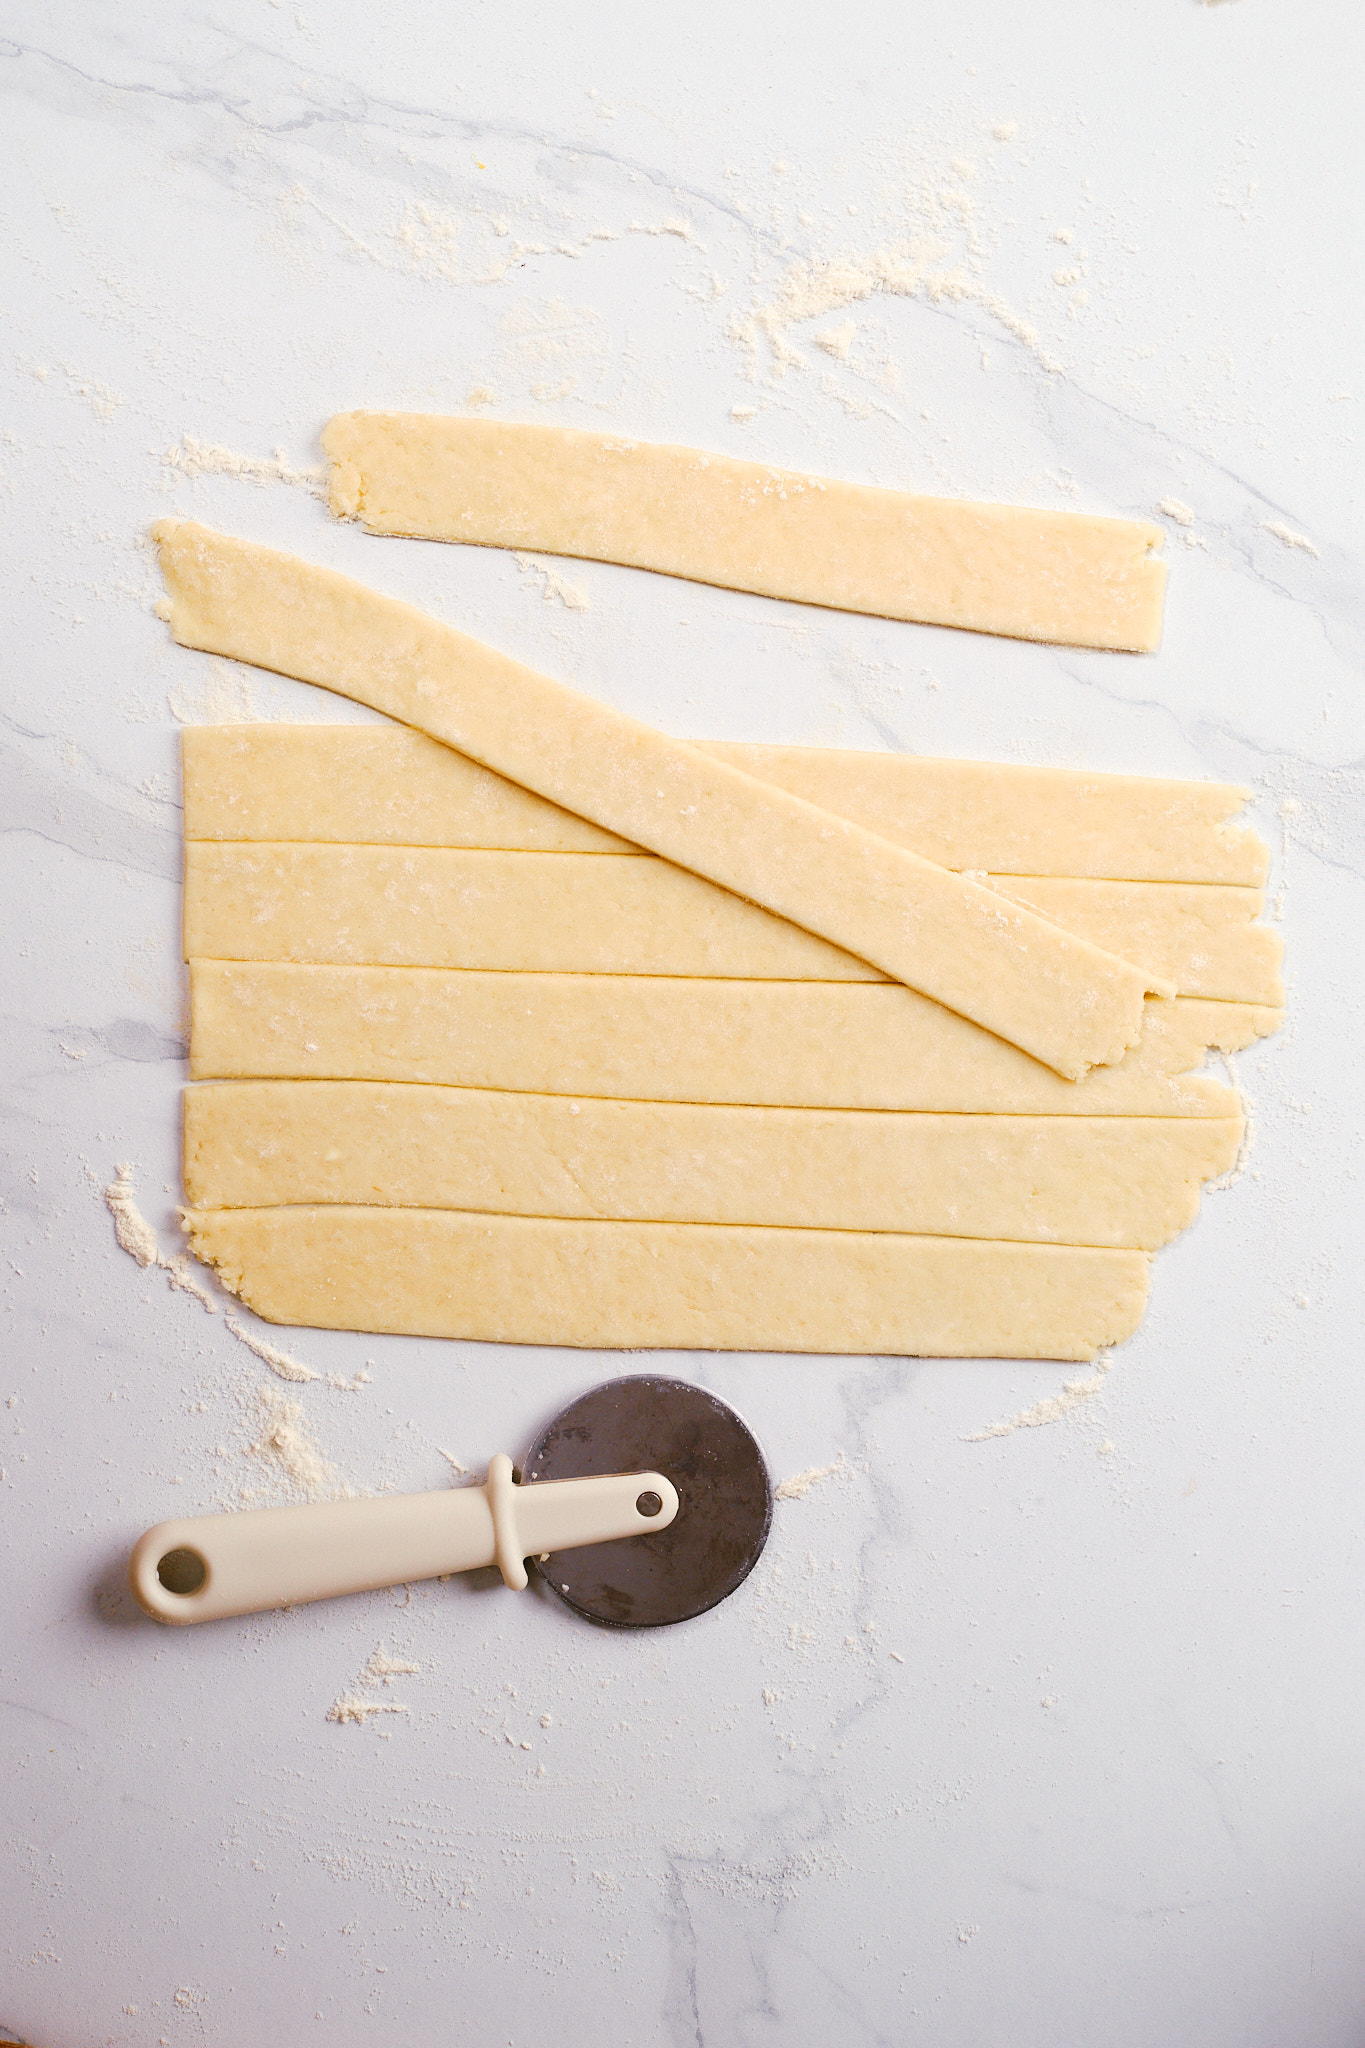
1. Cut the strips. Roll the second dough disk into a 10–11-inch circle and cut into 10 strips. Reserve the longest strips for the middle.
2. Arrange the first five. Lay five parallel strips over the apples, leaving gaps between them. Imagine they’re numbered 1–5 from left to right.
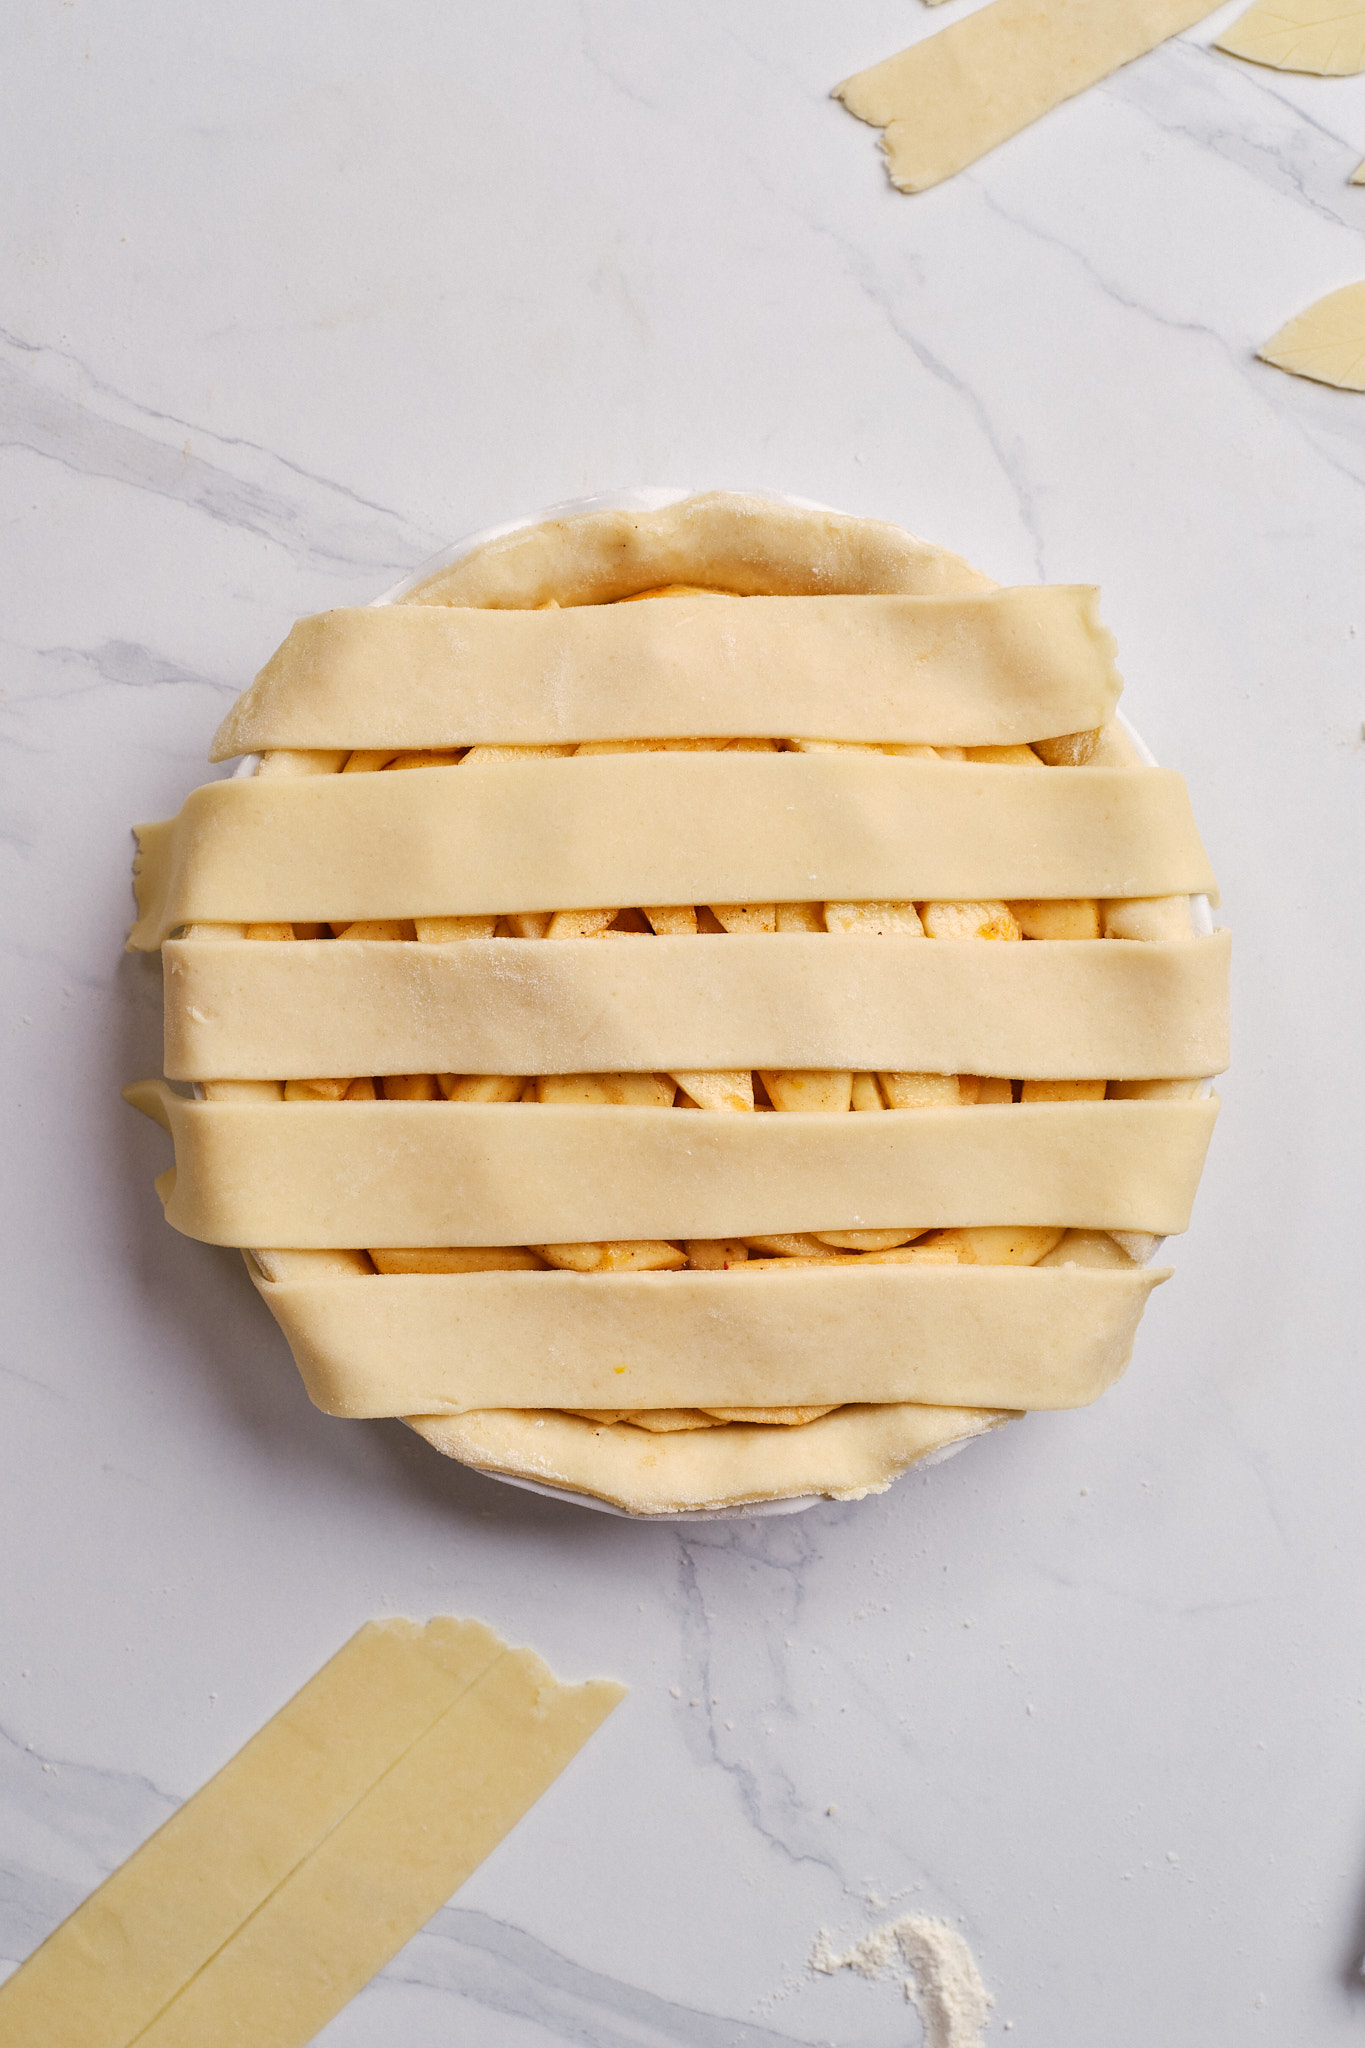
3. Start the weave. Fold back strips 1, 3, and 5. Lay a new strip across the middle at a right angle, then unfold the three strips over it.
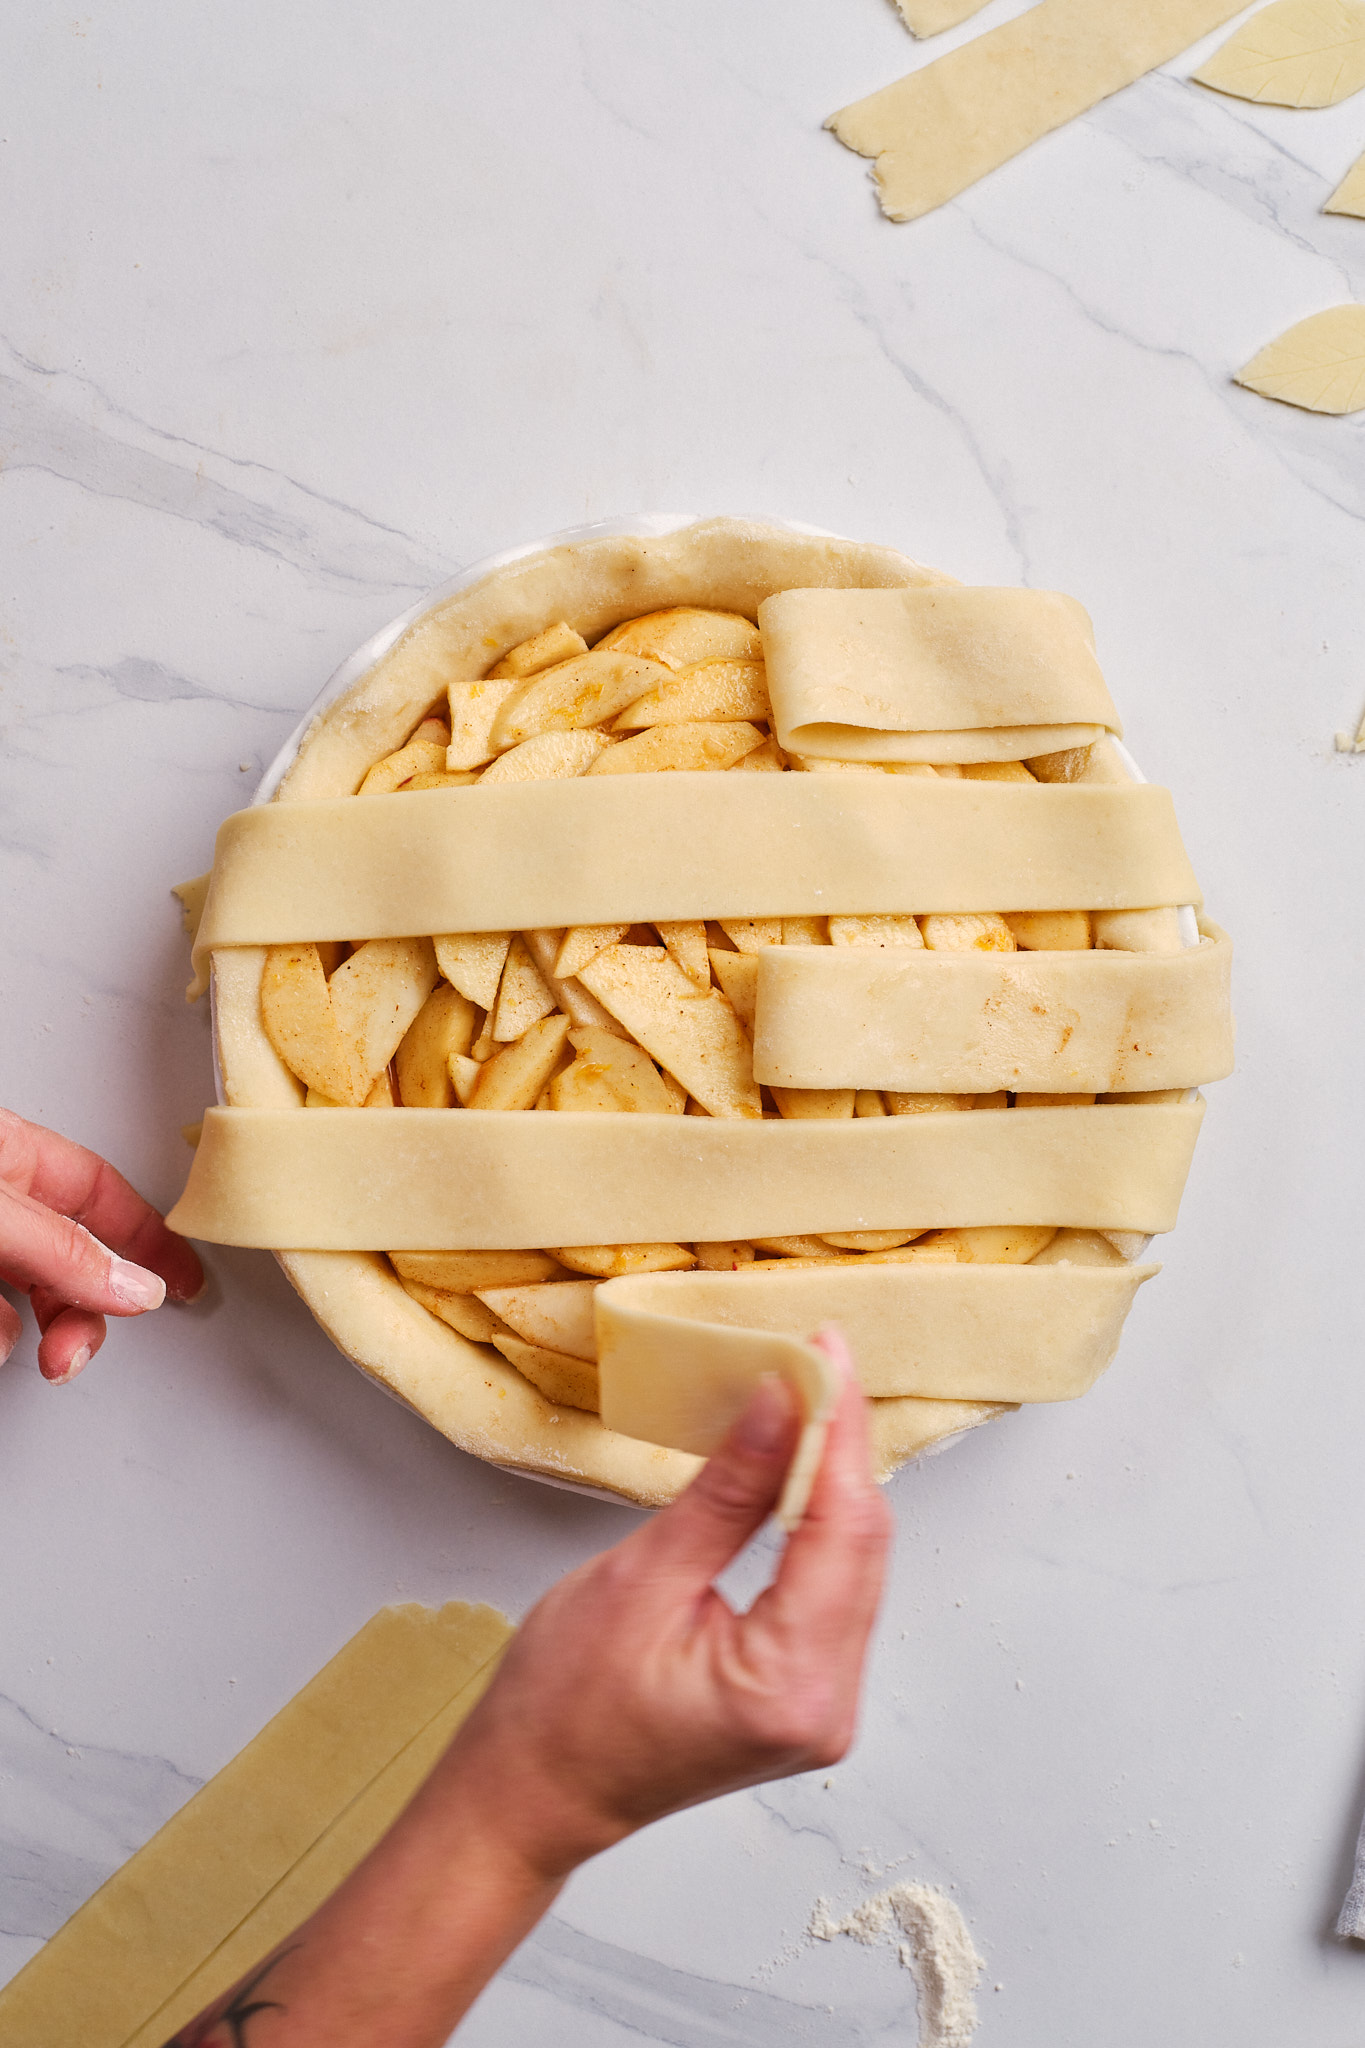
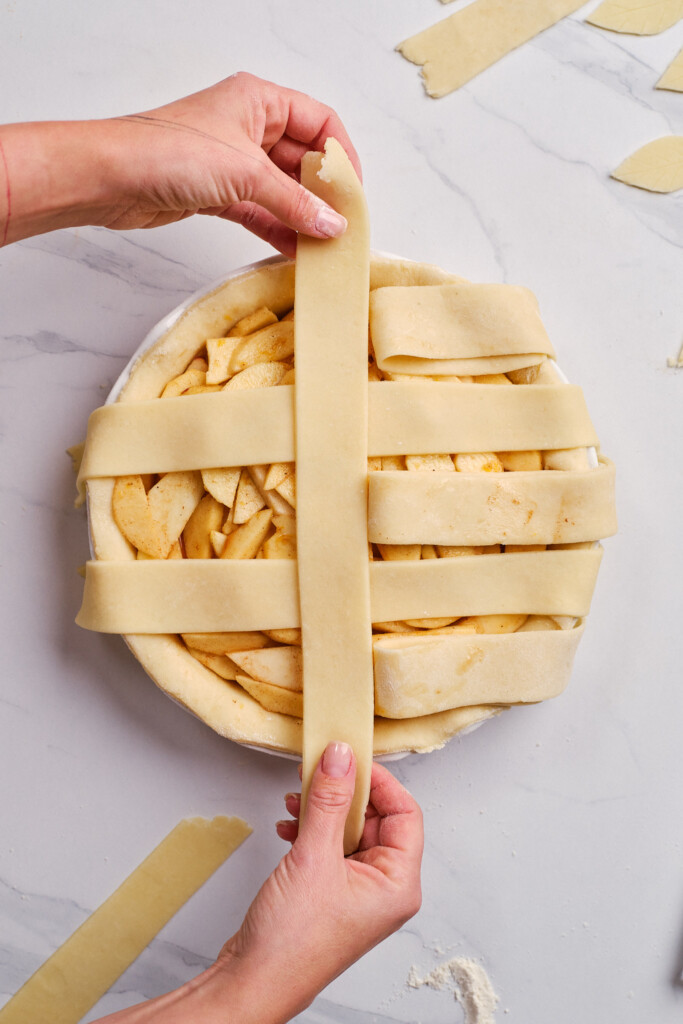
4. Work toward one edge. Fold back strips 2 and 4, add another cross-strip beside the first, and unfold. Repeat with strips 1, 3, and 5 to add another closer to the edge.
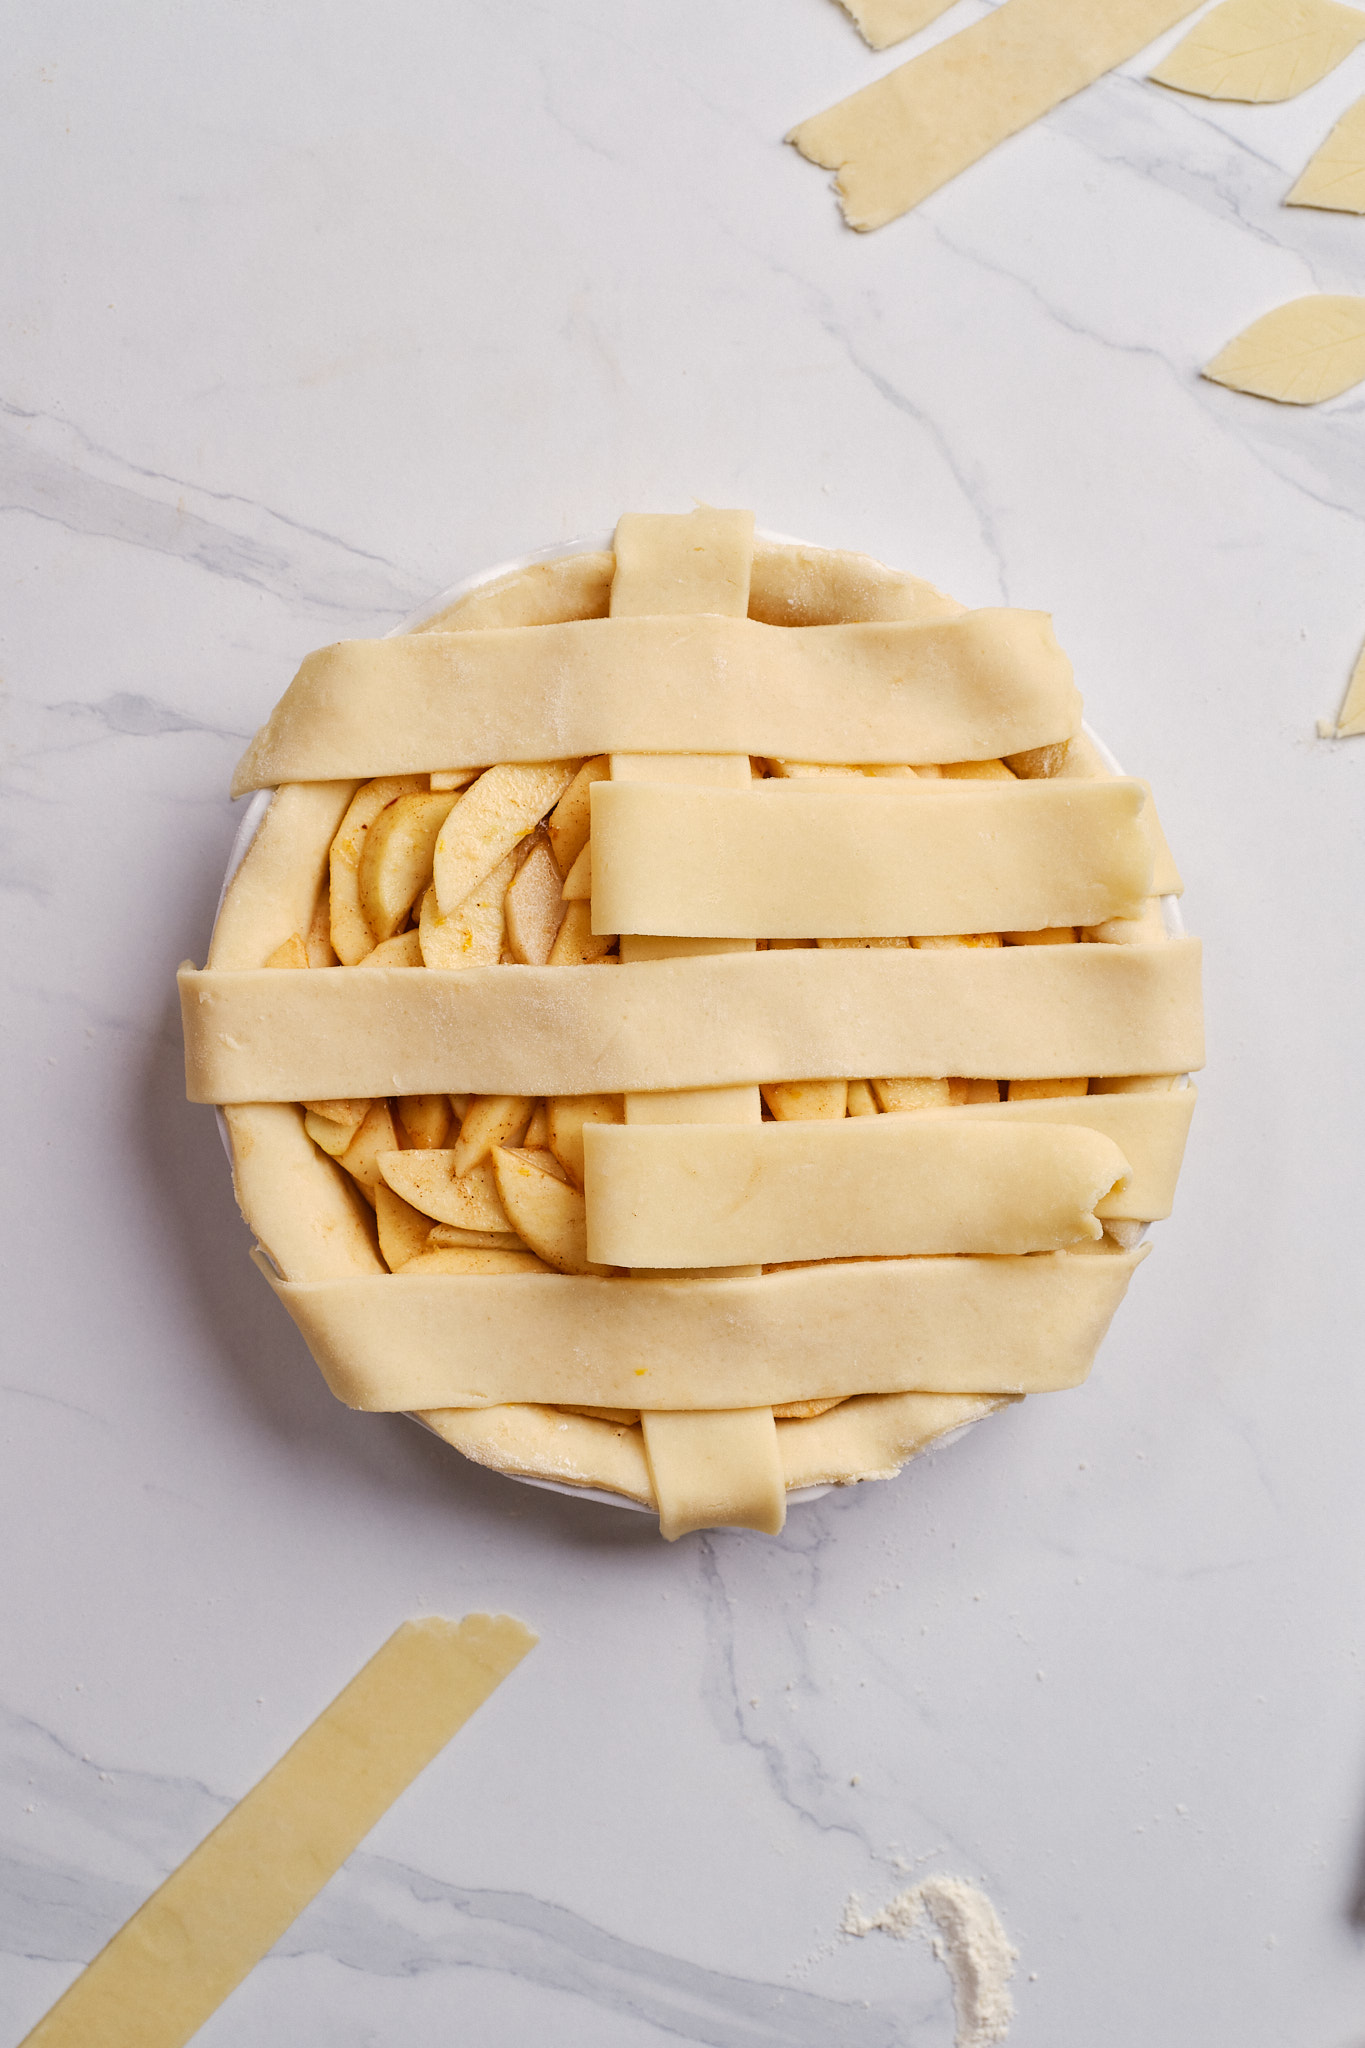
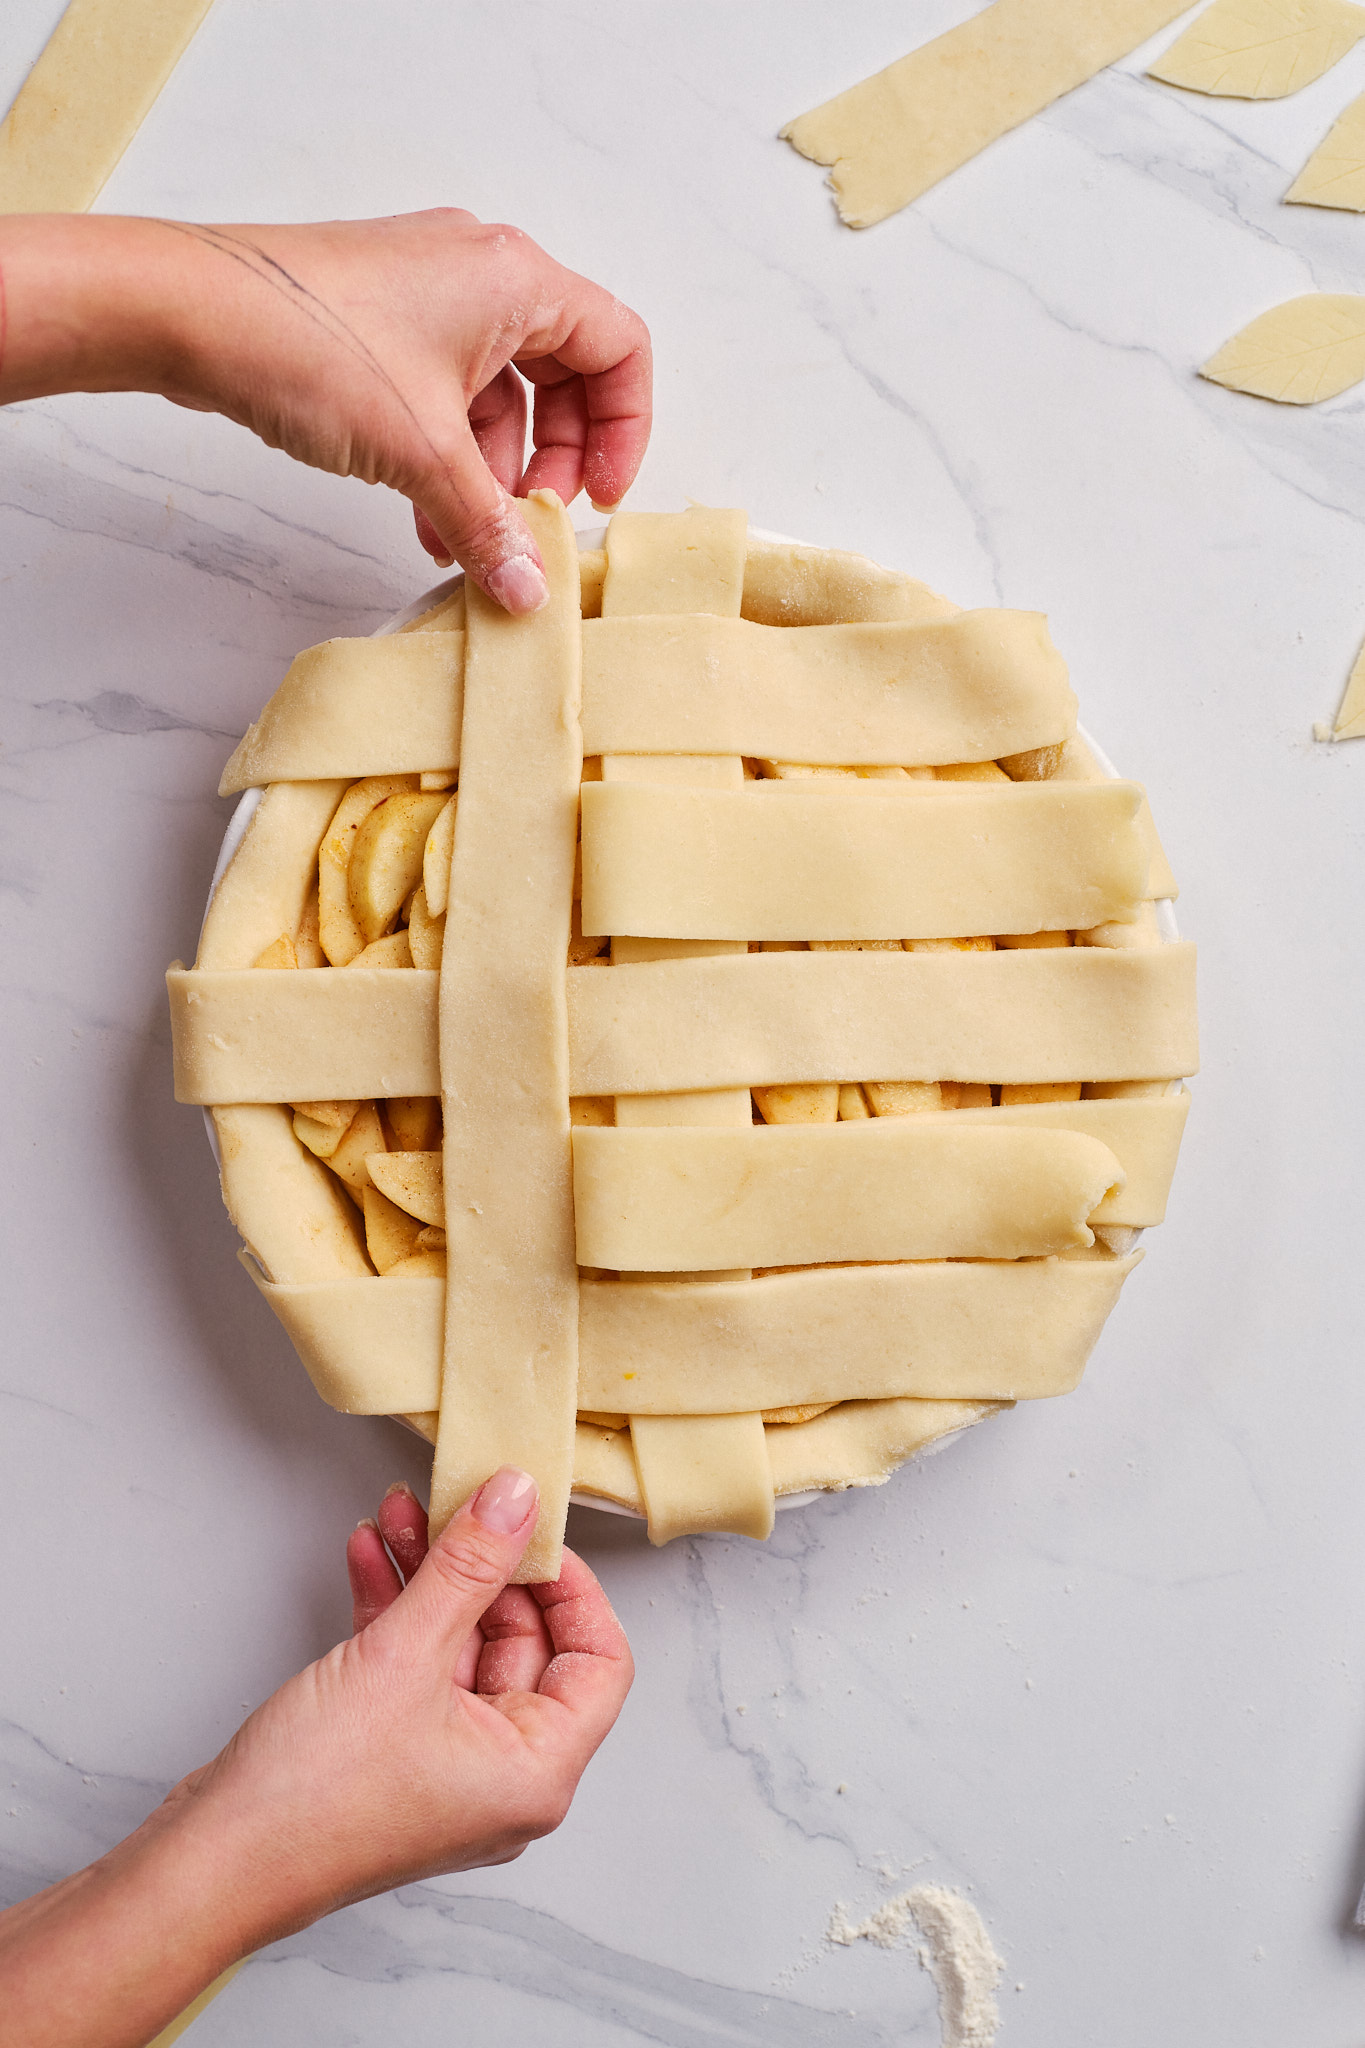
5. Finish the opposite side. Return to the middle and work toward the other edge, folding back strips 2 and 4, then 1, 3, and 5, to add the remaining two cross-strips.
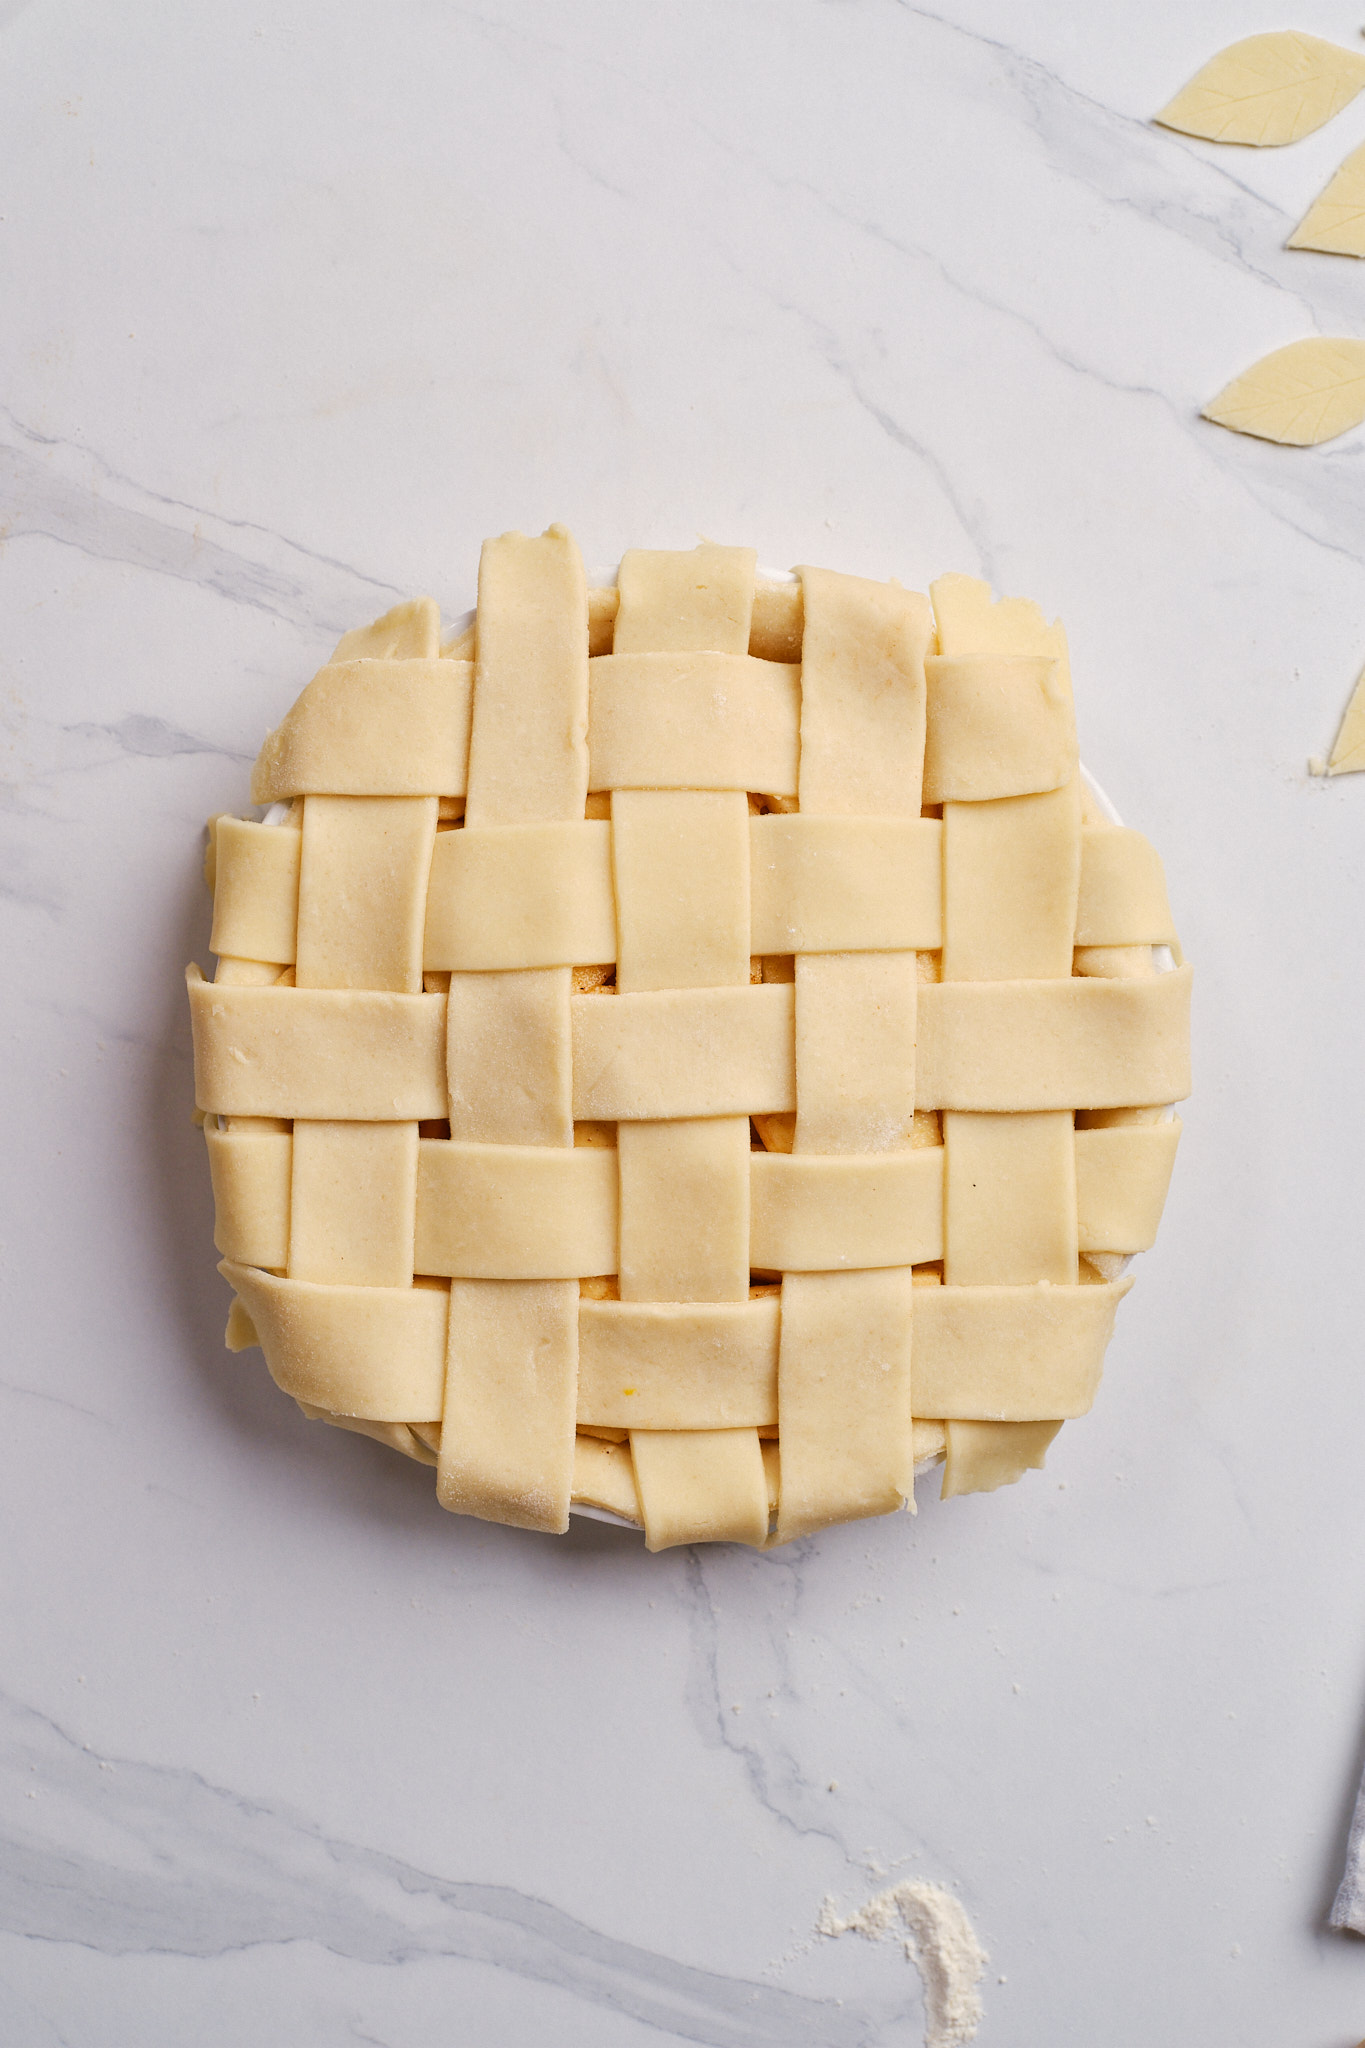
6. Seal the edges. Trim the excess dough, press the lattice ends and bottom crust together, and crimp with your fingers or a fork.
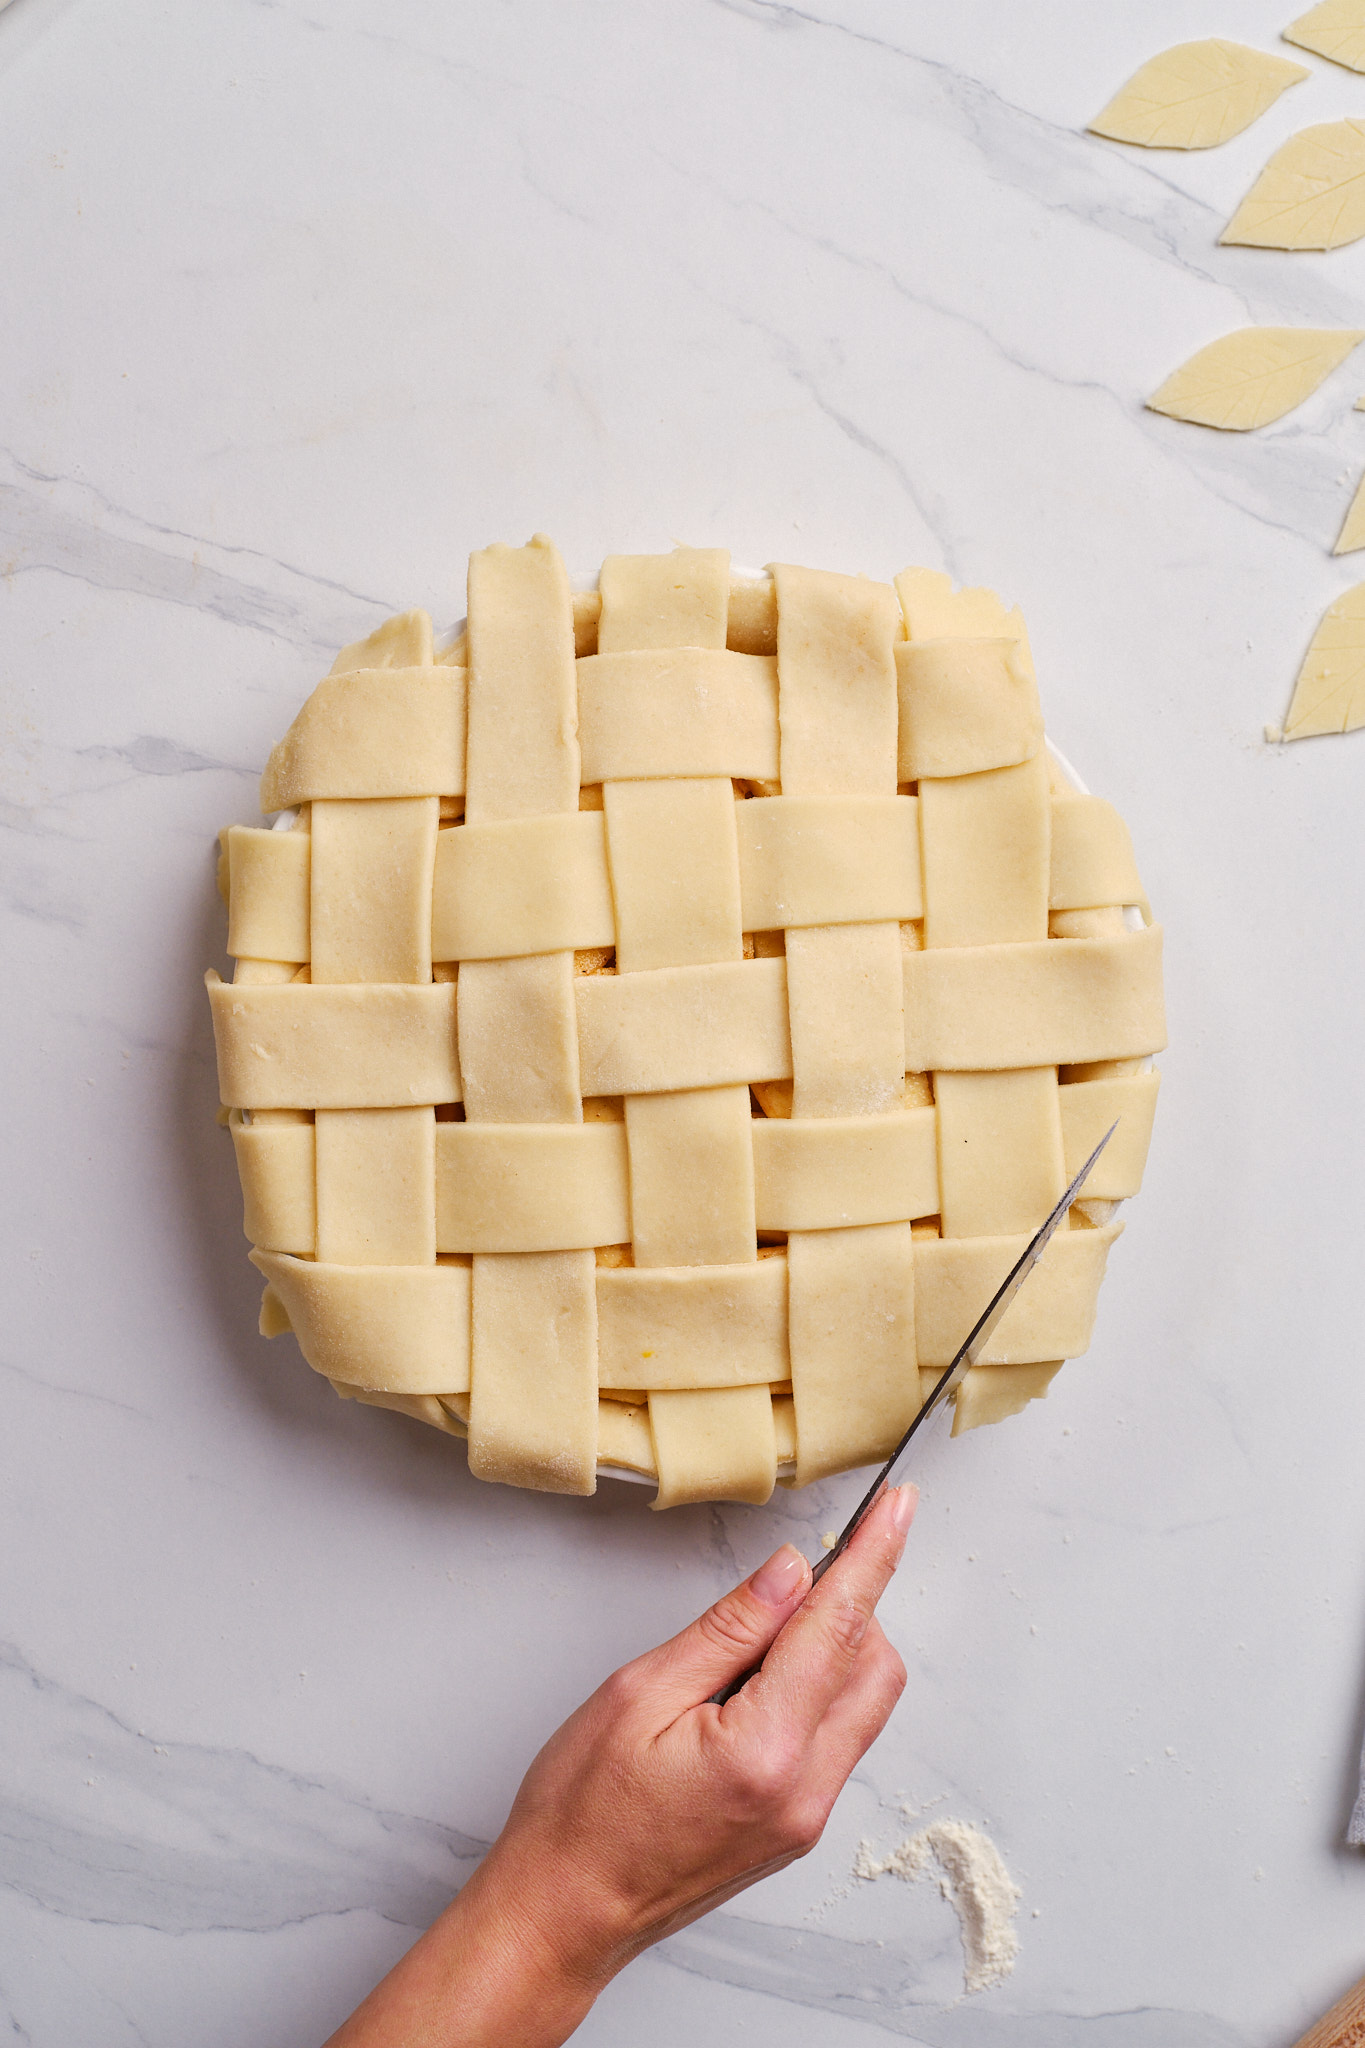
If the pastry becomes soft or sticky, refrigerate for 10–15 minutes before continuing.
💡Prefer a simpler top? Leave the second dough circle whole, lay it over the filling, and seal the edges. Cut several steam vents before brushing and baking. For apple pie flavors without rolling pastry, try my apple pie bars. For individual portions, try my apple hand pies.
Bake and Cool the Pie
1. Brush the exposed pastry lightly with 1 whole egg beaten with 1 teaspoon water, then sprinkle with coarse sugar.
2. Place the dish on a rimmed baking sheet in the lower third of a preheated oven. Bake at 400°F (200°C) for 20 minutes, then reduce to 375°F (190°C) and bake for another 35–45 minutes.
💡If the edges brown too quickly, use a pie crust shield. If the whole top is getting dark, loosely cover it with foil while the filling finishes baking.
3. Let the pie cool for at least 3 hours before slicing so the filling can set. I know it’s tempting to cut it sooner, but you can always gently warm your slice afterward.
Optional Apple Pie Decoration
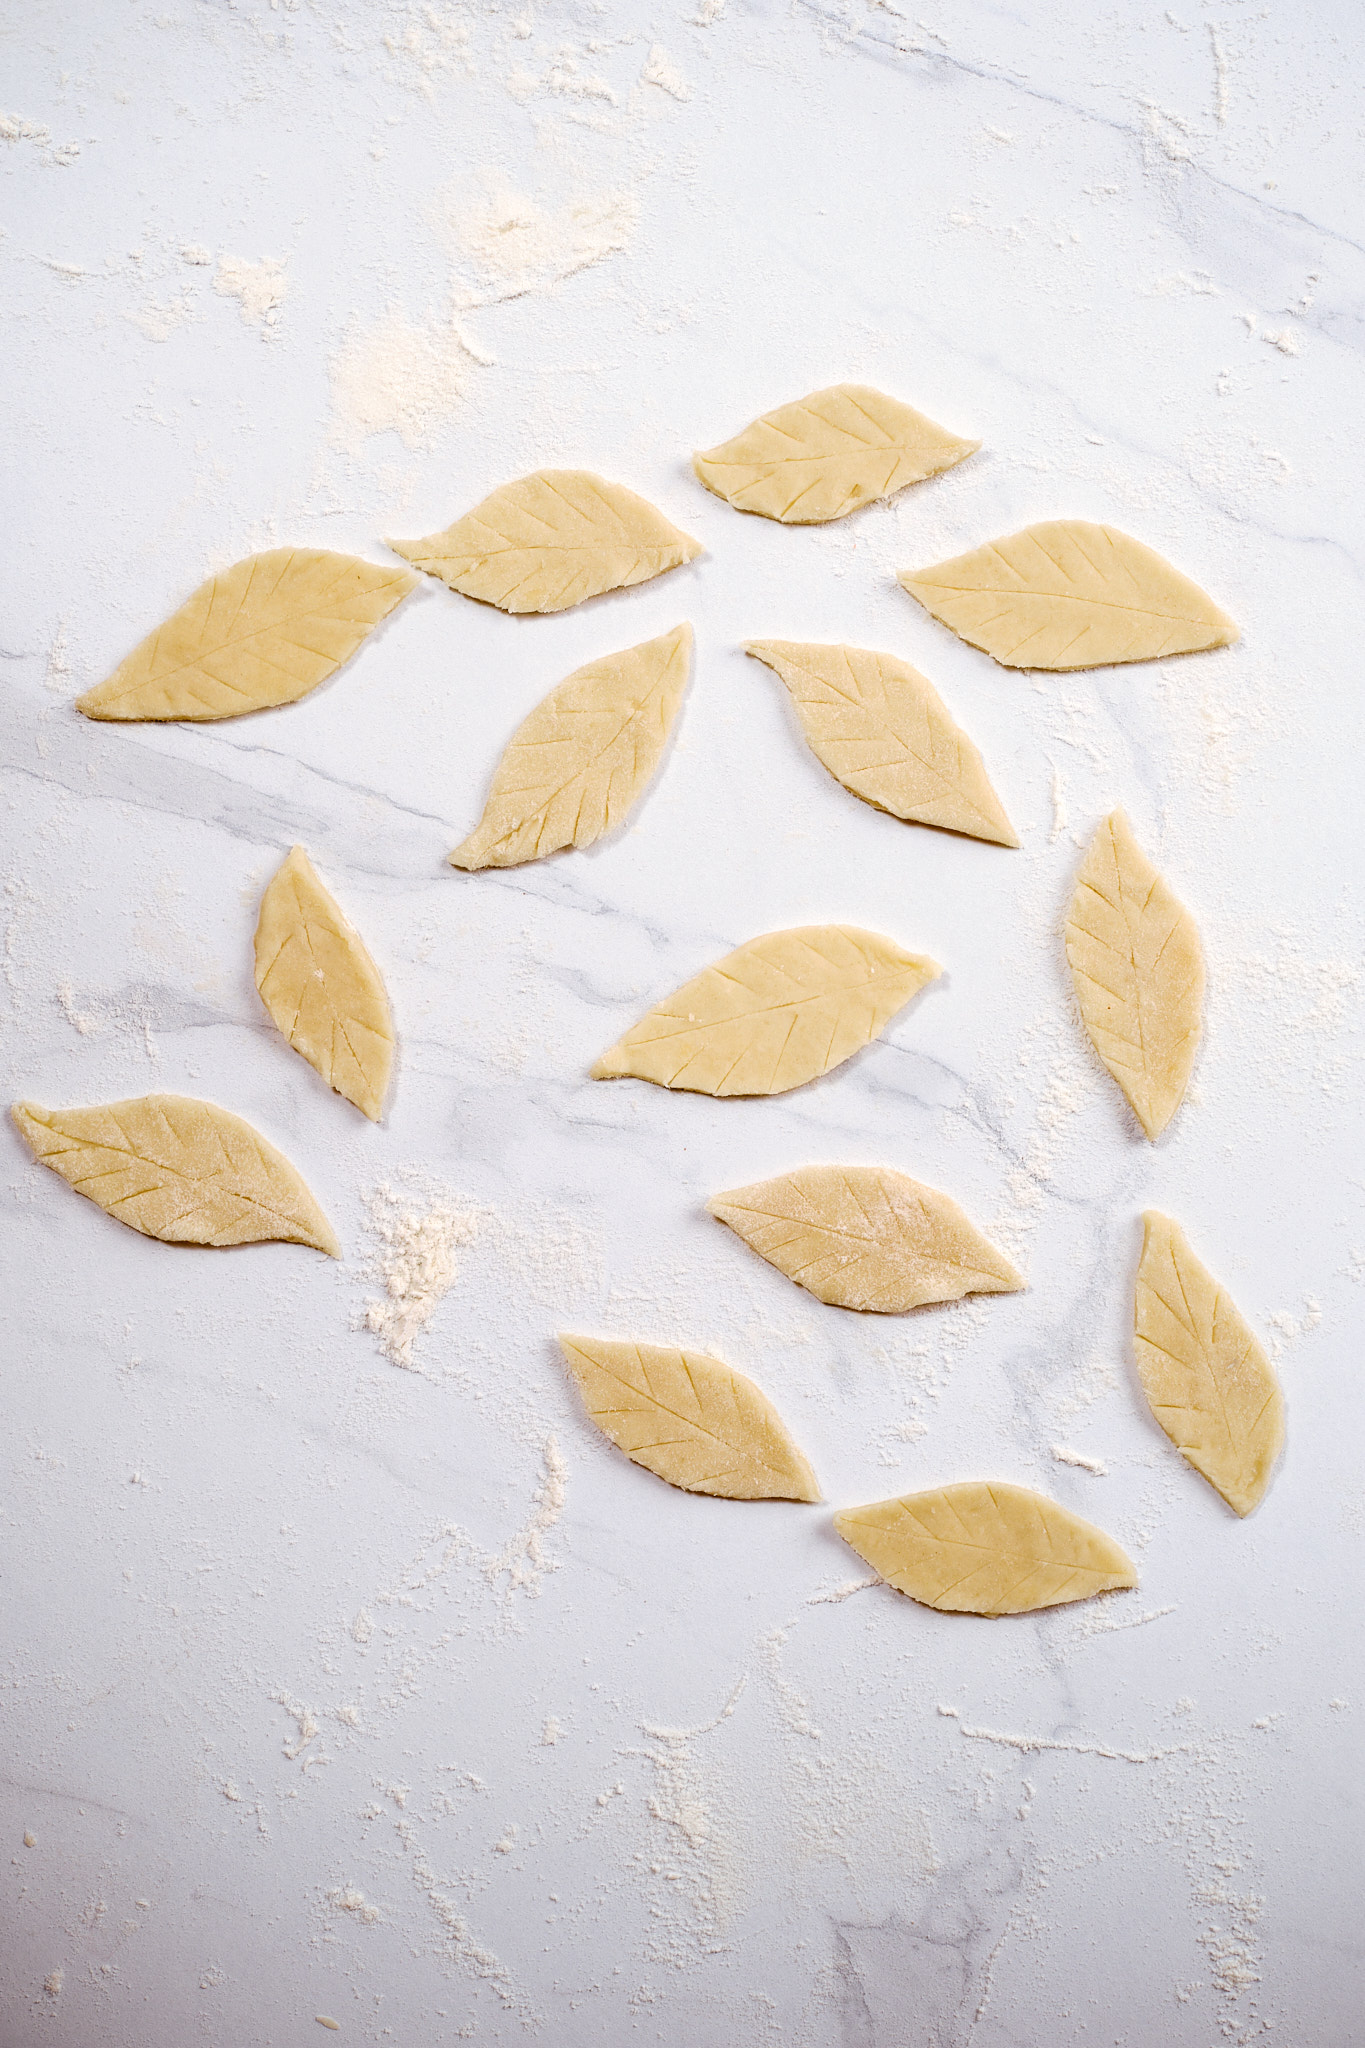
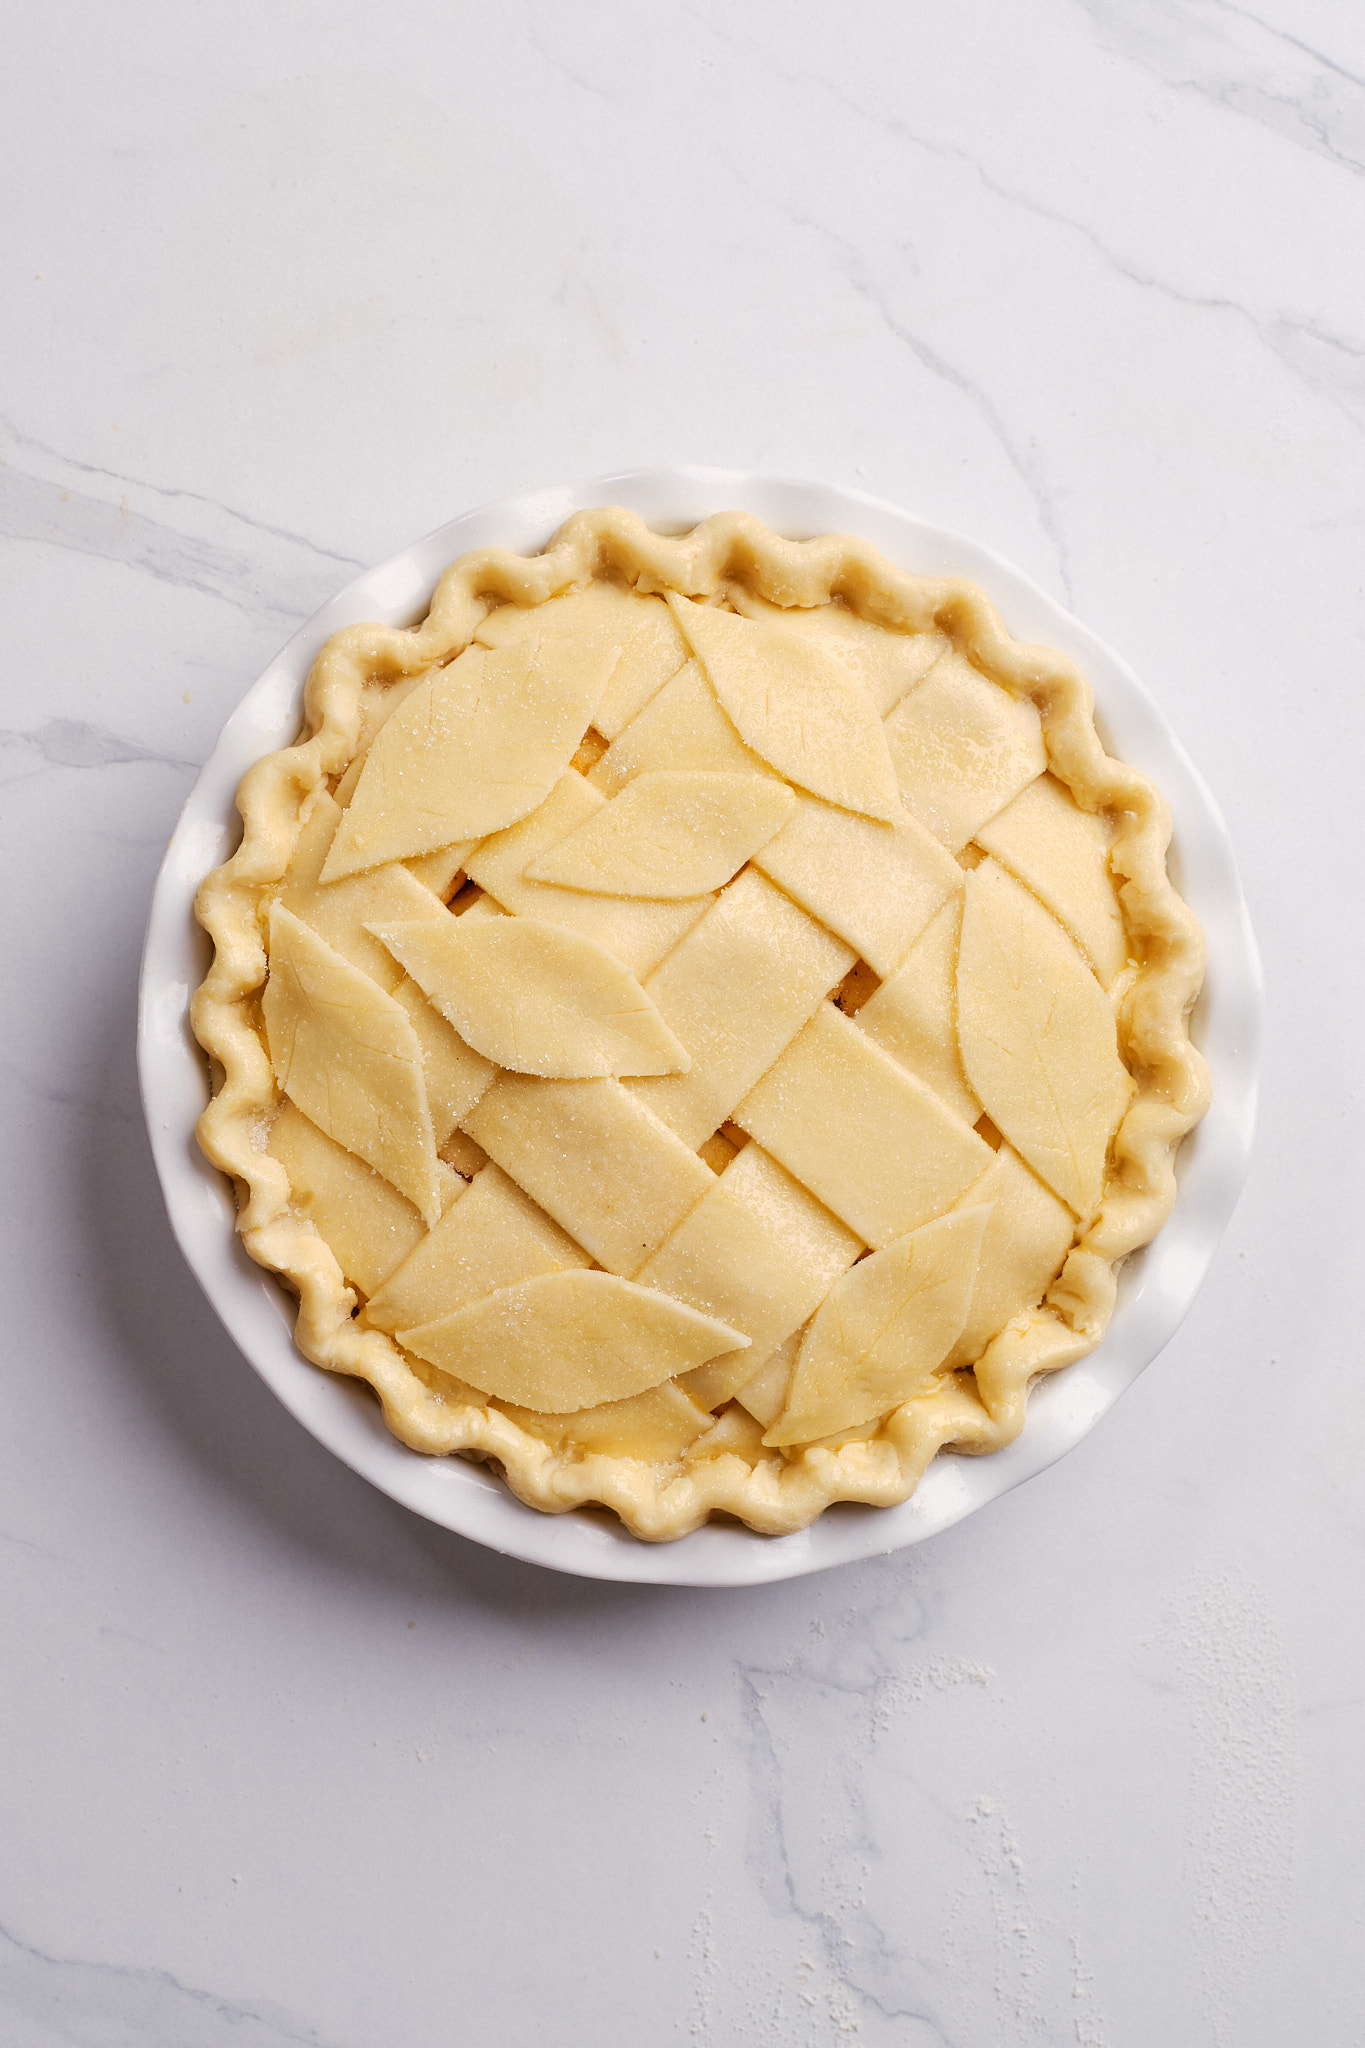
For Thanksgiving or a special occasion, I like to turn the leftover dough into leaves, like in the photos below. Attach them to the lattice or rim with a little water before brushing with egg wash. This is completely optional, the plain lattice looks beautiful too.
Tips for a Flaky Pie Crust
- Keep the butter cold. If the dough becomes shiny, soft, or sticky, put it back in the fridge for 10–15 minutes.
- Stop processing early. The dough doesn’t need to become a smooth ball in the machine. Keep some small pieces of butter visible and bring the dough together gently by hand.
- Use a light dusting of flour when rolling. Too much extra flour can dry out the pastry. If it sticks because it’s warm, chill it instead of covering the counter with more flour.
- Don’t force very cold dough. If it cracks immediately as you roll, let it sit for a few minutes until it bends more easily. It should still feel cool.
- Ease the pastry into the dish. Stretching it into the corners can make it pull back as it bakes.
These are the details I pay attention to every time I make this recipe. You don’t need a perfectly round piece of dough to make a good pie, but you do want to keep it cool and avoid overworking it.
How to Know When Apple Pie Is Done
I look for deeply golden pastry, thick juices bubbling near the center, and tender apples. Slip a thin knife through a lattice opening to check the fruit. A browned crust alone doesn’t mean the filling is ready.
How to Prevent Watery Filling and a Soggy Bottom
For the filling: Toss the apples thoroughly with the cornstarch so it coats them evenly. Bake until thick juices bubble through the lattice near the center, then let the pie cool before slicing. Taking it out too early or cutting it while hot can leave the filling runny.
For the bottom crust: Keep the pastry cold, let any pre-cooked filling cool completely, and bake in a fully preheated oven on a lower rack. If the top browns before the pie is ready, cover it loosely with foil and continue baking.
Why Does the Filling Shrink and Leave a Gap Under the Lattice?
Apples lose volume as they cook, leaving space beneath the pastry. To reduce the gap, arrange the slices in close layers, gently pressing out large air pockets, and mound the center only slightly.
You can also pre-cook the apple mixture for 5–7 minutes over medium heat, stirring gently, until the slices begin to soften but still hold their shape. This lets some shrinking happen before assembly. Cool the filling completely before adding it to the crust. A small gap can still happen, especially with raw apples.
Make Ahead, Storage, and Reheating
- Dough: Make it 2–3 days ahead and keep the wrapped disks refrigerated. Let them soften just enough to roll if they’re very firm.
- Whole pie: Baking it a day ahead gives the filling plenty of time to set and makes serving less rushed.
- Leftovers: Keep the pie covered at cool room temperature for up to 2 days, or refrigerate for up to 4–5 days. In a warm kitchen, use the refrigerator.
- Freezing: For longer storage, let the baked pie cool completely, wrap well, and freeze for up to 2 months. Thaw overnight in the refrigerator.
- Reheating: Warm individual slices in a 350°F (175°C) oven until warmed through, checking after about 10 minutes. The oven helps the pastry crisp up; the microwave gives a softer crust.
More Apple Desserts
- Apple Crumble Cheesecake
- Classic Apple Cake
- Apple Crumble Cake with Streusel Topping
- Easy Apple Fritters
More Pies to Try
Best Apple Pie Recipe
Equipment
- Pie crust shield recommended
Ingredients
For the Pie Crust:
- 2½ cups (315 g) All-purpose flour
- ¼ cup (50 g) Granulated sugar
- ½ teaspoon Salt
- 1 cup (230 g) Unsalted butter cold and cubed
- ¼–⅓ cup (60-80 ml) Ice water see notes
For the Apple Filling:
- 2 pounds (900 g) Apples about 6–8 medium apples, peeled, cored and sliced about ¼-inch (5–6mm) thick
- ½ cup (100 g) Granulated sugar
- ¼ cup (32 g) Cornstarch
- 1 teaspoon Ground cinnamon
- ¼ teaspoon Ground nutmeg
- ½ teaspoon Salt
- 1 tablespoon (15 ml) Lemon juice
- Lemon zest from one lemon
- 2 tablespoons (30 g) Butter unsalted, cold
For Brushing:
- 1 Egg
- 1 teaspoon Water
- 2 teaspoons Coarse sugar for sprinkling
Instructions
- Make the crust: Add flour, sugar and salt to a food processor and pulse briefly to combine. Add the cold butter and pulse until the mixture resembles coarse crumbs with some pea-sized pieces of butter remaining.
- Gradually add the ice water, 1 tablespoon at a time, pulsing just until the dough begins to come together. Do not overmix.
- Divide the dough into two portions, shape each into a flat disk and wrap in plastic wrap. Refrigerate for at least 1 hour.
- Preheat the oven to 400°F (200°C).
- Make the filling: In a large bowl, combine the sliced apples, sugar, cornstarch, cinnamon, nutmeg, salt, lemon juice and lemon zest. Toss until the apples are evenly coated.
- Roll the bottom crust: On a lightly floured surface, roll one disk of dough into an 11–12-inch (28–30cm) circle. Transfer to a 9-inch (23cm) pie dish and gently press it into the bottom and sides without stretching. Refrigerate while preparing the lattice.
- Prepare the lattice: Roll the second disk of dough into a 10–11-inch (25–28cm) circle and cut into 10 strips. Arrange the strips on a parchment-lined baking sheet and refrigerate until ready to assemble.
- Assemble the pie: Spoon the apple filling into the chilled bottom crust, arranging the apples evenly and slightly mounding them in the center. Dot the filling with small pieces of butter, then immediately arrange the prepared strips over the filling to create a lattice pattern.
- Trim the excess dough, press the top and bottom crusts together, and crimp the edges. Decorate with leftover dough, if desired (see the video).
- Whisk the egg with 1 teaspoon of water. Lightly brush the lattice and exposed crust with the egg wash, then sprinkle with coarse sugar.
- Bake: Place the pie on a baking sheet and bake for 20 minutes at 400°F (200°C). Reduce the temperature to 375°F (190°C) and bake for another 35–45 minutes, until the crust is deeply golden and the filling is bubbling in the center. If the crust browns too quickly, loosely cover the edges or top with aluminum foil.
- Allow the pie to cool at room temperature for at least 3 hours before slicing. This allows the filling to set.
Video
Notes
- Best apples: Use firm apples that hold their shape during baking. Granny Smith, Honeycrisp, Pink Lady, Braeburn and Jonagold are all good choices. For the best flavor and texture, I recommend using a combination of two varieties, one tart and one sweeter.
- How many apples do I need? Apples come in different sizes and weights, so for the most accurate results, I recommend using a kitchen scale. You’ll need about 900g–1kg (2–2.2 lb) of apples after peeling, coring and slicing, which is approximately 6–8 medium apples.
- Optional pre-cook the filling: For a softer filling with less shrinkage, cook the apple mixture in a large skillet over medium heat for about 5–7 minutes, stirring gently, until the apples just begin to soften. Let the filling cool completely before adding it to the chilled crust. Do not fully cook the apples, they should still hold their shape.
- Avoid air pockets in the filling: Don’t simply pour the apples into the crust. Arrange and gently press them down as you add them, filling any large gaps between the slices. Slightly mound the apples in the center, as they will shrink during baking. This helps prevent a large gap from forming between the baked apples and the lattice.
- Keep everything cold: Cold butter is the key to a flaky crust. If the dough becomes soft or sticky at any point while rolling or assembling the pie, refrigerate it for 10–15 minutes before continuing.
- Don’t add too much water to the dough: Start with ¼ cup (60ml) and add more only as needed. The dough should hold together when pressed but shouldn’t feel wet or sticky.
- Don’t overprocess the crust: Small visible pieces of butter are a good thing. They create steam as the pie bakes, producing flaky layers.
- How to know when apple pie is done: Don’t judge it by crust color alone. The crust should be deeply golden and, most importantly, you should see the filling bubbling through the lattice, including near the center of the pie.
- Make ahead: The pie dough can be prepared up to 2–3 days ahead and refrigerated. Let it sit at room temperature for a few minutes if it’s too firm to roll.
- Storage: Store leftover apple pie covered at room temperature for up to 2 days or refrigerated for up to 4–5 days. For the best texture, warm individual slices briefly before serving.
Nutrition
FAQs
Both are used in apple pies, but they give a different flavor. White sugar lets the apples, lemon, and spices come through clearly. Brown sugar brings a deeper molasses flavor.
For this recipe, I use ½ cup (100 g) granulated sugar in the filling. You don’t need brown sugar to get a flavorful pie, and I recommend following that amount when making this version.
No. This recipe uses an unbaked bottom crust. Add the filling and top crust, then bake everything together using the two temperatures in the recipe card.
For this version, I’d prepare the dough ahead and assemble the pie when I’m ready to bake, or bake the whole pie the day before. That keeps the raw base from spending a long time in contact with the apple filling.



You were right, it is indeed the best apple pie!
My mom usually made her apple pie a little differently. The crust wasn’t as buttery and flaky, which is something I really love and finally managed to achieve with this recipe.
The filling is great as well! It’s classic and pretty similar to the one I usually make.
I also found all your tips useful and informative.
For me, it’s a 10/10!
I’m a seasoned cook and have made my share of apple pies. Your demo is very good and has inspired me to try your technique. I’m certain it will be delicious!
Hi there – Your video says 11/2 cups flour but recipe says 2 1/2. Your bake times in the video versus the recipe are completely at odds with one another. Which is correct?
Sorry for the confusion, the correct amount is 2.5 cups (315g).
Thank you for the recipe its delicious